Stackfield provides an API interface and WebHooks. With Zapier and IFTTT you can use them specifically to link other tools with Stackfield!
We’d like nothing better than being able to perform all tasks in one single tool at work: to receive emails, to manage tasks, to stay informed about social media activities and changes within files and documents we work on together ... Instead we play ping-pong, jump from one tool to another and back again asking ourself: Couldn’t that be easier?
Actually, it is easier! Through the targeted use of WebHooks, events from other tools can be collected completely automatically in Stackfield. Be it new tweets, important e-mails and their file attachments or appointments - if you forward all of these events to Stackfield in an automated process, you only have to keep an eye on one single tool instead of many different ones. Stackfield has its own API interface, which you can use to create an automation process like this.
What is a WebHook?
Basically, WebHooks are nothing more than callback messages that link one service to another – they inform one tool about a specific event taking place within another tool, so to say. This might be the case, for example, if a confirmation message is sent after transactions via a Paypal account.
How to create WebHooks in Stackfield
To use WebHooks and automate processes in Stackfield, POST URLs must be generated within the platform. For this purpose, open the room settings of the room to which the information is to be sent and select the "Integrations" tab. The button "Add new WebHook" opens a window in which you can choose for which module the WebHook should be created. For example, you can specify that a file should be stored in the files module as soon as you receive it attached to an e-mail.
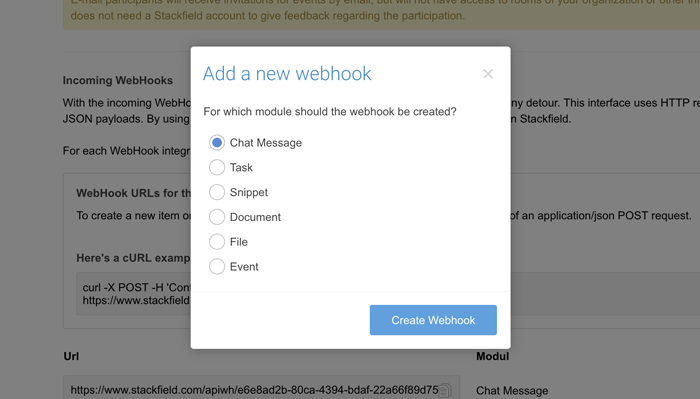
After a final click on "Add WebHook" the link will be generated. You will need this later in Zapier or IFTTT to link Stackfield to another tool.
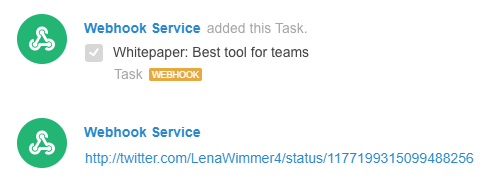
WebHooks for creating tasks and chat messages have already been created in the following example:

Automation services: Zapier & IFTTT
Zapier and IFTTT (IF THIS THAN THAT) are so-called automation services that form some kind of "mouthpiece" between different services.
Stackfield provides an API interface and WebHooks for this purpose. These in turn can be used by automation services such as Zapier or IFTTT to establish a fixed contact with other tools.
Thus, it becomes possible to link Stackfield with other tools. Instead of retrieving and transferring single updates from these tools by himself, the user receives them directly and automatically in Stackfield.
It works very well with a simple Excel if-then function. As soon as a particular event occurs within Tool 1, some action will be triggered within Tool 2.
Some examples:
- If I receive an e-mail and label it with a certain label, then a task needs to be created in Stackfield.
- If an appointment is set in Google Calendar, then it should be created in Stackfield as well.
- If I am mentioned in a Tweet, then I would like to receive a chat message in Stackfield.
How to use Zapier
To use Zapier sign up for free at: https://zapier.com/
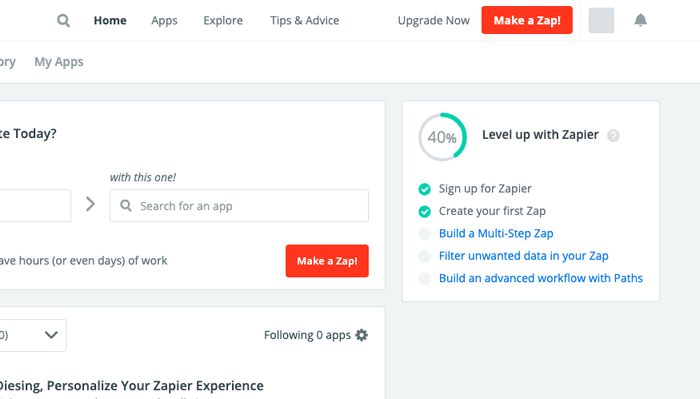
To create a new WebHook, click on "Make a Zap". Zapier will guide you gradually through all steps.
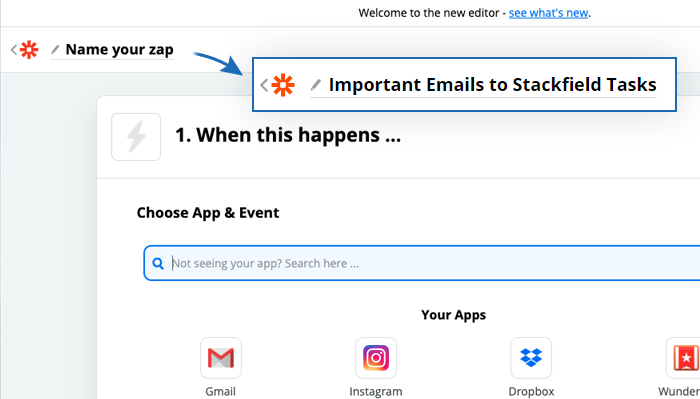
In the upper left corner, the "Zap" can be titled.
IF
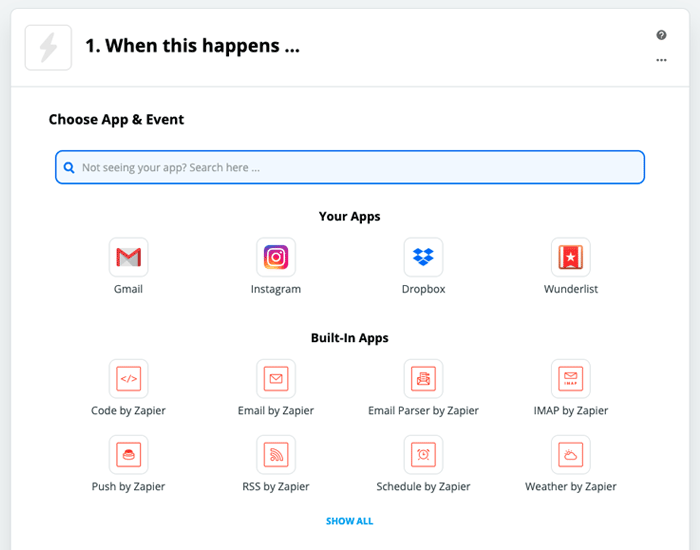
First of all, we need to define the first part of our "if-then-function": under what circumstances do we want our WebHook to be triggered?
Zapier already suggests some of the most popular applications. Other tools can be found via the search bar. Let's stay with our e-mail example:
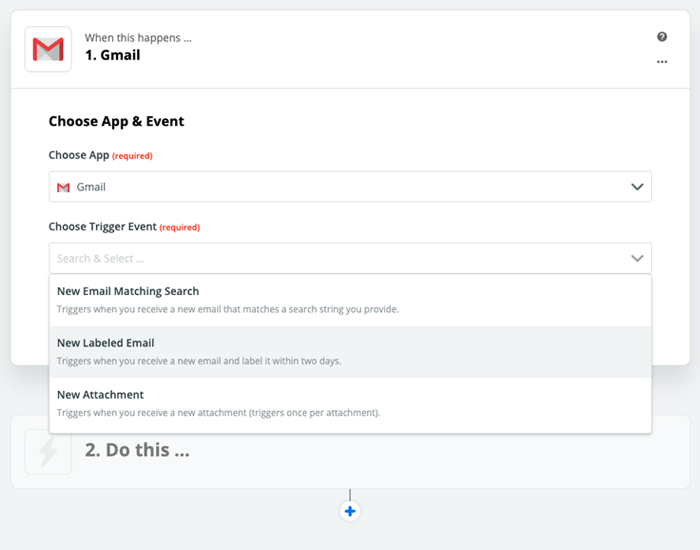
If I receive an e-mail and label it with a certain label, then a task should be created in Stackfield.
The WebHook should be triggered as soon as an email arrives in Gmail and receives a certain label. Therefore, we choose Gmail...
... and the respective trigger event.
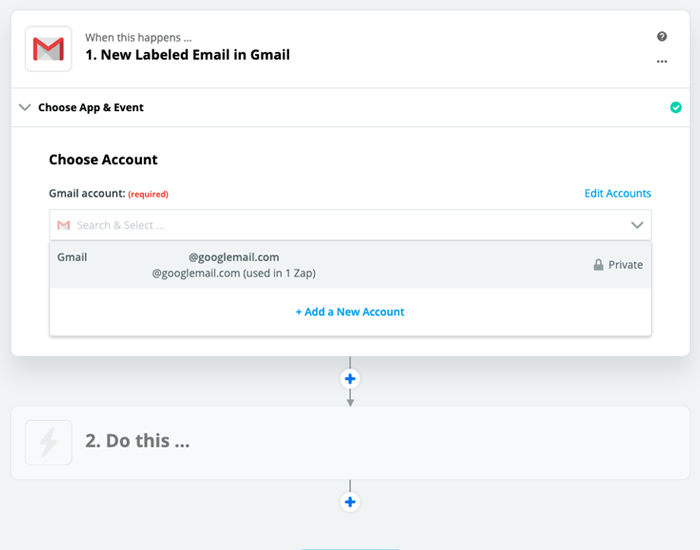
After clicking on "Continue" you will be prompted to link the corresponding Gmail account with Zapier or, if this has already happened, simply select.
Next, the desired label can be selected. For example, you can decide that we only want to trigger the WebHook for emails with the label "IMPORTANT".
Finally, you can confirm your entries by clicking "CONTINUE" and test the connection to Gmail: "TEST AND CONTINUE"
THEN
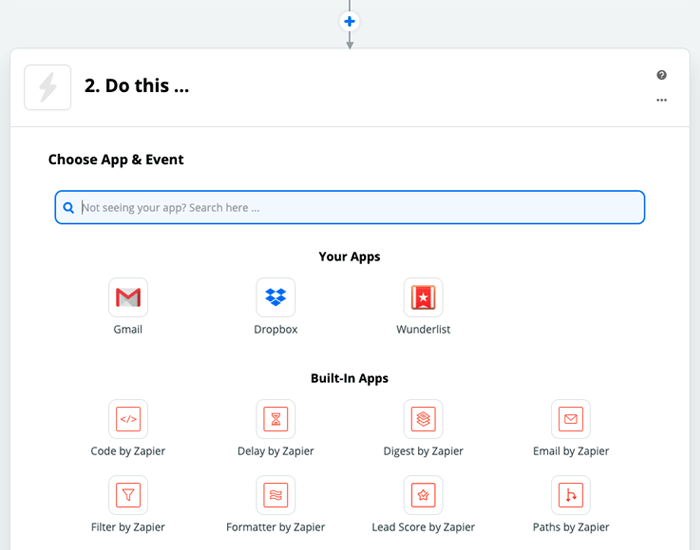
If the test was successful, we can continue with the second part of our "if-then-function".
If an e-mail arrives and it is given a label, then a task should be created in Stackfield.
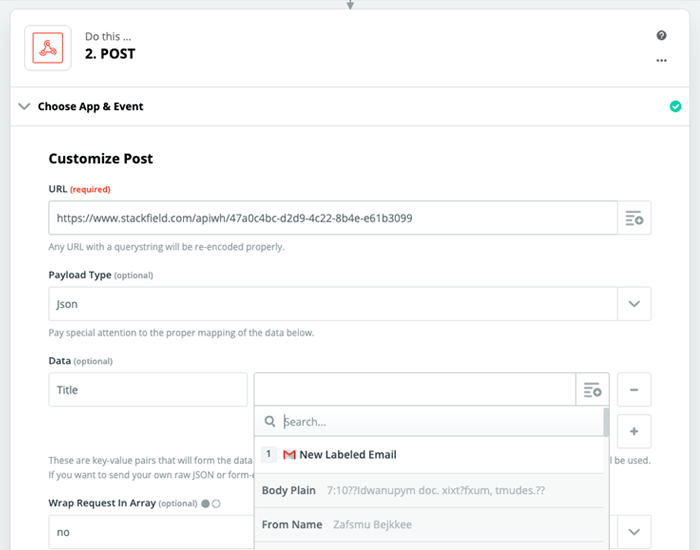
In the following mask you can select a target application. In our case, we need to go for "Webhooks by Zapier".
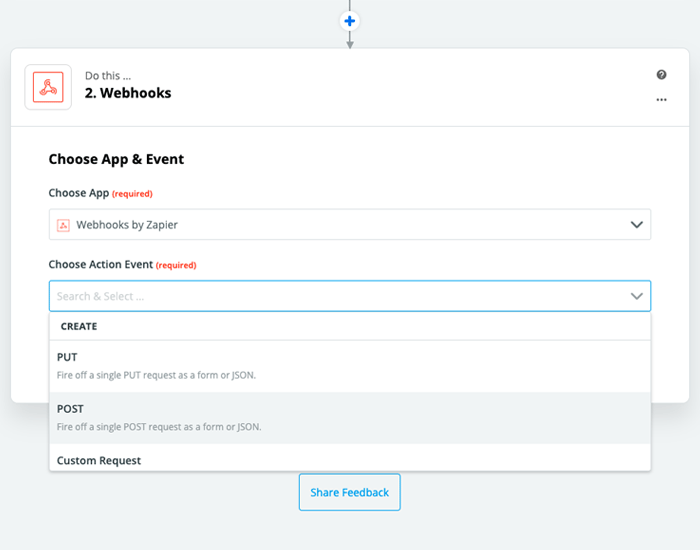
Next, Zapier suggests some types of action events where you need to go for "POST", because in order to send the data later, we have already generated the Post URLs in Stackfield.
These must be added into the "URL" field now. In this case, the right WebHook URL is the one for creating tasks.
For "Payload Type" select "Json".
What we enter under the item "Data" depends on what the WebHook was created for, i.e. what kind of content should be created in Stackfield (here: Tasks). Exact details can be found here.
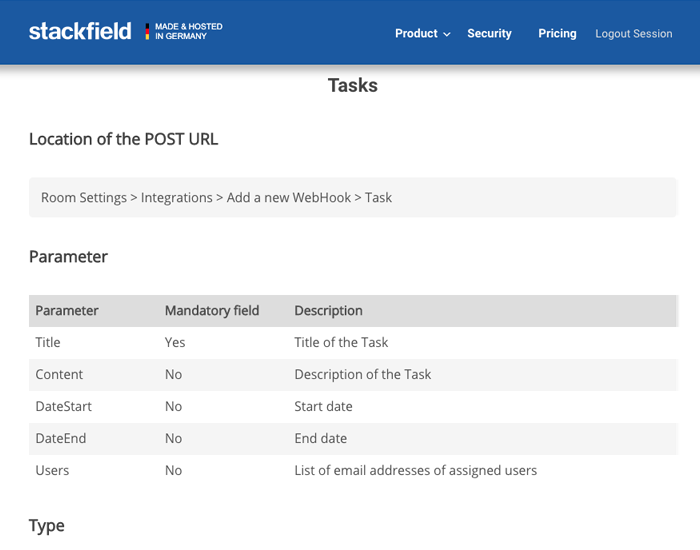
The parameter is to be entered into the first field. For tasks the parameter "Title" is a mandatory field.
In the second field, you can set which information should be included in the title of the task, for example the subject of the email. So, we choose "subject".
You want your tasks to cover more information? With the plus-symbol it can be specified that further information from the email should be drawn for the WebHook tasks. The "Content" parameter can be used, for instance, to fill in the description of the task, e. g., with the content of the email ("Body Plain").
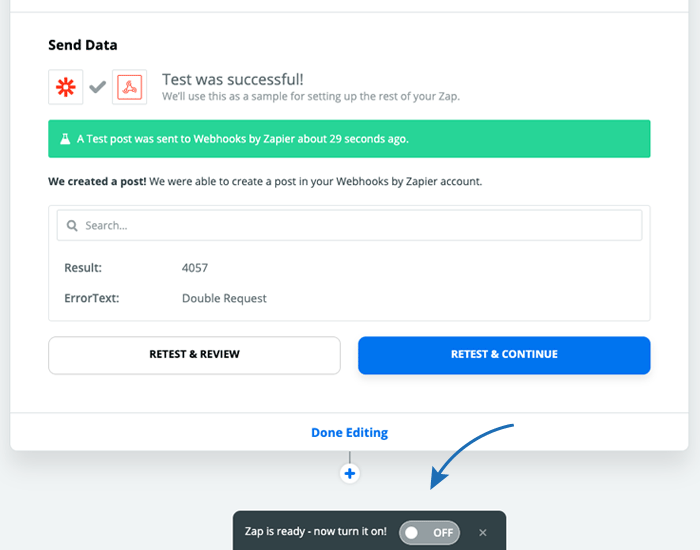
By clicking "CONTINUE" we will be led to a WebHook test, which we perform by clicking on "TEST & CONTINUE".
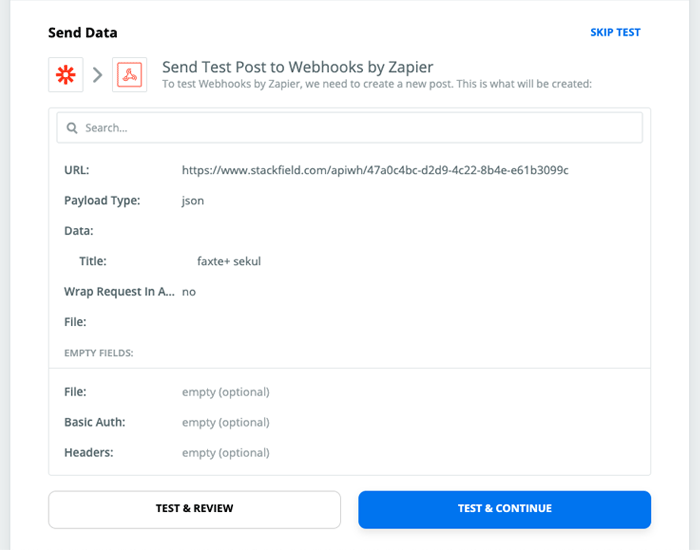
As soon as the test has been completed successfully, a green message about this will appear as well as a test WebHook task within the respective room in Stackfield.
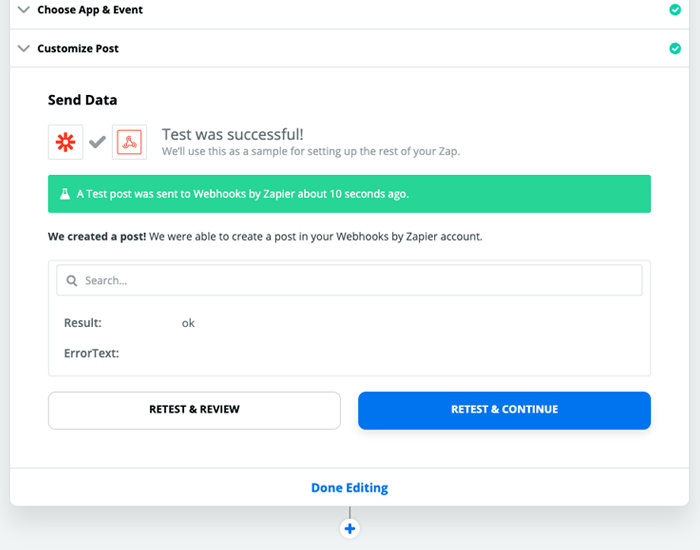
To activate the now created WebHook, all you have to do is set the slider from "Off" to "On".
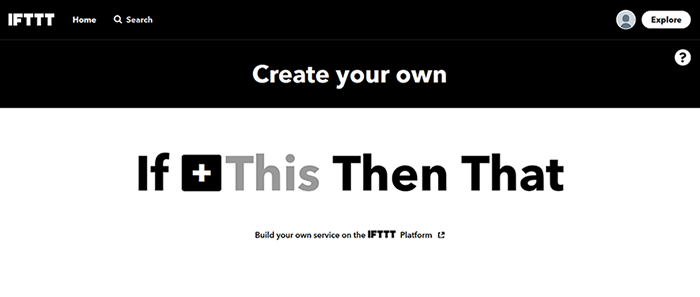
How to use IFTTT
To use IFTTT sign up for free at: https://ifttt.com/
The IFTTT platform can also be used to set up a new WebHook based on the if-then principle. Click on the user icon in the upper right corner and choose "Create". IFTTT will take you to the next page with the words "If This Then That".
IF
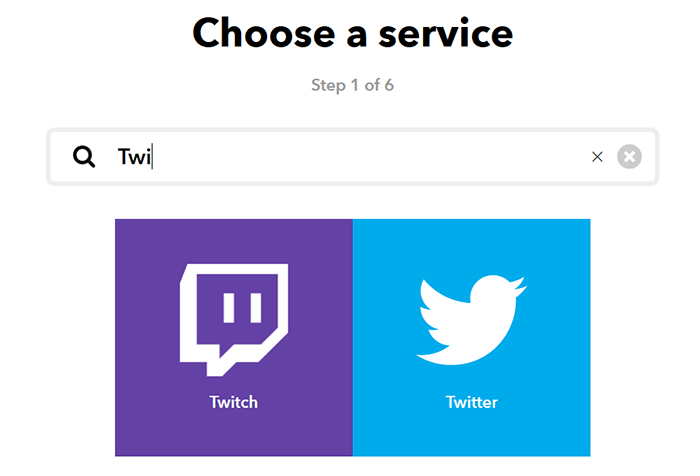
By clicking on the plus icon, the service redirects to the triggering app selection page. In this case, we have chosen Twitter as an example.
If I am mentioned in a tweet, then I would like to receive a chat message in Stackfield.
So we search for Twitter and choose the app.
If the personal account of the selected app has not already been linked to IFTTT, the first login will be made via the platform.
Otherwise, the desired trigger can now be selected from a predefined list.
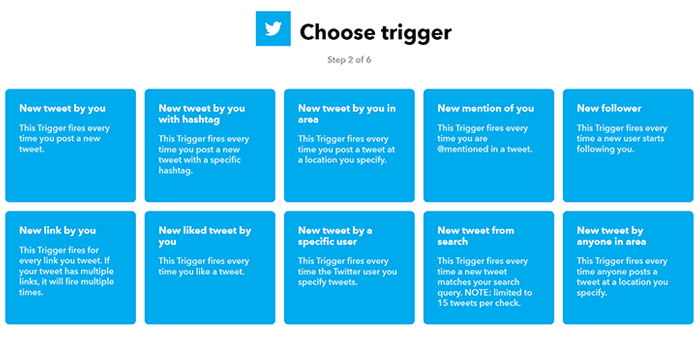
We select a event - in our case "New mention of you" – with which the first part of the if-then-function is complete.
THEN
To set the second part and select the target application, another click on the "plus" icon right in front of “That” is required.
If I am mentioned in a tweet, then I would like to receive a chat message in Stackfield.
Again, we choose "Webhooks" for our target application.
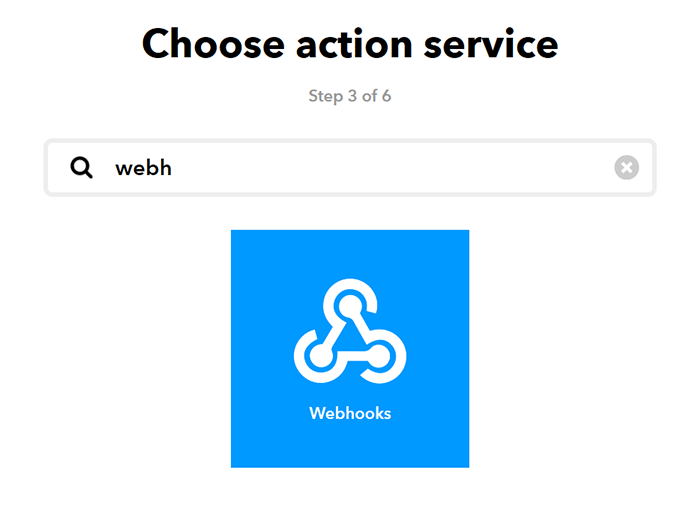
The only option for the desired action is "Make a web request".
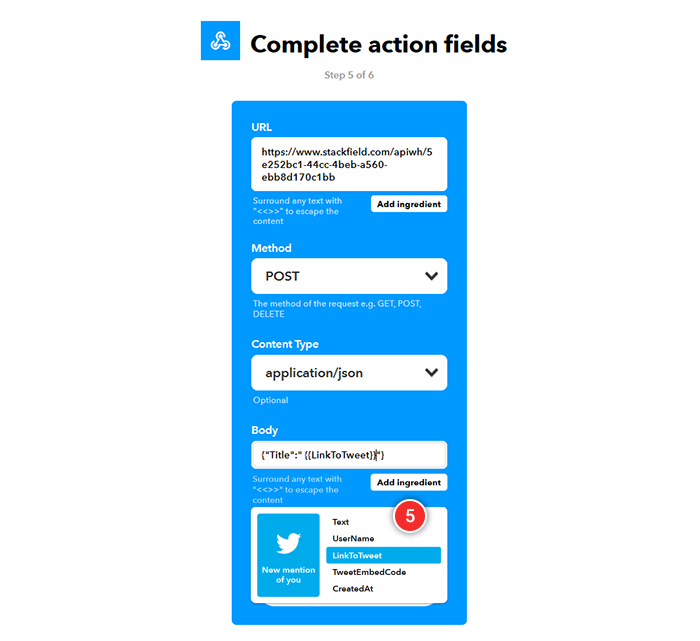
In the next step we will be redirected to the following mask.

In the first field we insert the WebHook URL from Stackfield (in this case we had created a WebHook for chat messages). (1)
Under Method we choose the option "POST". (2) For Content Type we choose "application / json". (3)
Since we have created a WebHook for chat messages, the "Title" parameter must be specified. (4) The form of the code can be found in the example of our Stackfield API page, which also contains the parameters.
{"Title":"{{LinkToTweet}}"}
In the first part of the brackets is the parameter and in the second part you can use the button "Add ingredient" to determine which content should be displayed later. (5) We would like to receive a link to the tweet later on.
Finally, the action must be confirmed via "Create action" before the WebHook can be created by clicking on "Finish".
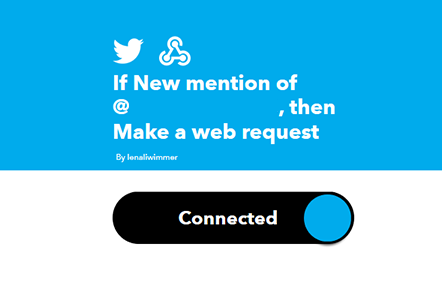
That your WebHook is active, can be seen from the fact that the slider of the just created "If This Than That" is set to "Connected". Though, it can still be edited via the "Settings" button. If required, you can also edit the title in here.
This is how the created WebHooks appear in Stackfield:
While the possibilities and the range of different solutions are increasing, the demands of the users are growing, too. Applications should be linked. Commands should be executed immediately. Unfortunately, there is not (yet) a tool that meets all demands of everyday business life. APIs and WebHooks, however, meet these requirements to a considerable degree - specifically through the targeted automation of specific processes.