It's that time again: Enjoy our new update with various new features in the areas of telephony, favorites, user handling, and more. We are looking forward to your feedback.
These are the new features at a glance:
Improved resolution for video calls
As in previous product updates, we have once again focused on making Stackfield's telephony a little more user-friendly and appealing. The camera resolution in video conferences and the quality of virtual backgrounds in video calls (conferences and 1:1) have therefore undergone some improvements. Feel free to visit our Learning Center to read more about calls on Stackfield and try them out with your colleagues!
Entries as favorites in your sidebar
Some elements on Stackfield need to be accessed, reviewed and updated regularly. This might be the page on social media posting guidelines, the whiteboard containing the current product roadmap or the task for the new major website update. In a few words: sometimes a shortcut to such elements would be helpful.
For precisely this purpose, we have something new for you. You can now add a specific item to the favorites in your sidebar to make this item accessible from anywhere at any time with just one click. The best thing about this feature? It works with all available module types on Stackfield, i.e. with discussions, tasks, snippets, pages, whiteboards, files, and events. Tip: You can identify the module type of an element in the sidebar by the small icon next to their title.
How to add an item to your favorites:
- Open the respective entry, e. g., a task.
- Click the More button (icon: three dots) at the top right.
- Select the option „Add to favorites“.
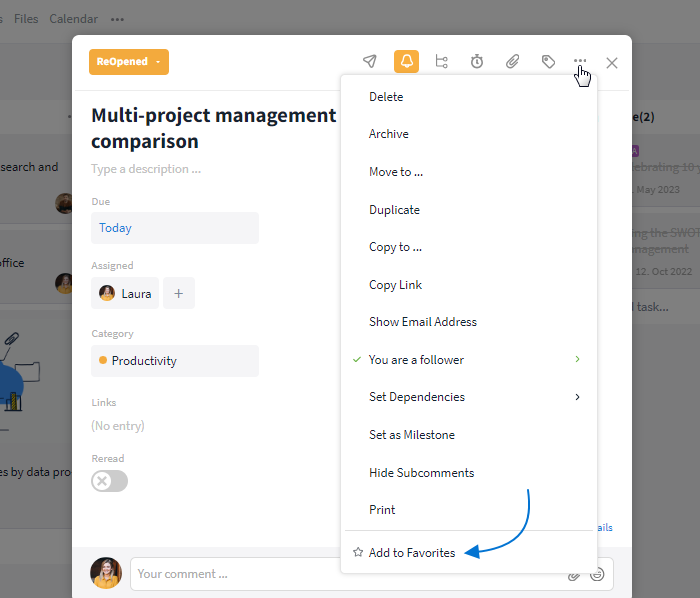
Adding a task to the favorites in your sidebar
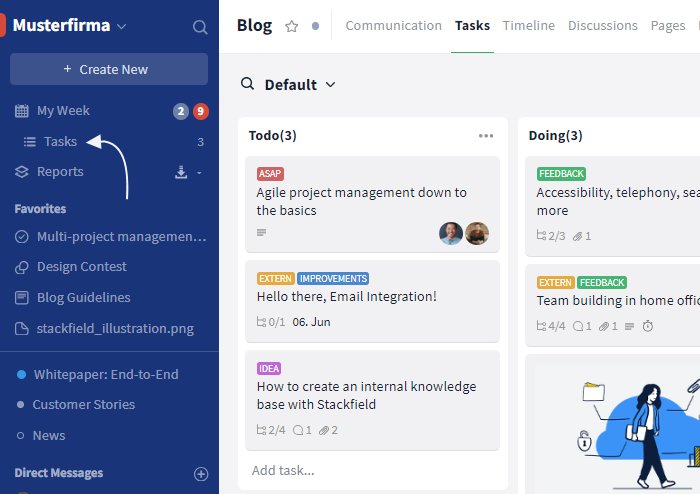
The item is now listed at the top left of your sidebar above your favorite rooms or group chats (if available) in the “Favorites” section.
To remove the item from your favorites, move the mouse over the corresponding title and click on the x symbol on the right.
Removing an item from the favorites in your sidebar
Note: If more than five items have been added to your favorites, only four items are displayed. All other elements are hidden and can be shown as a drop-down list using the “+ x entries” button.
More than five items in your favorites
Filters from My Week in your sidebar
Reading tip: How to use “My Week”
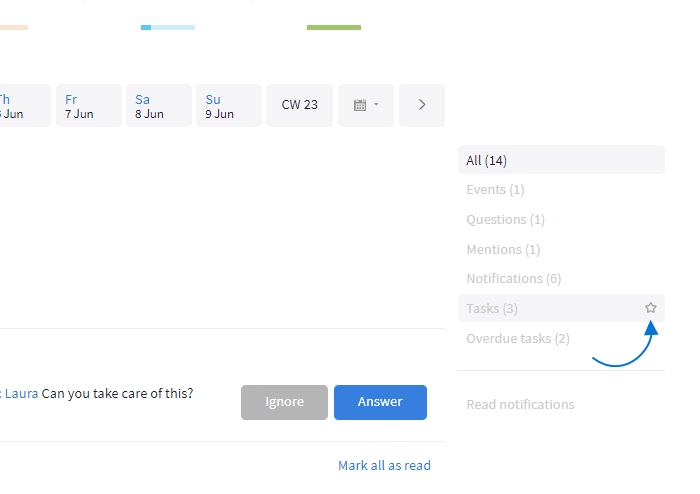
Especially in management and leadership positions, your own dashboard can quickly be flooded with tasks, notifications, mentions, and reminders. To filter the various items in My Week, there are various categories such as “Tasks” or “Notifications”.
In addition, you can now favorite different filters and display them at the top of your sidebar under “My Week”. This allows you to navigate directly to the relevant view from anywhere in Stackfield by clicking the filter. The number next to the title in the sidebar shows you how many items are currently listed in the view. The number next to “My Week” is adjusted accordingly, i.e. it counts all other items.
My Week filter in your sidebar
How to display a My Week filter in your sidebar
- Open your dashboard My Week.
- Hover over the desired filter title with your mouse and click on the star symbol.
- The view will now be displayed indented under “My Week” in your sidebar.
Adding a filter from My Week to your sidebar
Note: The various filters are only visible (both in My Week and in the sidebar) if they contain items. For example, if you have favorited the “Events” view, but are not invited to any event today, the filter remains hidden in My Week and in the sidebar.
To remove a filter from your sidebar, hover over its title in the sidebar and click on the x symbol on the right. Alternatively, you can also remove a view from your sidebar via My Week by clicking the star symbol again.
Removing a view from your sidebar
The following filters can be added to your sidebar:
- „Events“: Today's events to which you have been invited or which you have accepted
- „Approvals“: Invitations to events with pending approval by you
- „Questions“: Pending questions addressed to you
- „Polls“: New polls in rooms you are included in
- „Mentions“: Notifications about mentions in which you have been tagged
- „Notifications“: Changes relevant for you
- „Tasks“: Tasks assigned to you with due date “Today”
- „Subtasks“: Subtasks assigned to you with due date “Today”
- „Overdue tasks“: Tasks assigned to you with an overdue due date
Sharing items via the Direct Messages
In the past, if you wanted to share an item on Stackfield, e. g., a task or a file, you had to copy the link of the item, navigate to the corresponding private chat and then paste and send the link. To make it easier to share and discuss items, you now have the option of sharing an item with your colleagues via a single button. This feature is available for all module types.
How to share items via the Direct Messages:
- Open the desired entry, e. g., a task.
- Click on the paper airplane symbol at the top right (“Forward to person” on mouseover).
- Select one or more people you would like to share the item with. If necessary, use the search at the top under “Forward” to filter for a specific person.
- If required, add a message using the pop-up text input field.
- Click “Forward” to complete the process. (Tip: To cancel the process, click “Close”).
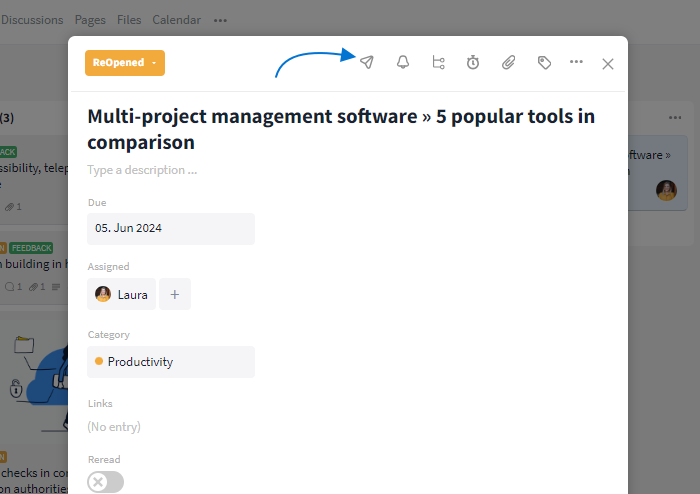
Sharing/Forwarding a task
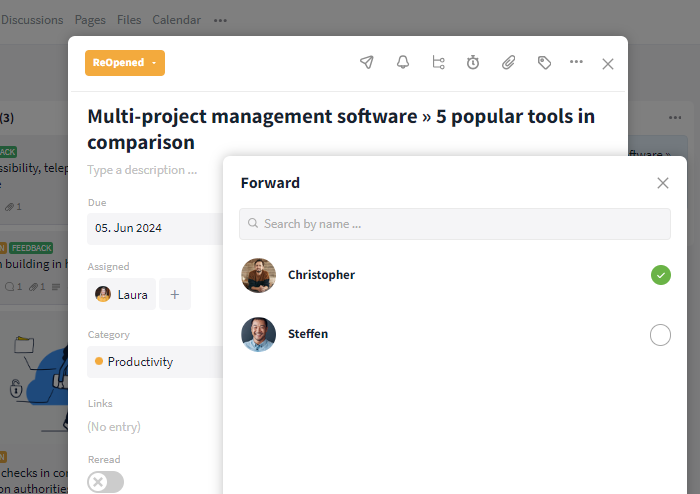
Who do I want to share the item with?

Custom message
The link to the corresponding entry will now be sent to the selected person(s) via the Direct Messages, including an additional message (if specified).
Organization-wide right groups for rooms
Reading tip: How to manage the right groups within a room
In your Stackfield rooms, you can control the rights of room members via right groups. In addition to the predefined right groups “Contributor”, “Reader” and “Manual approval”, you now have the option of defining organization-wide right groups. Organization-wide means: these right groups are available in all rooms of the organization and can be selected and assigned by you without having to be redefined each time.
Note: Only Admins of the organization can define organization-wide right groups.
How to define organization-wide right groups:
- Open the settings of your organization and switch to the tab Permissions.
- Scroll all the way down.
- Click on the blue button “Add Right Group” next to “Global editing rights for contents of the organization”.
- Add a title for your new right group and define the rights as usual by (de)activating modules and adding or removing check marks next to the different rights.
- Click “Save Changes” to finish.
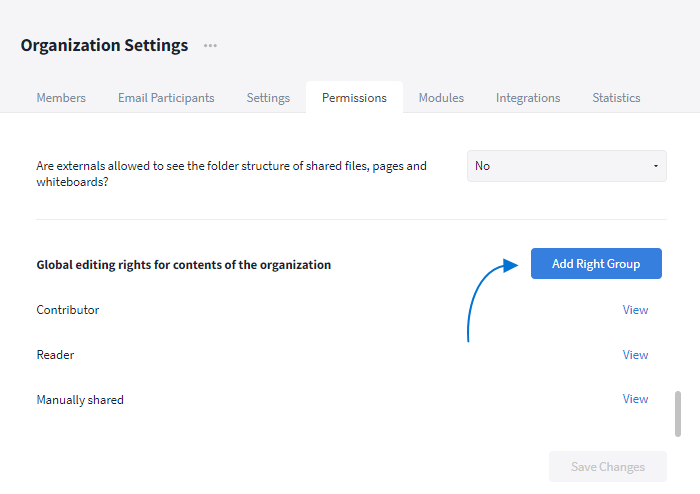
Adding an organization-wide right group
The new right group is now listed with all organization-wide right groups in the corresponding section in the organization settings as well as in the settings of the various rooms.
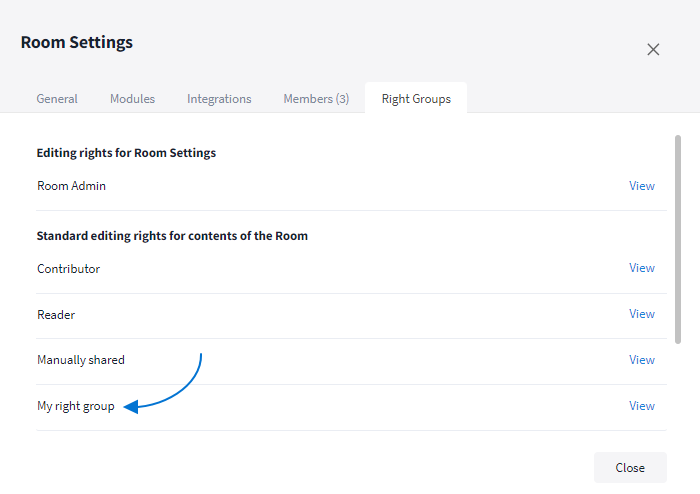
Organization-wide right groups in a room
Note: The default right groups defined by Stackfield can be viewed via “View”, but cannot be edited. You can adjust the right groups you have defined yourself at any time via “Edit” in the organization settings. Organization-wide rights groups cannot be edited in the room settings.
Improved user handling in the organization settings
Adding new users to your organization
Note: Only Admins (and, depending on the organization settings, users with the role Member) can add new users.
To ensure that you don't forget to add new users to the relevant teams and rooms, we have adjusted the process for inviting users via email as follows:
- Open the settings of your organization as usual.
- Click the button “Invite New Members”.
- Enter the email address of the new users as usual and add a personal message, if desired.
- Click “Next”.
- Now, you are in the new tab “Add the Member to a team?”. Click “Add” next to the desired team to add the user.
- Click “Next”.
- In the now opened second new tab “Add the Member to a room?” you can add corresponding users to different rooms in the same way as the previous tab. If necessary, use the search to filter for specific rooms. Once you have selected a room, you have the option of changing the right group.
- Click “Send Invitation” to complete the process.
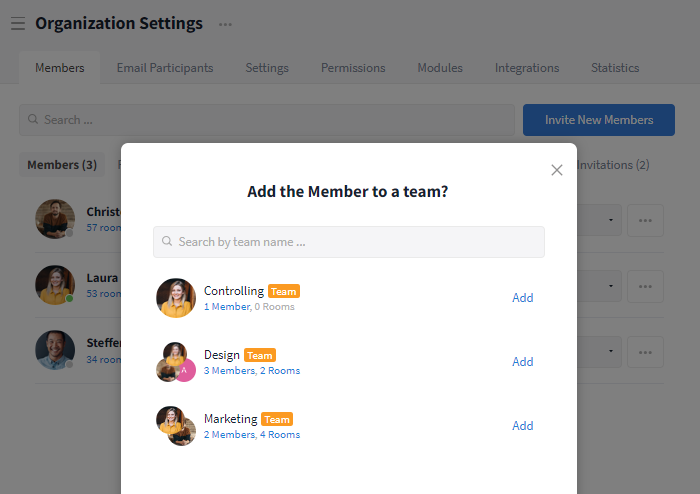
Adding a new user to a team
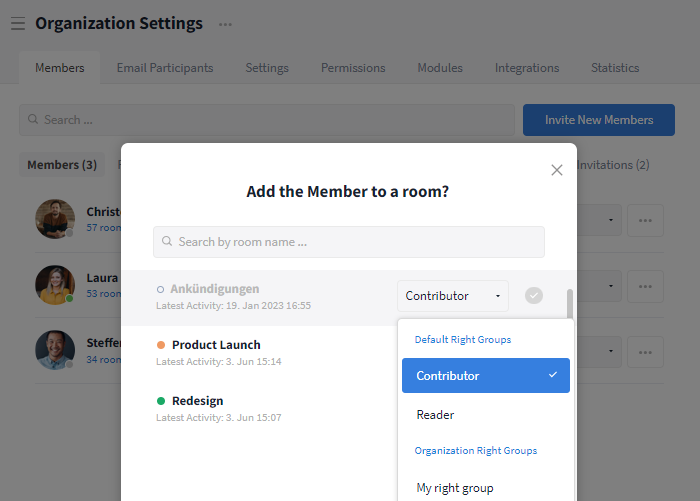
Adding a new user to a room
Managing users included in your organization
Note: This feature is only available for Admins of the organization.
You can find a list containing all users of your organization in the Members tab in the organization settings. Every user is listed here with the following information:
- Profile picture (if available)
- Display name
- Email address
- Number of rooms, the user is included in (if available)
- Number of teams, the user is included in (if available)
- Time of last login
- Role within the organization
Here, you now have the option of directly adding a user to other rooms and teams with just a few clicks:
- Click the link that counts the user's rooms / teams.
- Click the blue plus button or the “Add more rooms / teams” button to open a list of all available rooms / teams.
- Select the room / team by clicking “Add” to add the user to the room / team.
- For rooms, if necessary, change the user's right group.
Adding a user to another team