What is a "Room Group" and who can see it?
Room groups* serve to sort and structure the individual rooms. For example, a room group can be used for departments, topics, or projects. In the project portfolios, project rooms can also be displayed grouped by their room group.
For the users, it should be clear at first sight which rooms are to be found in the group by the chosen name. Room groups are represented in the room list by folders.
All room groups are visible by default for each user with the role Admin or Member - those who can create rooms or room groups. The reason: All employees in a company should be given the same structure so that they can see what topics already exist and there is no redundancy when creating. The room groups are not displayed for external users (roles: Guest and External).
*Note: A room group only serves the purpose of grouping different rooms together. If you want to "work", you can only do so within the individual rooms.
Creating a room group
To create a room group click on the "+ Create New" button at the top of the sidebar and select the option "New Room Group ...". Now, a text input field pops up and you can enter a name. Finally, press the Enter key to create the room group. To stop the process of creating a room group simply click anywhere around Stackfield and the text input field will close automatically.
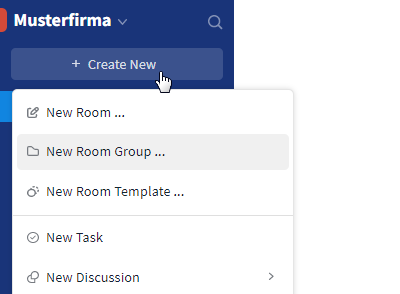
Create a new room group via the sidebar
Changing the settings of room groups
By moving the mouse pointer over a room group, a "More" button (symbol: "Three dots") appears on the right-hand side, which can be used to rename or delete a room group. By deleting a room group, you will not lose any rooms, only the sorting will be cancelled. Besides, the "More" button can be used to create new rooms directly within a room group.
All empty room groups, i. e. those that only include rooms that you do not belong to, can be hidden for you. To do so, use the "More" button (symbol: "Three dots", visible by mouseover) to the right of any room group and the option "Hide empty room groups". With the option "Show empty room groups" they become visible again. These options are only displayed to members if they have permission to create rooms or room groups.
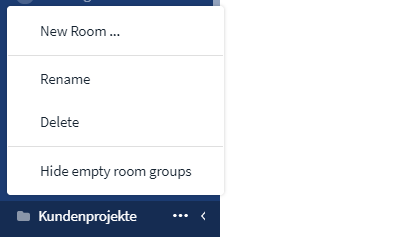
The editing functions can be accessed via the "More" button (symbol: "Three dots")
By clicking on the "folder" symbol of the room group, you can assign a color to it. There are 9 different colors to choose from, which can also be assigned several times. The color of the room group will be adopted by the rooms in it. The room color is displayed in the calendar module and in the Gantt view.
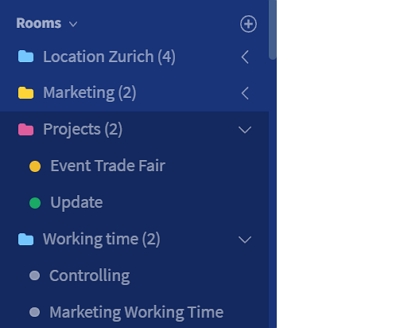
Colors of the room groups
Hide / show rooms of a room group
Each user can decide for himself whether the rooms within a room group are visible at first glance or not. By clicking on the "arrow" symbol to the right of the name of the room group (symbol: "Folder"), the individual rooms (symbol: "Circle") can be hidden / displayed. If the rooms are hidden, the arrow points to the left, if they are displayed, the arrow goes down.
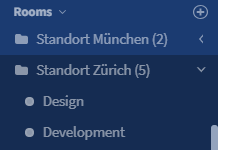
Hide (left arrow) / show (down arrow) rooms of a room group
Tip: Through the global search you can select a room group and, by doing so, switch to the room, which comes first in the room group's list. This can be helpful whenever you want to navigate to a room group without having to search for it first.
Options for admins
In the organizational Settings within the Permissions tab, you can define "who" (or which role may create and edit room groups.
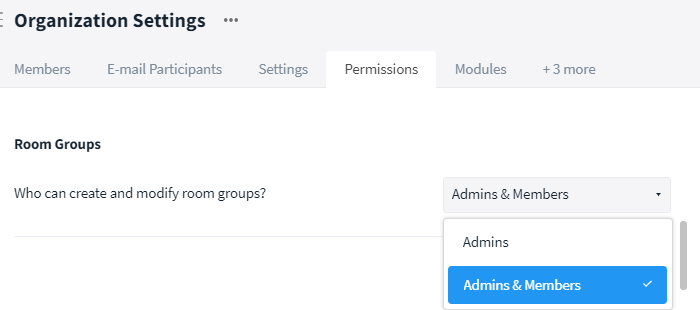
Organization Settings: Create/edit room groups