Basics
On Stackfield, all activities can be broken down into different workspaces. Rooms are the best way to organize work by topic. For example, you can create a room for each department of your organization and/or for different projects or functions. This way, all actions, information, and the complete digital communication exchange are centrally bundled in one place and can be accessed at any time. The content of the room is only available to members of the room.
Several interconnected modules (e.g. communication) within the room facilitate the work and display it clearly.
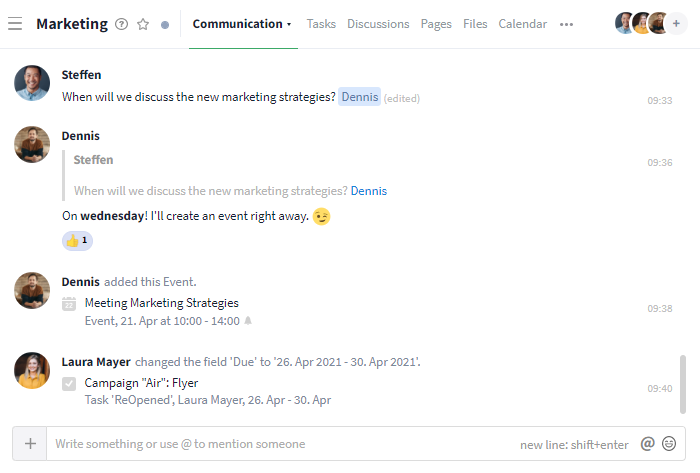
Example of a room of the marketing team
Within the sidebar, all rooms available to you are listed next to a circle icon. Here, you can combine rooms that fit together thematically into a room group (folder icon). Rooms can be used in a variety of ways thanks to the different room types. The style of the circle indicates the selected room type. Click here, to learn more about the individual room types.
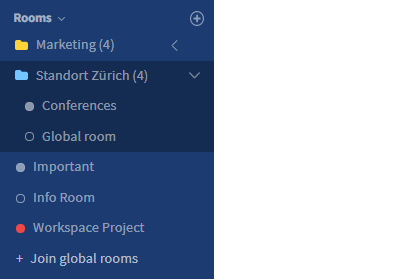
Room list within the sidebar
The different Room Types
Three different room types are available on Stackfield. You can identify them in the sidebar based on the style of the circle next to the room names.
- Closed Room: filled circle
- Global Room: circular ring
- Project Room: colored circle (color depends on the project status)
What are the individual room types particularly well suited for?
Closed rooms are especially useful for information or topics that only affect a specific group of people and do not have a foreseeable duration. You can use closed rooms for departments or individual teams, such as the marketing team.
Global rooms are great for information that needs to be universally accessible. This might include important news about your organization, a "coffee kitchen" of sorts, or policies.
Project rooms have been designed for your company's projects and events. They have a start and end date as well as a project-related planning overview.
Common features of the room types
- All room members are displayed to each other at all times, regardless of their role.
- Rooms are only displayed within the sidebar of their members.
- The global search, reports, and My Week only display the contents which each user is authorized to see. Only members of the room with the appropriate rights have access to it.
- Standard and individual editing rights for the contents of the room can be assigned.
- The type of encryption of a room can be specified through the organization settings or selected when creating the room.
- Rooms can be created from templates.
- The Room Admin can archive / delete / move the room and change all room settings as desired.
- The room can be equipped with (individual) modules and integrations. All modules are interconnected and can function collectively as a large whole.
- Users can be added / removed from the organization via the room settings.
Special feature: Global Rooms
Users with the role Member / Admin can join global rooms by themselves without an explicit invitation or submit a joining request.
Click here, to learn more about global rooms.
Special feature: Project Rooms
Project rooms have a start and end date. A graphical representation, the so-called project details, provide information about the entire course of the project as well as the remaining workload. The project portfolios provide an overall view of all projects.
Click here, to learn more about project rooms.
Good to know before creating a Room
Before creating a room, you should consider some aspects that cannot be changed afterwards:
- Activation of End-to-End encryption: What kind of data will be exchanged within the room (keyword: compliance with the General Data Protection Regulation, professional obligations and compliance guidelines)? We recommend exchanging sensitive data in an End-to-End encrypted room.
Note on password management: For End-to-End encrypted rooms, keep the room password secure and accessible at all times, i.e. outside the End-to-End encrypted room!
- Creation from room template / import: Is there already existing content that should be used as a basis? (See "room templates" and "task import")
- Selection of the room type: What is the purpose of the workspace and what kind of environment is required for it?
If the wrong encryption type, the wrong room type, and/or the wrong template was selected by mistake, a new room must be created. The entries can then be moved individually into the new room.
Procedure: Open the required entry and click on the More button in the upper right corner (symbol: three dots). Alternatively, this is also possible in the overview by right-clicking.
Files can easily be downloaded collectively and uploaded to your target location (see: Working with multiple files).
Creating a Room
To create a room, click on the "+ Create New" button at the top of the sidebar and select the option "New Room...".* The room can be moved to a room group by drag and drop later at any time.
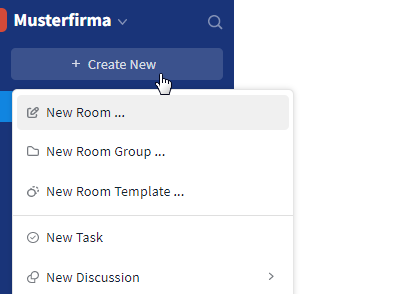
Create a room via the sidebar
To add a room directly to a room group, click the More button within the sidebar (icon: three dots, visible by mouseover) next to the name of the corresponding room group and select the option "New Room...".
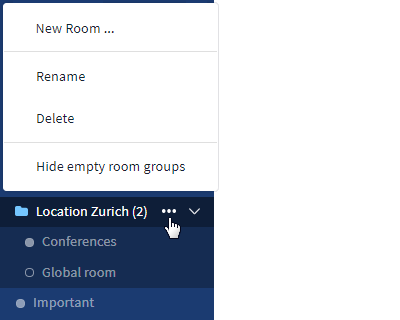
Adding a room (icon: circle) directly to a room group (icon: folder)
The way to the new room: all basic settings
Once you have selected the option "New Room...", a dialog window will pop up in which you can determine all the basic settings of the room in just a few steps.
Step 1: Name*, type of encryption (symbol: lock) and, if necessary, room template
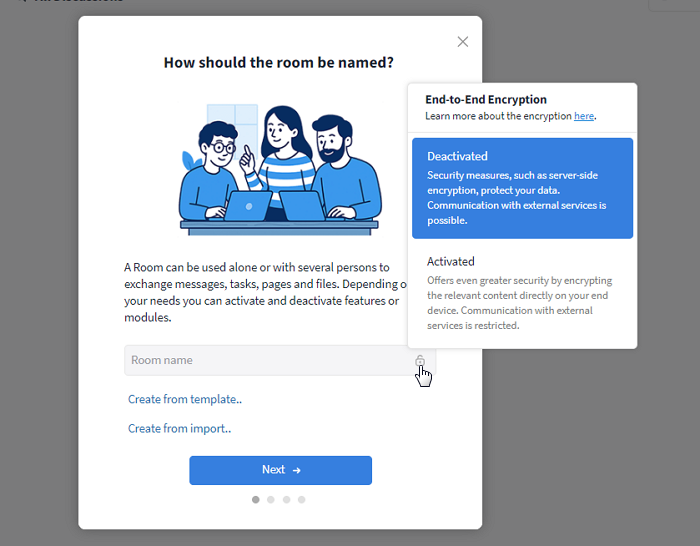
Activate the end-to-end encryption if required and use a template
Step 2: The suitable room type depending on the intended use and further specific settings*
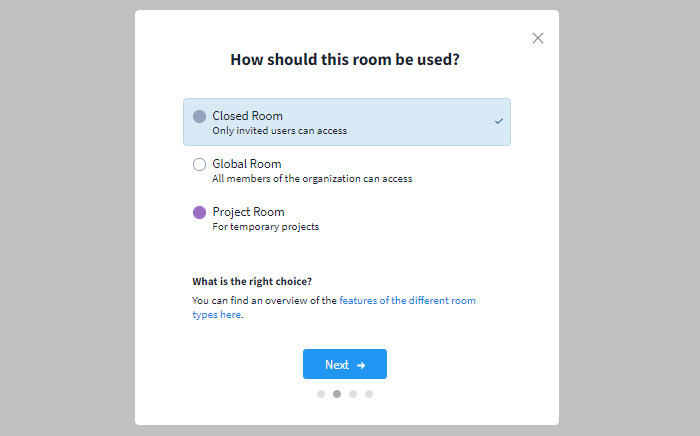
Closed Room: no further settings
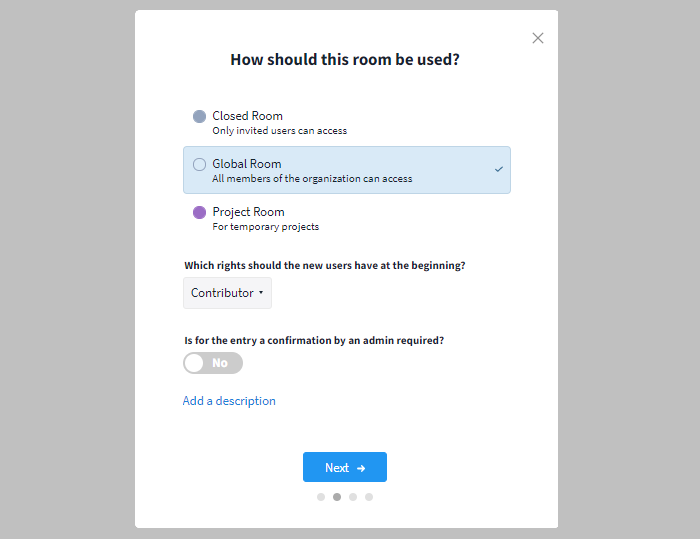
Global Room: standard right group, confirmation by admin, description
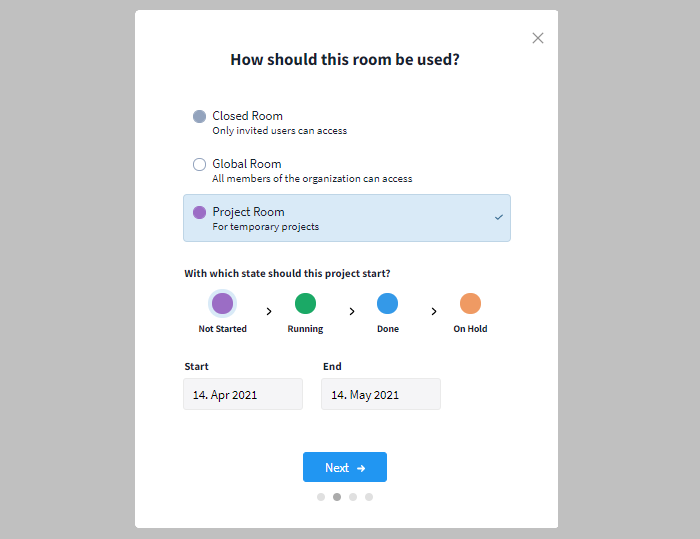
Project Room: starting status, start and end date
Step 3: Features - (De-) Activate the modules as required*
Step 4: Access - Add individual users / teams from the organization to your room*
*Note: Room Admin(s) can change the following settings afterward: name of the room, specific settings depending on the room type, (de-) activated modules, adding / removing members
Accessing and modifying the Settings of a Room
The administration of the room members, as well as properties of the room can be viewed within the "Room Settings" by all members of the room and edited by the Room Admin.
To open the room settings, click on the room name in the upper left corner of the room or on the More button in the upper right corner (symbol: three dots) and select the option "Room Settings". Alternatively, the settings can be opened within the sidebar by right-clicking the corresponding room.
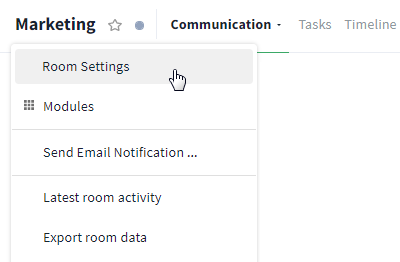
The Room Settings are accessible via the room name
General
The tab General contains the room name, description and room color. These features can be viewed at any time and edited by the Room Admin.
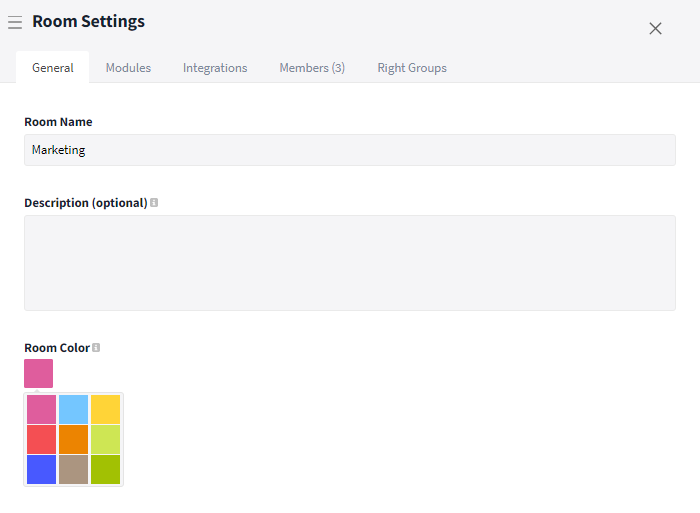
The room features can be found within the Room Settings
Color
The color of the entries within the calendar is determined by the color of the room. The color of the room may be inherited from a room group.
Description
As soon as a description has been stored within the room, a question mark icon appears in the navigation bar at the top of the room, directly next to the room name. By clicking the icon, the description can be displayed at any time.

Viewing the description via question mark icon
Room Password
End-to-End encrypted rooms contain a room password which can be accessed within the tab General directly below the room color.
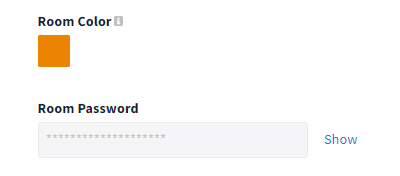
End-to-End encrypted rooms contain a room password
Room type Global Room
Within global rooms, further settings are available at the end of the overview. Here, you can define the role that should be assigned automatically to new room members and activate a confirmation of joining by a Room Admin.

There are further settings available for global rooms
Room type Project Room
Within project rooms, project details can be accessed at the end of the overview.
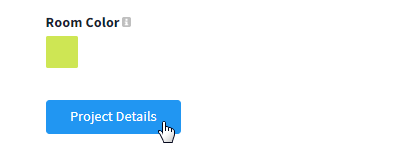
For project rooms, project details are available within the settings
Modules
The tab Modules represents all modules available in the organization. Modules that are activated within the room are highlighted in green and marked with a check mark. Room Admins can (de-) activate the modules and edit them at any time (see: Modules within a room).
Integrations
The tab Integrations displays an overview of all existing WebHooks and email integrations. Room Admins can create additional integrations here and (de-) activate the sending of messages to email subscribers.
Members
The tab Members contains the administration of the room members. It shows all users of the room, including their user role. You can easily remove them from the room or add more users to the room here.
Right Groups
Within the tab Right Groups, you can view the settings of any right group by clicking the "View" button next to it. Room Admins can create (new) individual right groups and decide which rights (e.g. deleting content) should be available to users of this group. To learn more about user rights within a room, click here.
Further functions, e.g. archiving, deleting and leaving a room
Several administrative and personal functions can be displayed via a pop-up menu. To open the menu, click on the room name in the upper left corner or on the More button (symbol: three dots) in the upper right corner within the opened room. The menu can also be opened in the sidebar by right-clicking the room name.
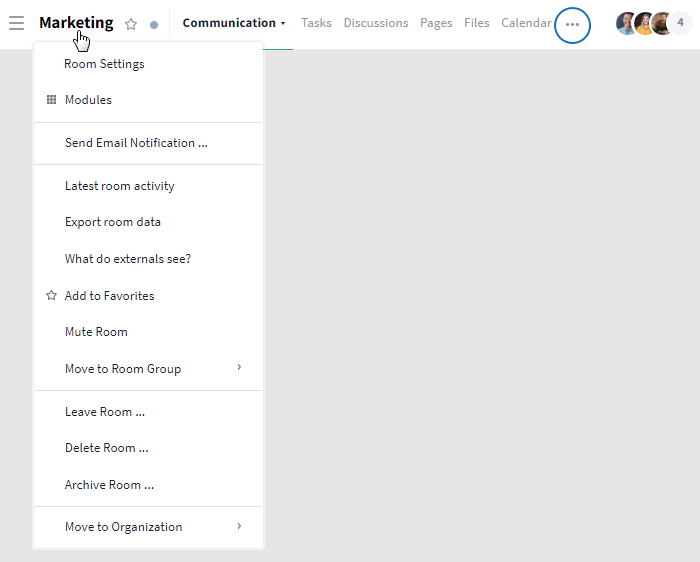
Room menu including relevant functions
By default, the following functions are available in the menu, depending on your right group and role:
The following additional functions are optionally displayed depending on where you access the menu:
- Displaying the latest room activities (menu within the room)
- Exporting room data (menu within the room)
- Showing / Hiding empty room groups for yourself (menu within the sidebar)
Options for Organization Admins
Organization settings
Within the organization settings, admins of the organization can anchor general settings for the entire organization.
The following settings are particularly relevant for working with rooms:
- To which rooms should new members (roles Member and Admin) of the organization be added automatically?* (tab Settings - option "Default Rooms")
- Who can create rooms? (tab Permissions)
- Who can create and modify room groups? (tab Permissions)
- Do you want all rooms to be End-to-End encrypted? (tab Permissions)
- Who is allowed to create rooms without activated End-to-End Encryption? (tab Permissions)
- Who can create room templates? (tab Permissions)
- What modules are available to users from the organizations? (tab Modules)
- What integrations are available to users from the organization? (tab Integrations)
*Note: Only members newly added to the organization are also added to default rooms. Users already included in the organization and if the Guest / External role is present, on the other hand, must be added manually.
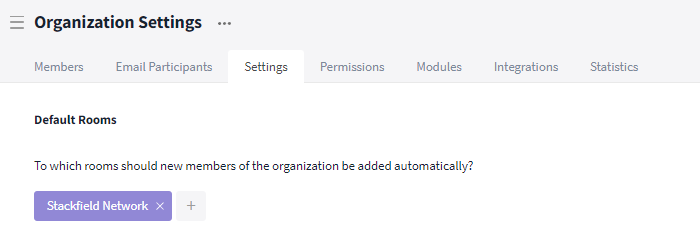
You can set rooms as default
Further articles
If you have any questions about the features, your plan or upgrading to the Premium plan, just contact our Support, we'll be happy to help.