In Stackfield, tasks represent the fundamental unit of work. They break down the workload into actionable steps and help keep track of ongoing responsibilities. When the day is organized into tasks, to-dos, ideas, reminders, and more are captured in one central place.
Creating a task
In the Tasks module, a new task can be created by clicking the blue plus button in the top right corner.
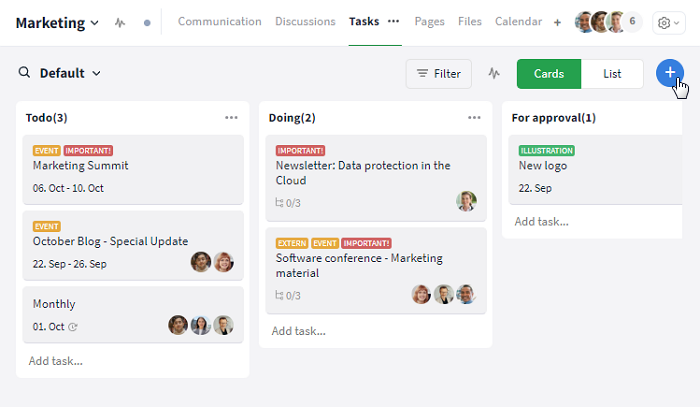
New tasks can be created via the blue plus symbol in the upper right corner
Using the module search (icon: magnifying glass, top left) helps avoid duplicates. If a task already exists, it can be edited; if not, it can be created automatically by pressing Enter.
A task can be created with the Enter key via the module search
At the end of each column / status, a task can be added by entering a title in the field "Add task..." and pressing Enter. Optionally, assignments (via @-mention) and due dates (e.g., in the format DD.MM.YYYY) can be added directly.
The end of the column offers you several shortcuts
Alternatively, tasks can also be created in the following modules and areas:
- Module Communication: Displays all activities within the room (e.g., task updates) as well as communication
- Module Timeline: Shows all dated tasks in chronological order within a Gantt chart
- Module Calendar: Displays all appointments and dated tasks
- Sidebar: The "+ Create New" button at the top of the sidebar allows quick creation of module entries (e. g. "New Task")*
- Global Search: The control center of the global search enables navigation within Stackfield, creating module entries, and more
- Room Templates: Room templates can be created including general tasks and used as often as needed.
- Duplicate: Existing tasks can be duplicated as many times as required.
- Task Import: Existing content, such as task lists in Excel files, can be imported into Stackfield.
- Email integration: Email content can be converted into module entries
- API / WebHook: With the Stackfield API, information can be sent to Stackfield and stored as module entries
*A new task can be created at any time via the "+ Create New" button at the top of the sidebar and the "New Task" option. Note: An additional field will appear in the task card, allowing you to specify the room where the task should be stored.
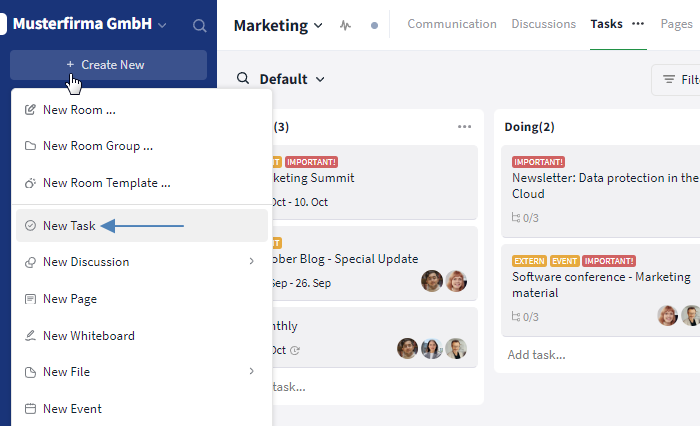
In the sidebar, tasks can be created using the "+ Create New" button.
Task card structure
Each task consists of various elements and can be extended with additional attributes. The only mandatory field is the task title; all other fields may be left blank and filled in later. However, it is recommended to enter all relevant information directly in the task card.
Clear responsibilities are created by assigning the task either to oneself or to another person, and by setting a due date. The task status is located in the top left corner, while further adjustments (e. g., creating subtasks, time entries, or labels) can be made in the top right corner. Additional fields ("Custom fields") can be added for all tasks in a room via the room settings, e. g., to record topics, order numbers, or priorities.
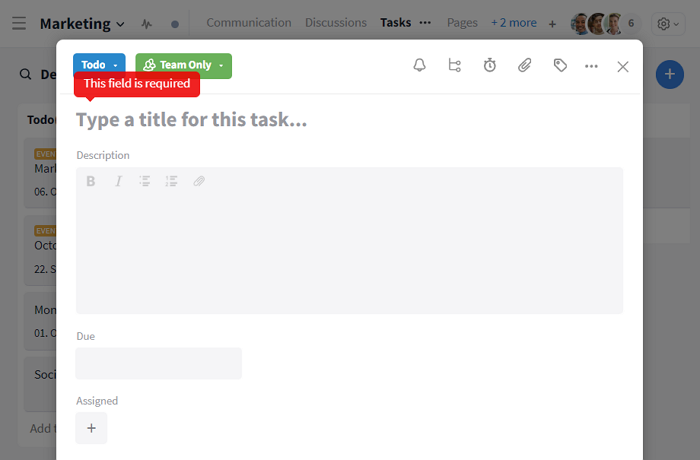
The title of each task is a required field
Due Date / Recurrence / Reminder
To avoid missing a task, always agree on a time by which the task should be completed. If there is no fixed deadline, you can also enter an estimate. The due date can be set for a specific time ("Date & Time") or a period ("From - Until"), and can be entered once or as a recurrence. You can also set a reminder for the task and its deadline.
As soon as you assign a due date to a task and save or create it, it will be added to the schedule and calendar modules (if enabled). Visibility can only be restricted by a filter and / or right groups.
On the due date, the task appears in the My Week dashboard of all assigned users. If a time period is stored, the task will remain open in My Week from the beginning of the period until it is marked as "Done".
Recurring task
The following successively selected buttons can be used to set a recurrence, as well as the rhythm:
- "Due"
- "Date & Time" or "From - Until"
- "Recurring"
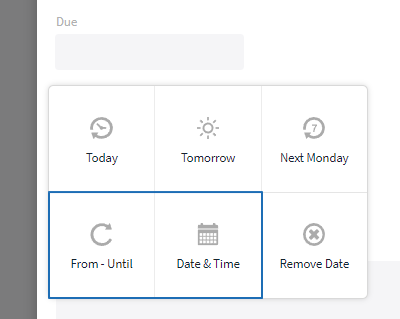
First step: "Due" + "Date & Time" / "From & Until"
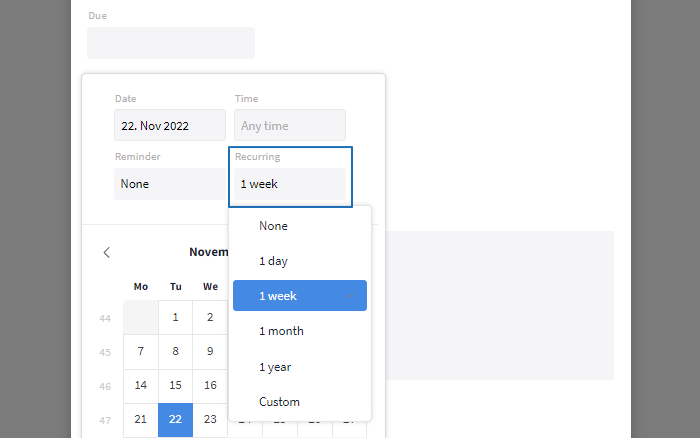
Second step: "Recurring" + Choosing the rythm
For recurring tasks, only the next due task is created in the first processing status (by default "Todo"). As soon as this task is marked as completed (status "Done"), the next task is created automatically.
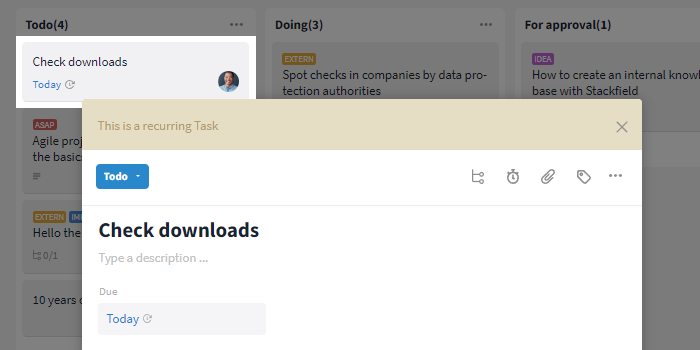
Recurring task in the module "Tasks"
In the calendar, all individual tasks of the recurring task are entered according to their due date and marked with a recurrence sign.
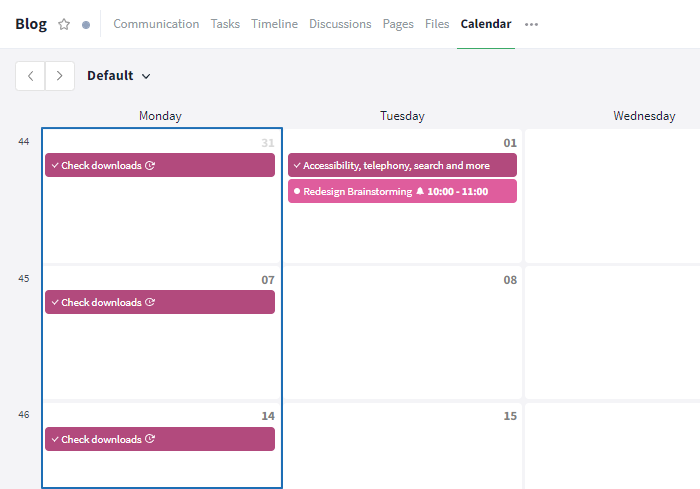
Recurring task in the module "Calendar"
Reminder
In the task card, you can activate a reminder for the task or the start of the due date via the "From - Until" or "Date & Time" fields. All people assigned to the task will then receive a notification in My Week.
Note: Once the task status is set to "Done", notifications and reminders about the task will no longer be sent.
Rescheduling / Change of due date
If only the due date is changed, it will be applied directly. With activated reminders and / or recurring tasks, a query appears once the due date is changed (via "Due" in the task or via "Reschedule" for expired tasks in My Week). You can then specify whether the settings should be adjusted to the new date or if you want to reset them completely.

Decide whether to adjust or reset the settings
Due date: Special case: List view
In the list view of the module Tasks, the due date of each task is displayed as a column. For tasks with a time period as the due date, the "Due by" column represents the beginning of the period. To show the end date, click on "MORE" in the upper right corner and select the option "Due end". You can use the filter to save the view if necessary. You can also change the order of the individual criteria or columns in the drop-down list using drag & drop.
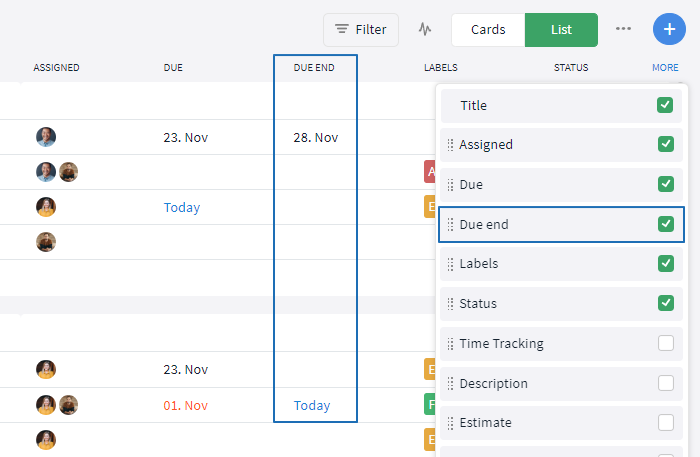
Include the end of the time period in your view
If the start date or time of a task is changed, the end date is shifted by the same interval, since the "task scope" usually remains the same. However, if the end date is edited, the start date remains the same and the task scope is assumed to be correspondingly shorter or longer than originally planned. To edit a column, left-click on the corresponding field. With a right click, you can edit some selected criteria through shortcuts.
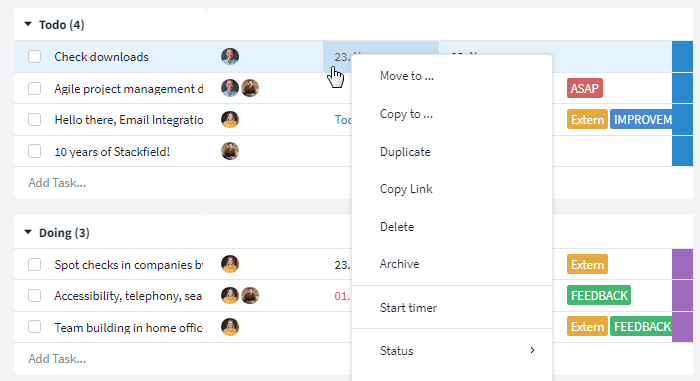
Right-click to open a drop-down menu with custom functions
Processing status
In the top left corner of an open task card, the status of a task can be viewed and updated at any time (regardless of other settings). To keep everyone informed of the current progress, the status should be updated regularly.
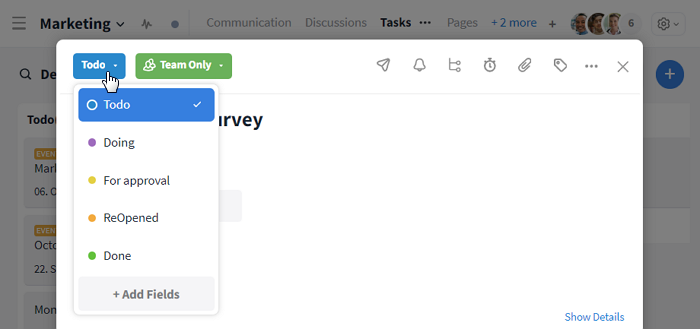
Status of the task
In the overview, the status of a task can be changed by right-clicking on the task and hovering over the "Status" option. (Tip: Within a room, the status of multiple tasks can be updated at once).
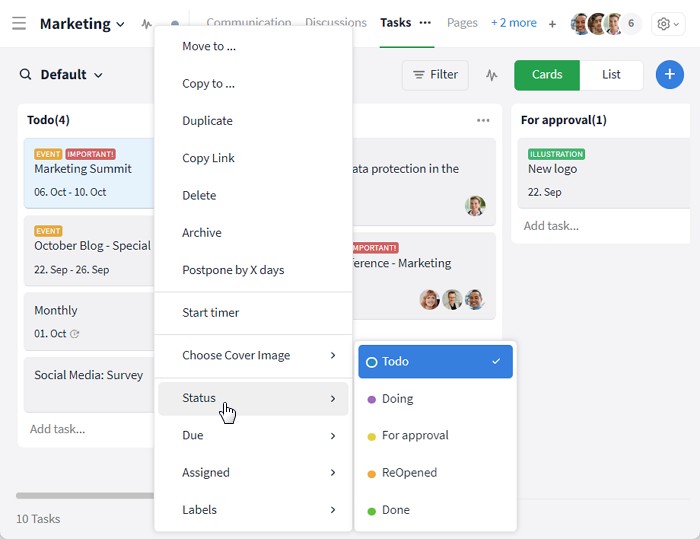
The status can be changed in the overview
In the overview, the visibility of task statuses depends on the filter settings. By default, tasks are grouped by status, which is displayed in the group title. In the card view, statuses are represented as columns and can be changed via drag & drop.

The status can be changed via drag & drop
Notes: The editing status may have been individually customized by room admins. Changing the status may be restricted based on your assigned permissions or may require an approval.
Special case: Approval
The sender forwards the completed task (through a status change) to the person responsible for the approval. The recipient (the person registered for approval) receives a notification in My Week and can manage the approval centrally. A task waiting for approval can no longer be edited by the sender (or other users) until it is accepted / rejected. If changes to the task are still necessary, the task must be "withdrawn" by the sender and, as soon as the changes have been completed, it must be reassigned.
Display options
Tasks can be visualized as a list, a Kanban board, in the calendar, or on a timeline (Gantt chart) – visible to all authorized members. The current view can be adjusted and saved according to individual requirements using filters. In some cases, the view must be refreshed to display all changes (Notifications within a room). A cross-room overview of tasks can be found in the Reports module.
List
By clicking the "List" button in the top right corner (below the navigation bar, between "Filter" and the plus icon), the view switches to a list format. All tasks are displayed one per row and can be further grouped vertically by criteria such as status (see screenshot), due date, dropdown, or user. Groups can be expanded or collapsed via the arrow next to the group title. Additional information (e.g., subtasks or labels) can be displayed via the filter or the "MORE" option.
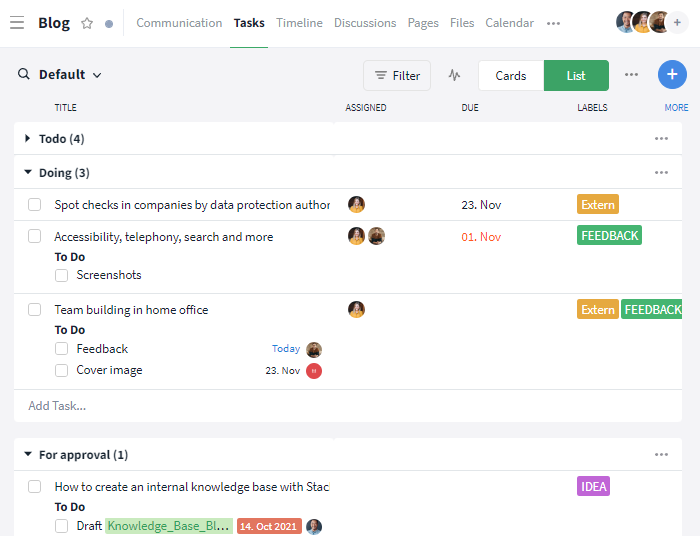
Display of tasks in a list
Cards (Kanban Board)
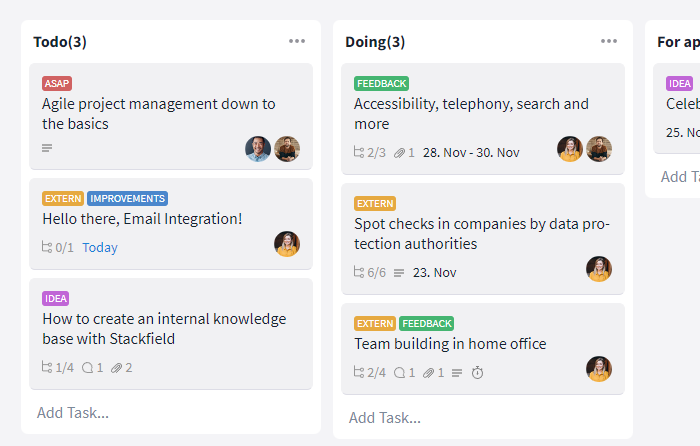
By clicking the "Cards" button in the top right corner, the view switches to the card layout. The Kanban board displays all tasks (including title, assignee, due date, and more) as individual cards. By default, the board is divided into columns sorted by task status. Tasks typically move from left to right across the columns – e. g., from "Todo" (all upcoming tasks) to "In Progress" and finally "Done" (all completed tasks).
If needed, tasks can also be grouped by other criteria (e. g. "Group by") or additional ones (e. g. "Swimlane by") such as due date or custom fields.
The order of tasks within a column, and thus their prioritization, can be adjusted using the filter settings ("Sort by"). In addition, images attached to tasks can be displayed as cover images (see: Further functions).

Display of tasks as cards in a board
Swimlanes
Swimlanes allow a second grouping on the horizontal level of a Kanban Board. Tasks are not only sorted by the primary grouping criterion (by default: status) but also grouped within each column according to a secondary criterion.
To add swimlanes, open the filter options via the Filter button in the top right. At the top, under "Swimlane by", a dropdown list with all available criteria is displayed. The option already selected under "Group by" cannot be chosen again and will be shown as greyed out.
Available swimlane options include:
- Processing status (z. B. "Todo")
- Due date (z. B. "Today" or "Overdue")
- ustom criteria from the custom field "Dropdown" (e. g. topics or priorities)
- Users stored through the custom field "User"
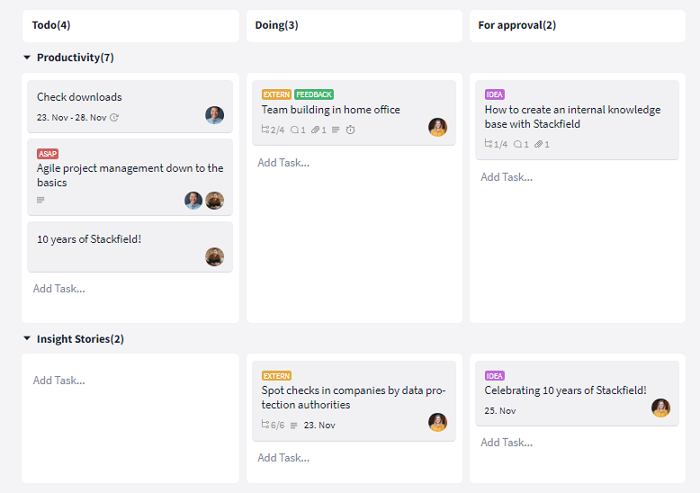
"Swimlane" view of a Kanban Board
Once a swimlane category is selected, the view updates automatically. (Tip: Frequently used filters can be saved as a view.) Swimlanes can also be expanded or collapsed individually for a clearer overview.

Irrelevant swimlanes can be hidden
Calendar
In the Calendar module, tasks appear on their due date and are marked with a check symbol. Tasks without a due date are not included in the calendar. Each task shows its title and time, as well as icons for recurring tasks (symbol: recurrence sign) or active reminders (symbol: bell), if applicable. Instead of the calendar sheet, a member view can also be displayed. The calendar can additionally be integrated with external calendars if needed.
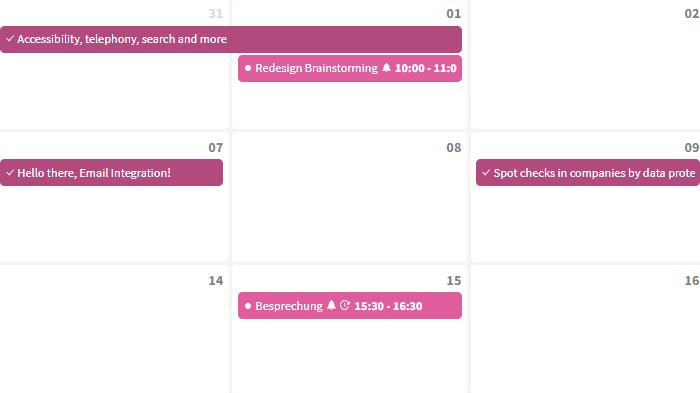
Display of tasks in the calendar
Timeline (Gantt)
In the Timeline module, tasks can be displayed per week / month / year, including their dependencies on other tasks. Dependencies can be set via drag & drop, and timeframes can be extended, shortened, or shifted. Milestones can also be created to mark important interim results and deadlines within project phases./p>
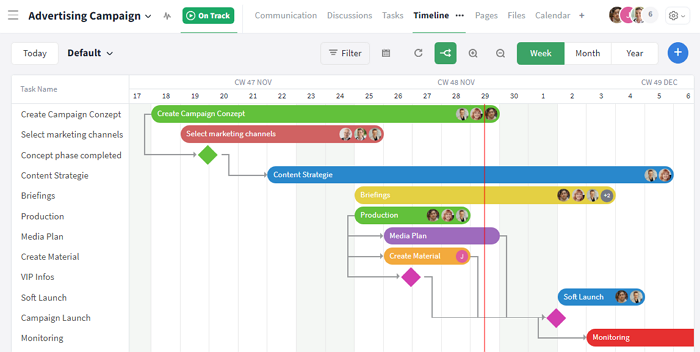
Display of tasks in a timeline
Further functions
Subtasks
It is possible to create and group subtasks by using lists within the task. This way, individual work steps, and thus the remaining workload of tasks, become visible. The subtasks can be assigned to different people and can be given due dates.
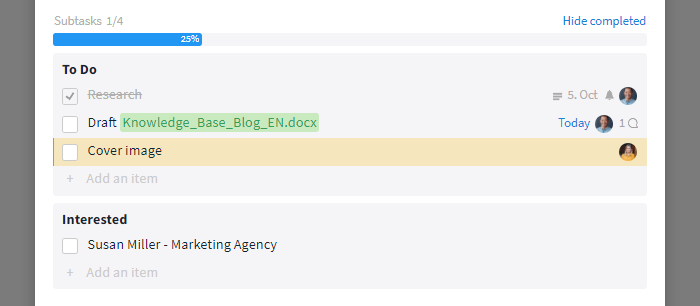
Subtasks in the task card
Tip: Reminders can also be set for subtasks. Make sure to add a due date and assignment to the subtask. In this case, it is not enough to simply assign the task.
Gantt chart: Dependencies, Milestones, Automatic Scheduling, and Critical Path
Once the module Timeline is active, tasks can be assigned a dependency and / or marked as milestones. The automatic scheduling and the critical path additionally help to coordinate different tasks.
File as cover image in task cards
If a file in image file format is attached to a task in the Kanban Board, the corresponding image* will automatically appear as the cover image in the task card. The corresponding settings can be changed at any time by right-clicking on the task and selecting the option "Choose Cover Image" via mouseover.
*The drop-down list offers you several options:
- "Show most recent" (Default setting): Once a new image file is attached to the task, it will be displayed as the cover image in the task map.
- "Show no image": The existing cover image, if available, will be removed from the task map and future attachments will no longer be automatically displayed as cover images.
- File title: A specific image can be chosen as the cover image by clicking on the corresponding image file.
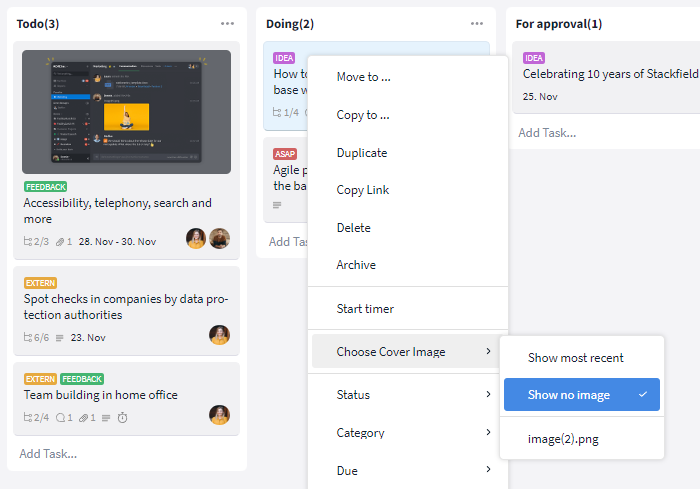
A cover image can be added to the task card
Markers within images
Images uploaded to Stackfield can be annotated directly in the right place using markers. This ensures that any feedback remains visible. For images attached to tasks, all markers in the task are stored as subtasks in a separate list and can be easily checked off.
Labels
Labels for tasks are directly visible in the Kanban and List view as well as in My Week. They can be added within the opened task card by clicking on the label icon or in the overview through a right-click.
Labels within the Kanban view
Further articles
*Note: To receive a reminder, an assignment and a due date must be stored for the (sub-)tasks.
Options for admins
Further articles
Advanced settings: Status and custom fields
In the "Room Settings", room admins can configure additional options for the tasks within a room. This can be done by opening the Modules tab, selecting the Tasks module, and then choosing "Settings". Alternatively, the settings can also be accessed directly from the task overview by clicking the "More" button (icon: three dots) in the top right corner and selecting the option "Customize Fields".
Processing status
The individual processing statuses of the room can be edited and deleted here. The order of the parameters can be adjusted via drag & drop using the small dots. By clicking on the colored dot, the status color can be changed. All changes are applied by clicking "Save".
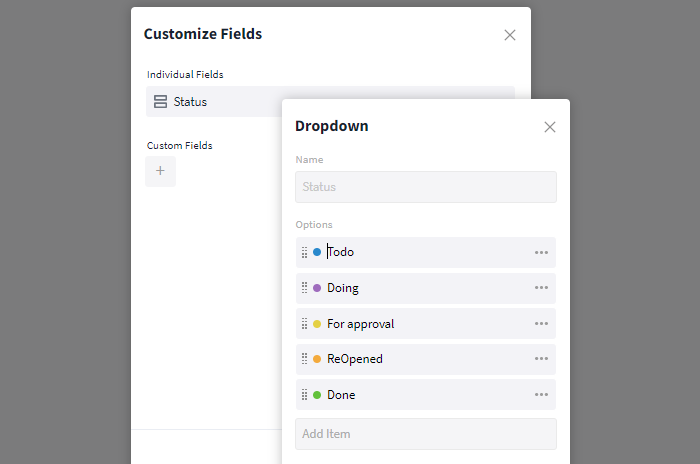
Customizing standard fields or statuses
Some settings can also be adjusted directly in the Kanban board. The order of statuses within columns can also be changed there via drag & drop. Using the More button (symbol: three dots) in a column, the status color can be changed, the column can be renamed, or it can be deleted entirely. New columns can be created on the far right of the overview via "Add List ...".
Custom Fields
To structure tasks, various types of custom fields are available, such as checkboxes, dropdown lists, or text boxes. This ensures that all users within the room have a suitable place to store their information. Changes to order, name, and color follow the same logic as status fields.
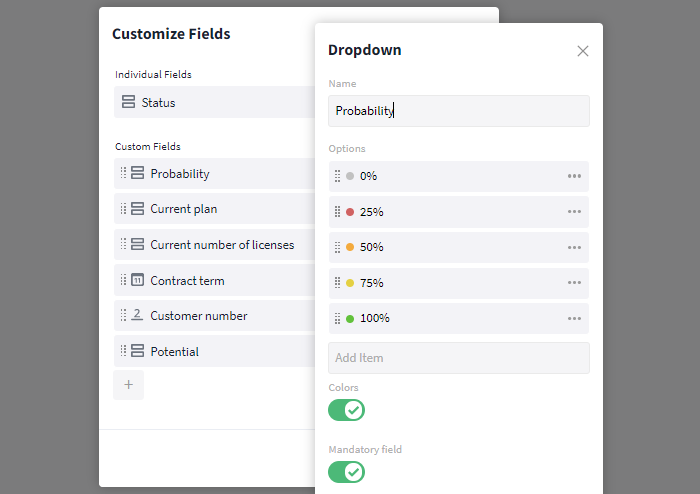
Different types of custom fields are available
Deactivate cover image in Kanban Board
cover images in task cards can be disabled if needed. This functionality can be found via the settings of the room. In the General tab, under Display options, you will find the option "Show cover images of tasks in card view?". The function can be deactivated via the switch (green: enabled, grey: disabled) and applied by clicking "Save Changes".
The feature can be re-enabled at any time by toggling the switch again and saving the change.
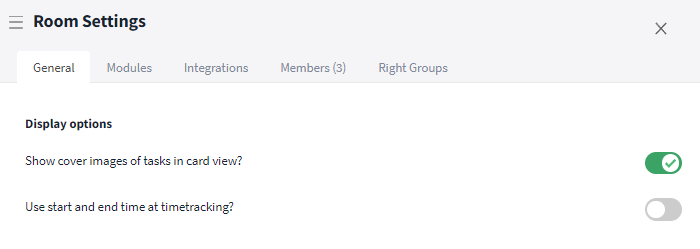
Cover images in the Kanban board can be disabled