By using the time tracking module, you can document the processing time of your tasks. This is especially useful when working on a project, as it gives you an overview of the project's progress and helps you avoid bottlenecks.
Reading tip: Obligation to record working time: Stackfield has the solution
Basics and preconditions
Basis: (De-) Activating and modifying the modules within a room
You have to enable the time tracking module to be able to use it. Activate it either directly when creating the room or later within the "Room Settings". To access the settings, click on the room name at the top left of the room or the more button (symbol: three dots) at the top right and select the option "Modules".
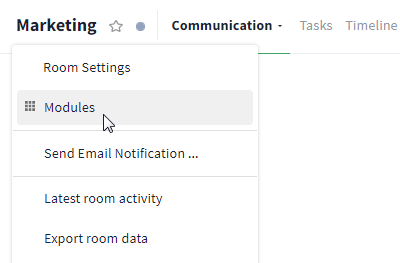
You can activate the module "Time Tracking" via the room settings
Now, click on the module Time tracking to activate it (color: green). (If the task module was not activated before, it will be switched on automatically). Afterward, it can be used within every task of the room. Simply select the corresponding task and click on the time tracking icon (symbol: stopwatch) within the task card.
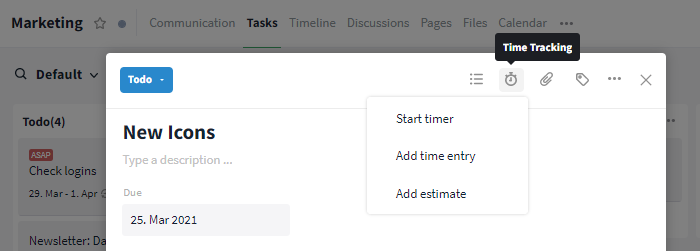
Click on the stopwatch icon to use the time tracking feature
You now have three choices available in a drop-down menu:
Creating a time entry (timer / manual)
You can choose between two options when recording and documenting your working time on a task. Either start a timer and use it to track your working time "live", or create a time entry manually.
The timer is particularly suitable when a task is pending that you want to spend some time on at that moment. If you already have some time behind you or don't want to be bound to a timer, the manual input is more ideal.
Creating a time entry using the timer
Start the timer:
If no time entry has been created in the task yet, an overview will appear in the task card as soon as you start a timer (via the time tracking icon + "Start timer", see: Basics). If time entries have already been added to the task, the time that the timer records will be added "live" to the time already processed.

New time is added to the time already captured
View the timer:
The total recorded time can be viewed on the task card within the cards view as well as in the overview of the opened task.
Within the sidebar, the timer is displayed as a red button (starting point: 0h 00m 00s). This way you keep an overview of the elapsed time everywhere on Stackfield. By clicking the timer, you can return to the task running at any time.
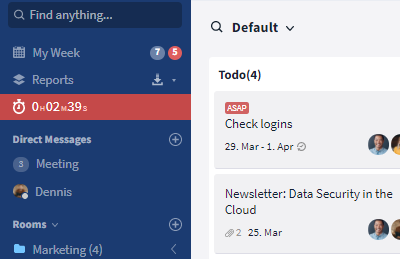
Take a look at the timer at any time via the sidebar
Stop the timer:
To stop the timer, either click the button "Stop timer" within the time tracking overview in the opened task or click the time tracking icon (symbol: stopwatch) in the upper right corner and select the option "Stop timer".
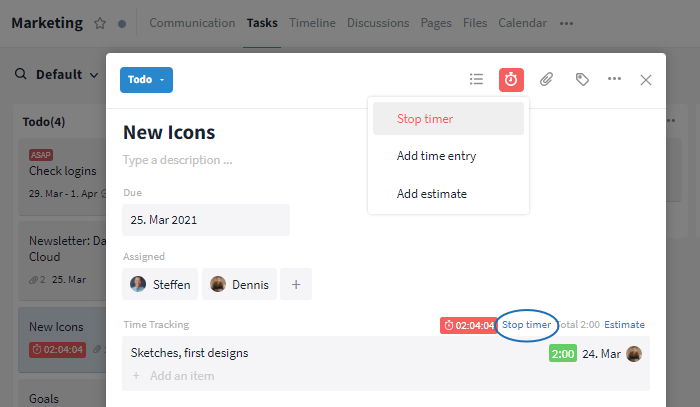
If you stop working on the task, stop the timer
Finalize your time entry:
Now, a dialog window pops up offering you the possibility to add a description to the time entry. By clicking the button "Add Time Entry" your selection will be confirmed and your time entry will be displayed directly in the overview. If you decide not to add the time entry, click "Cancel Time Entry" in the dialog window or delete / edit the entry afterward.
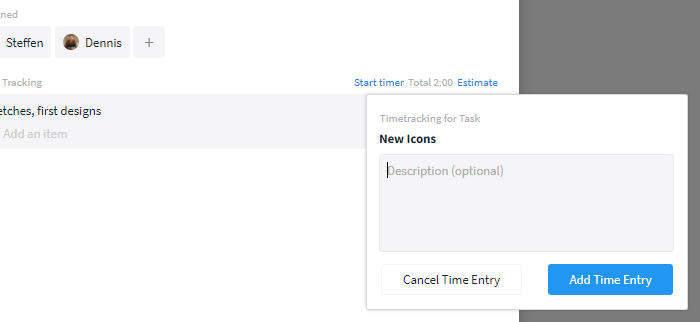
You can optionally add a description
Tip: As soon as an overview of the time tracking exists in the task, you can activate the timer at any time via the "Start timer" button (see: Overview of the time tracking).
Creating a time entry manually
Fill in time entry:
You can add time entries manually (via the time tracking icon + "Add time entry", see: Basics). In a dialog box, you have to enter the time worked in hours / minutes, the date, and the person. Optionally, a description (e. g. of the activities performed) can be filled in. Later, all data will be displayed in the overview of the time tracking.
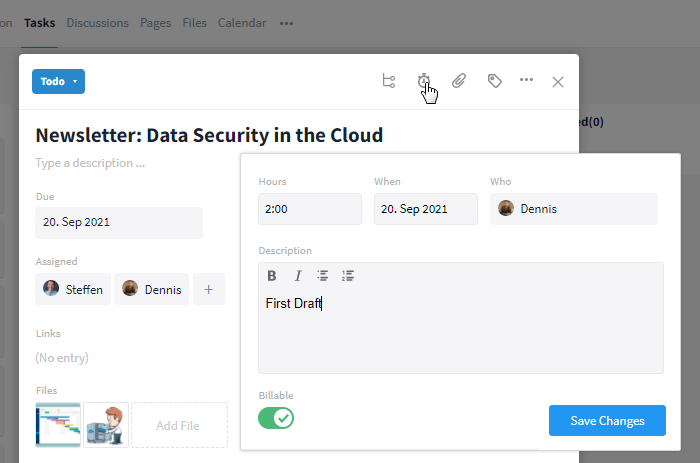
Fill in all fields to add a time entry
Finalize your time entry:
Once you have filled in all the fields as desired, you can add the time entry to the task by clicking "Save Changes". If no time entry has been added to the task yet, an overview will now appear in the task card. Otherwise, the new time entry is simply appended to the other entries.
Tip: As soon as an overview of the time tracking exists in the task, you can create a time entry at any time via the button "+ Add an item" (see: Overview of the time tracking).
Adding an estimate
Add an estimate:
To keep track of the ratio between the time you have already worked on the task and the time you want to work on the task, add an estimate (via the time tracking icon + "Add estimate", see: Basics) of the total time to be spent on the task.
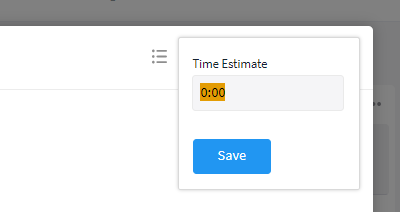
Add an estimate to the task
Estimate within the overview:
If no time entry has been added to the task yet, an overview will now appear in the task card. Otherwise, the estimate is simply added to the overview. In addition, a bar appears showing the time worked in relation to the estimated expected total time. The worked time is marked in blue ("Total"), the remaining time is marked in gray ("Remain"). If the total time (total time recorded) is equal to the estimate, the whole bar is blue and the remaining time is "0.00".
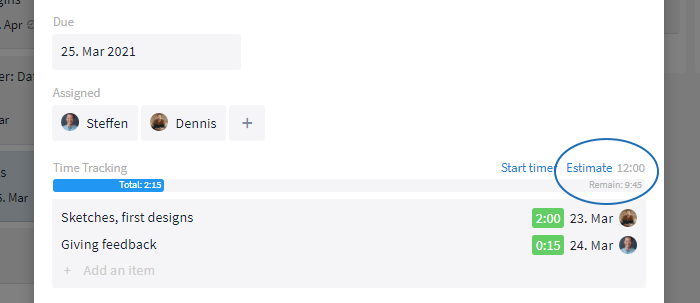
Ratio of total time to remaining time
As soon as the time specified in the estimate is overdrawn, the bar turns red, and instead of a "Remain" the overdrawn time ("Overdrawn") is displayed.
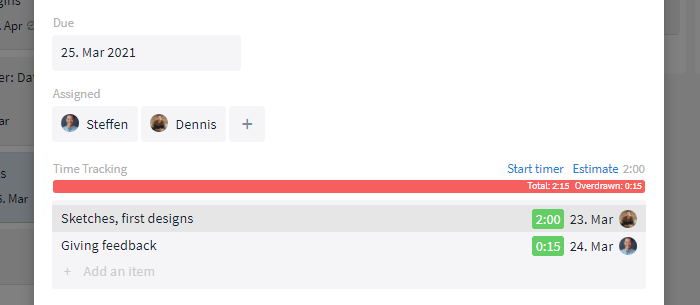
The bar turns red as soon as the estimate is overdrawn
Overview and management (editing/deleting) of the time tracking within a task
Overview:
Once a timer is started, a time entry is added manually or an estimate is added for the first time, an overview of the entire time tracking appears in the card of the corresponding task.
Quick access:

Overview of the time tracking within a task
To activate a timer, click on the "Start Timer" button. This way, you can document your processing time "live" and later summarize it into a time entry.
Via the button "Estimate" you can add an estimate of the expected total time to be spent on this task. If you have already added an estimate, you can edit or remove it here completely at any time by clicking the specified value.
The estimate is visualized below by a bar. It represents the time worked in relation to the estimated expected total time.
To add a time entry directly in the overview, click the button "+ Add an item".
The grayed-out area of the overview contains all time entries (created by the timer as well as manually) including the captured time, date, person and, if applicable, a description.
Edit / Delete time entries:
By clicking a time entry, it can be opened and edited. Within the opened time entry, you can change the captured time, the date, the person, as well as the description at any time by clicking the respective field. In the lower left corner of the time entry, a slider with the heading "Billable" is displayed.
Further options can be accessed via the "More" button:
- If you have already billed the time entry, you can lock it ("Lock time entry") (see: How can I mark my accomplishments as done?).
- You can copy a link to the clipboard that leads to the time entry ("Copy Link").
- You can delete the time entry ("Delete"). When selecting this option, a confirmation prompt will open to avoid accidental deletion. Confirm it to delete the entry irrevocably.
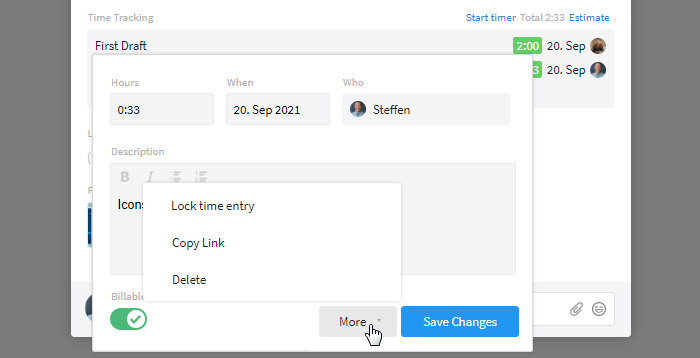
You can delete time entries or copy their link via the "More" button
How can I distinguish my services?
In cooperation with customers or even internally, there may be given time quotas. Often, not all of the work can be billed. To make it easier for you, you can divide your time entries on Stackfield into "Billable" and "Non-billable". As soon as you have deducted a time entry from your time quota or included it in the invoicing, you can mark it as completed by locking it. This way you prevent it from being taken into account more than once.
To mark a time entry as billable, open it with a click in the overview.* At the bottom left of the opened time entry, you will find a slider with the heading "Billable". To change the setting, click on the slider (Green - Billable, Gray - Not billable). By default, time entries are marked as billable.
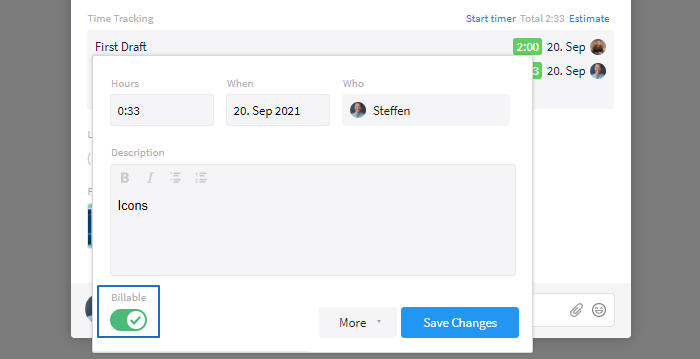
This time entry is billable
*You can also adjust the setting during the manual creation of a time entry.
How can I mark my accomplishments as done?
To visibly mark accounted time entries as completed, you can lock them (comparable to a status change). Locked time entries can be opened, but no longer edited. Of course, entries can also be unlocked in the same way if the time entry still needs to be edited.
To lock a time entry, open it with a click in the overview. Now, click on the "More" button at the bottom right and select the option "Lock time entry".
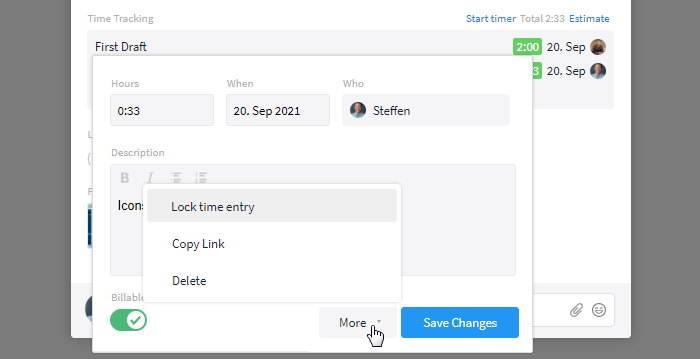
You can lock time entries via the "More" button
The time entry is now marked with a hint in its opened state. To unlock it again, click on "Unlock time entry".
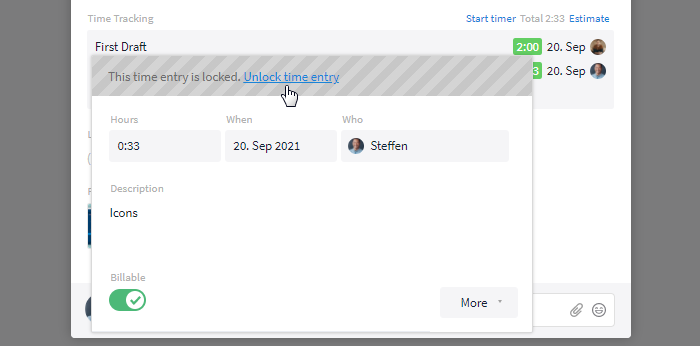
This entry was locked
Alternatively, you can lock all the time entries of a task collectively. Simply click on the More button (symbol: three dots) in the upper right corner of the task card and hover the mouse over the option "Lock Time Entries". With a click on "Yes" all time entries of the task will be locked at once.
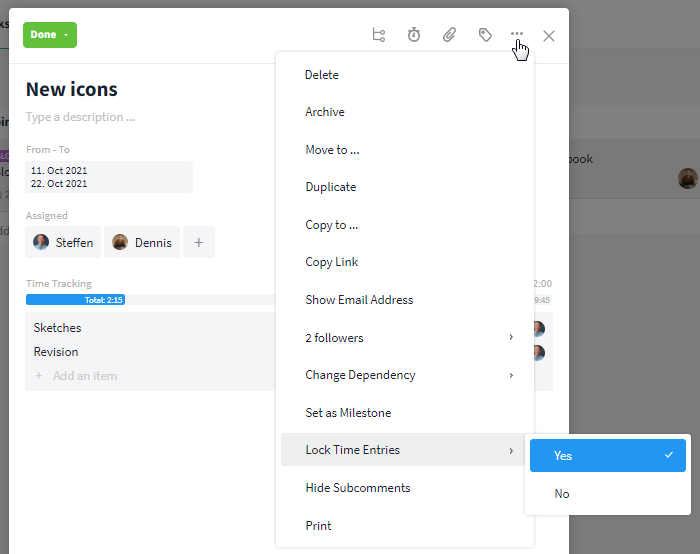
Time entries can be locked collectively
In the reports (all) time entries of different tasks can be viewed. Time entries can be marked there individually or collectively as (not) locked. Locked time entries are marked with a gray lock icon in the reports.
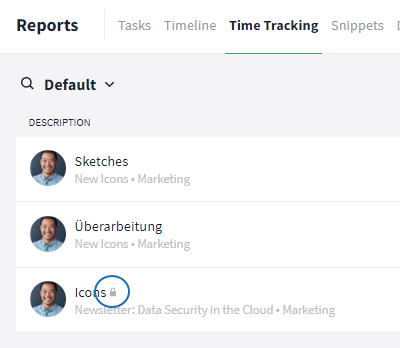
Locked time entry in the reports
Creating a report
Pick a module
When creating a report that includes time tracking, you have two options to choose from. You can either view all time entries from all rooms or all tasks including their total processing time (sum of all time entries in the task) and estimation.
For option 1 (all time entries), click on the "Reports" button within the sidebar and select the option "Time tracking". Now, all time entries available to you within the organization will be displayed in a list.
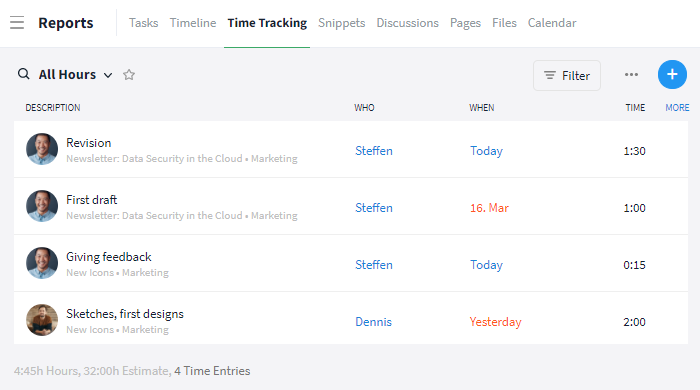
All time entries within the reports
Tip: In the bottom left corner the sum of the total recorded time of all entries, the sum of all estimates, as well as the number of created time entries are displayed. Information hidden from the overview (e.g. by a filter) is also hidden here.
For option 2 (all tasks including time tracking and estimate), click on the "Reports" button within the sidebar and select the option "Tasks". Now, all the tasks available to you will be displayed. To display the time tracking and estimation in the overview, switch to the list view and click the "More" button in the upper right corner to add more columns. Now, select the options "Time Tracking" ("CO." within the overview) and/or "Estimate" ("ES." within the overview) as required. Time tracking shows the sum of all time entries stored in the task.
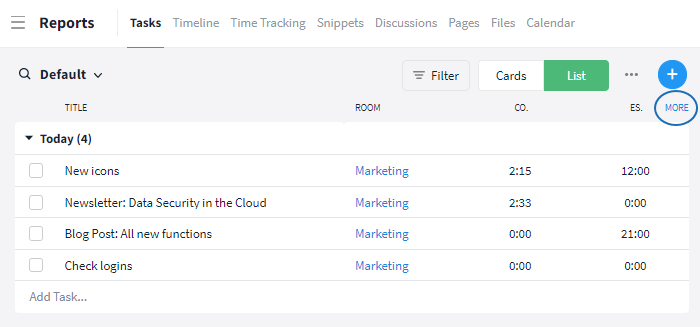
All tasks including their time tracking and estimate can be displayed within the reports
Adjust the view
By using several filter functions, you can easily narrow down the view, e. g. the individual columns, within the reports. Simply, click on the "Filter" button and change the required functions.
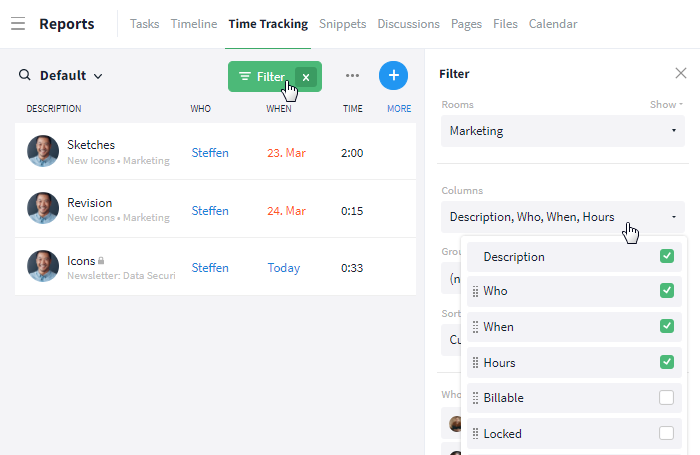
Narrow down the overview to create a report
Tip: Using the filter "Status of the task", only time entries of tasks with a certain status, e.g. "Done", can be displayed.
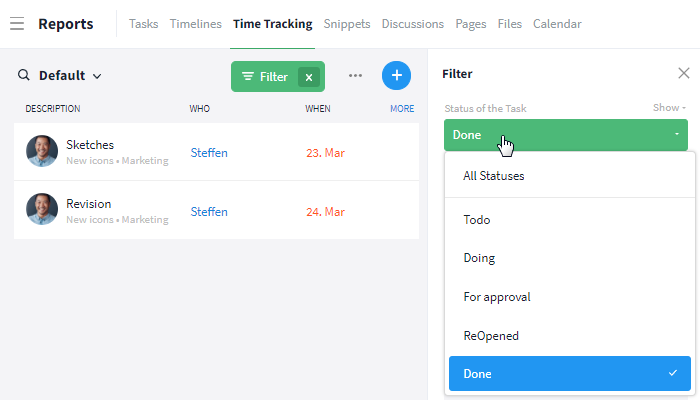
Filter by the status of the tasks the time entries belong to
Edit multiple time entries via multi-selection
Using the multi-selection, you can select several time entries in the reports as (not) billable or locked / open.
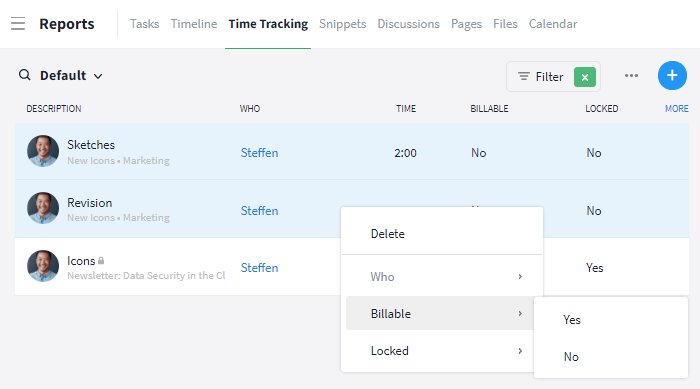
You can edit multiple entries at once
Editing via multi-selection, in this case, is only possible if none of the entries are marked as locked and if all selected entries have the same setting. For example, several time entries can only be marked as "Not billable" at once if they were previously all marked as "Billable".
Tip: Use the filter to display the "Billable" and "Locked" columns. To allow multi-selection editing, all selected entries must be set to "No" in the "Locked" column and to "Yes" or "No" in the "Billable" column. Locked entries can also be identified by a lock symbol in the title.
Print and Export
Once you have customized the view using the filter settings and only the content you need for your report is displayed, you can export it. To do this, click on the "Filter" button and select the “Print and Export” option at the bottom of the list.

You can export and print your view
Now, a tabular view of the displayed / selected time entries opens, which can be exported as PDF, CSV, or Excel or printed directly.
Tip: The sum of all recorded hours is shown below the time entries in the exported view.
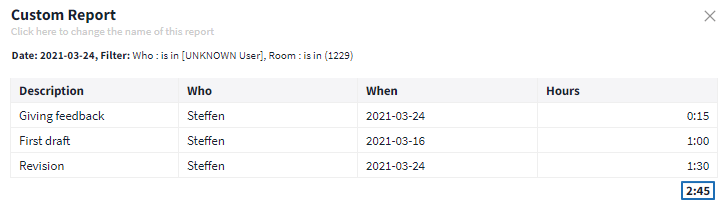
Export scope of the time tracking
Options for admins