Files from the "outside", i. e. from your own computer or other online data storage services, can be integrated into Stackfield with a specific format/layout. This includes file types such as Word, Excel, PDF, image (JPG, PNG, etc.), and links. Using our search functions, you can easily find the title / name of a file.
Uploading / attaching a file and storage location
Basics
You can upload files in the modules Files and Communication, and attach them to all entries of the room. Simply click on the plus button / paperclip icon and select the corresponding source.
Files located on the computer can be stored easily via drag and drop. The directory structure is maintained during the process, i. e. folders that are uploaded to Stackfield via drag and drop will also be stored as folders.
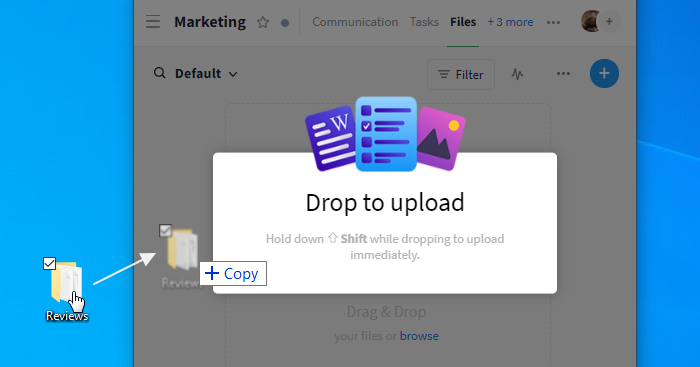
Folders can be uploaded via drag and drop
All uploaded files are stored with the format defined for the file type. By default, they can be found and opened in the files module.
If a file already exists with the same name (the file extension must be identical as well) as the file you're uploading, a dialog box appears. You can then either replace the old file with a new version or rename the file to be uploaded. Alternatively, you can cancel the process by pressing "X". If one of the components of the name is different, the file will be uploaded directly as a new file, since no assignment to previous files is possible.
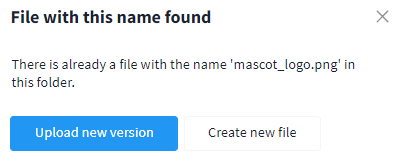
Dialog window when uploading a file with the same name
If you are uploading multiple files at once, the upload process will not be aborted for the other files.
Within the module Communication
To create a file within the communication module, simply click the plus icon to the left of the text input field and select the option "File".
Within the module Files
To upload a file in the files module, click on the blue plus icon in the upper right corner. The file will always be placed within the overview / the currently opened folder.
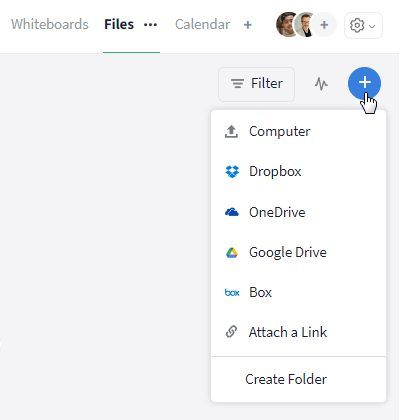
Upload a new file via the blue plus icon in the upper right corner
As an attachment
By clicking the paperclip icon you can either attach and link files to other entries (tasks, events and discussions) directly within the entry or within the comment section.
As a link
Files from external services (criteria: accessibility via HTTP or HTTPS), such as Google Drive and Dropbox, are uploaded to Stackfield as links.
Through email integration
Email integrations create automatic forwardings of emails to rooms in the form of tasks, discussions, and chat messages. Files attached to these emails will also be attached to the task / discussion or, in the case of chat messages, created loosely within the chat history.
How to organize the display
Files are displayed in the form of a list for all authorized users. By default, only the title and file type are displayed. However, additional information (e.g. labels and size) can be displayed via the "More" button in the overview or in the filter under "Columns". You can also create folders for the structured storage of files.
The filter allows you to modify and save the view according to your own requirements. Occasionally the view must be updated (see: Notifications within a room).
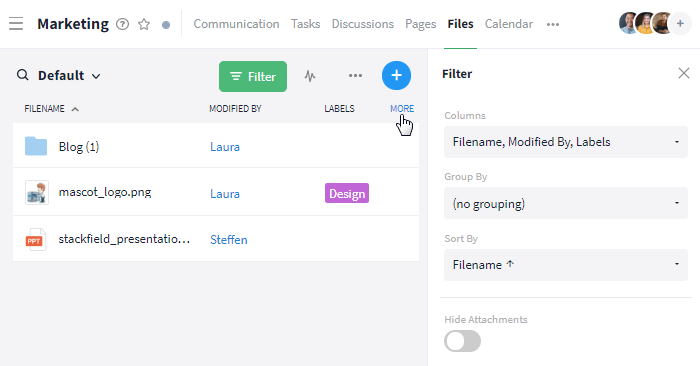
Structure the display by using filters, labels and folders
Preview of files directly within Stackfield
All plans offer organizations the 1-picture preview for image files, PDF*, MP4, and links in the communication stream of rooms / direct messages with deactivated end-to-end encryption. Starting from the Premium plan, preview for (Open / Libre) Office files is additionally possible. The corresponding Office application does not need to be installed for a preview.
*Tip: Via mouseover on the 1-picture preview of PDF files the number of pages can be shown.
Procedure: Browser / Desktop App
To open the preview of a file, click on the preview image or the option "Preview" next to the corresponding file within the files or communication module.
Click on the image or "Preview" to display it
Now, you can zoom in (magnifying glass symbol with a "+"), zoom out (magnifying glass symbol with a "-") or display the file in its original size (symbol: diagonal arrow) via the application bar in the upper right corner. A thumbnail view of all pages on the left allows you to quickly "jump" to the corresponding page. To view all document pages, simply scroll down / up.

Preview of Office documents
Note: The preview of MP4 files (thumbnail view of videos) is possible within the communication stream. However, the preview must not be blocked by browser settings (plug-ins), system settings, or any software installed on the device. For links, the technical requirements of the provider (e.g. YouTube) must be met on top of that.
Procedure: Mobile App
Within the mobile app, you can open the preview of a file by clicking the preview image or by clicking "Preview" within the opened file. For PDF files, there is currently only the 1-image preview available on Stackfield. You need to download the file to view it in full. On Apple devices, a preview of the file can be opened without saving it to the device. Extensions to this are forthcoming.
Downloading and editing files
Procedure: Browser / Desktop App
You can download files within the overview of the module Files as well as in its opened state and save them on your computer. To download a file within the overview, click on the "More" button (symbol: three dots; visible by mouseover) and select the option "Download". To download an already opened file, click on the download icon in the upper right corner.
Afterward, you can open, edit and save the desired file at the respective location. Finally, you need to upload the new version back to Stackfield.
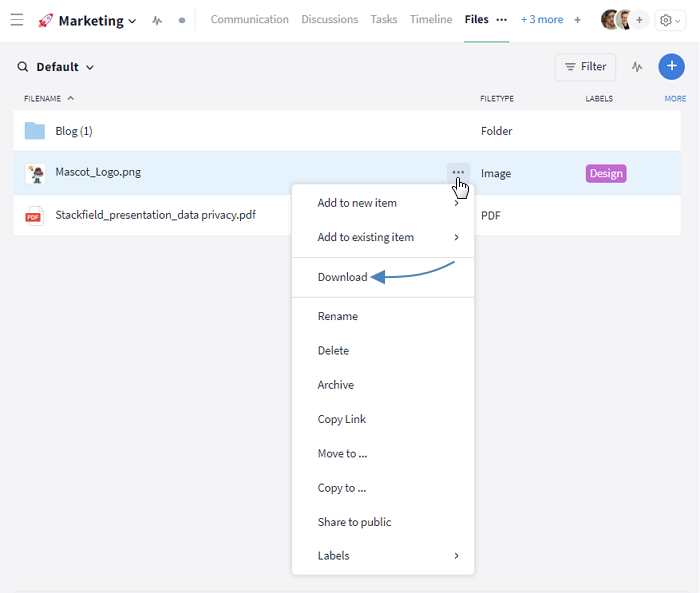
Downloading a file for editing within the overview
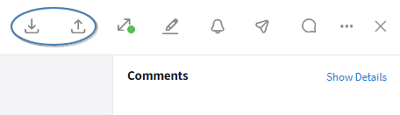
Downloading a file in its opened state / uploading a new version
It is also possible to download multiple files at once (procedure).
Local editing
All plans offer at least the local editing of (Open / Libre) Office files. You can download the desired file via the "Edit locally" button (visible by moseover).
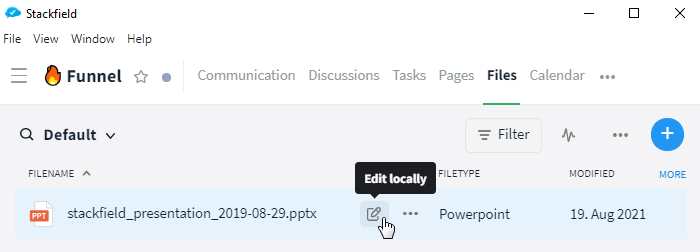
Start editing via the "Edit locally" button
The file will then open for editing directly outside of Stackfield. Within the room and within My Week, the change of the button to "Locally in work" will automatically indicate a note regarding the editing status.
All files that are being worked on locally can also be viewed within the Reports as well as via the filters. This way, your team can quickly identify who is currently working on a new version in the various workspaces without having to assign a label or status manually.
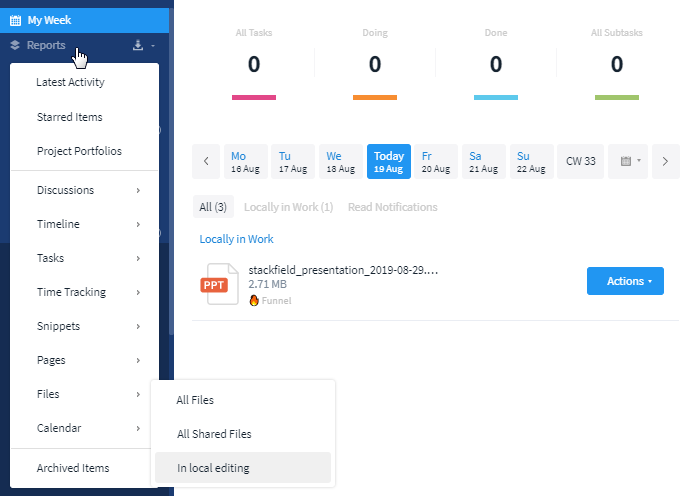
Overview of files with the status "Locally in work"
When you are done editing the file, save it. ("Save" is perfectly sufficient. "Save as", along with the associated selection of a location on the computer is not necessary.)
Afterward, you can upload the new version to Stackfield or cancel the editing. Within the overview in the room / within My Week, you can select the options by clicking the "Locally in work" / "Actions" button. Within an opened file, you can upload the file by clicking the upload button in the upper right corner.
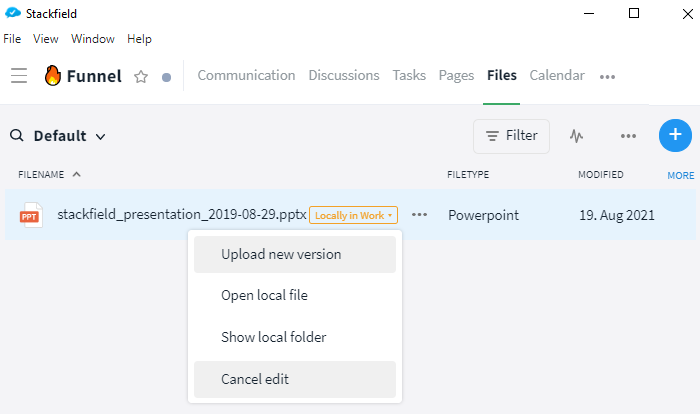
Finish local editing via the "Locally in work" button
Procedure: Mobile App
To download a file in the Stackfield Mobile App, click on the desired file and select the option "Download" via the "More" button (symbol: three dots or three horizontal lines) in the upper right corner.
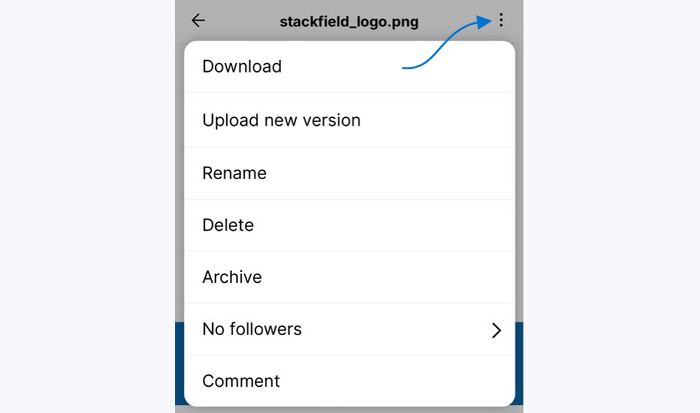
File options within the mobile app
To edit the file, you need to open the file in the storage location of your mobile device (varies depending on the file manager app you are using). On Android devices, the file is automatically stored in the specified download folder (e. g. "My Files" app). On iOS devices, a popup opens in which you can select the desired storage location. You also can open a complete preview of the document via the option "Quick Look" here.
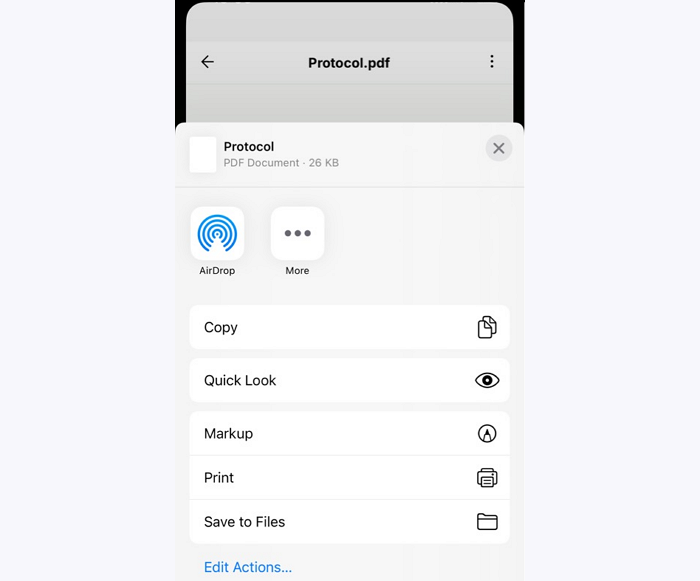
iOS: Choose the storage location of the file
How does the versioning of files work?
Any file already in the room can be updated to the latest version by uploading it again under the same name (+ same file format*) within the same location (room + folder inside the room) and using the "Upload new version" option. Within the opened file, a button in the upper right corner allows you to do so as well.
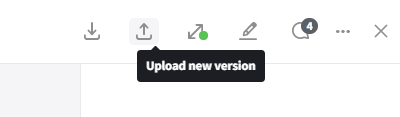
Upload a new file
*Note: If users use different Office formats (MS Office vs Open / Libre Office), versioning is only possible if they work in the same file after downloading and do not switch to their own format. If different formats are used, a new file is uploaded instead of a new version.
Once a new version has been uploaded, a note is added to the comments section. The version number is displayed in the upper left corner. Clicking on it opens a list with all versions. This way, you can easily select and view any desired version.
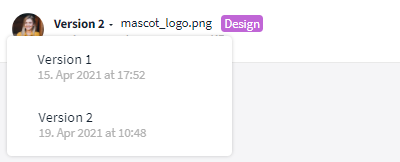
Switch between different versions
Within the overview, you can view older versions via "Download" or "Preview", current versions additionally via "Edit locally".
To remove the last version, click the "More" button (icon: three dots) in the upper right corner of the opened file and select the option "Delete Latest Version "*.
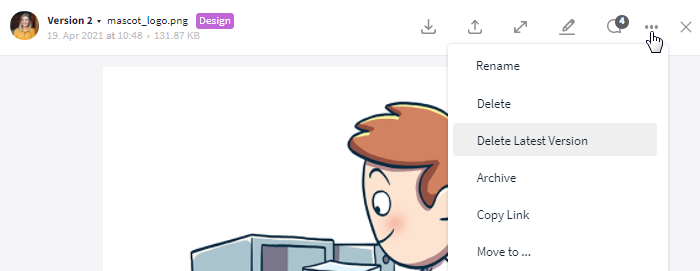
Delete latest version via "More" button
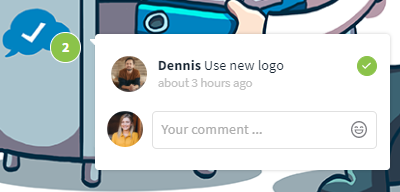
Comments on the file and markers within the image
The comment area can be displayed within an opened file by clicking the speech bubble icon in the upper right corner. Comments, mentions to users or references / links / attachments can be left there (see: Message options). All changes are visible in the history.
Special feature for files: Marker within the image (→ Annotations)
Within files, you can leave annotations directly in the image at the point you want to clarify. Just click on the pencil icon in the upper right corner of the opened file and select the position of the annotation. Now, you can comment on the annotation and create it via Enter. The annotation will be displayed immediately by a red circle with numbering. As soon as the annotation is clarified / considered, it can be checked off. Checked off annotations are displayed in green unless they are hidden in the history.
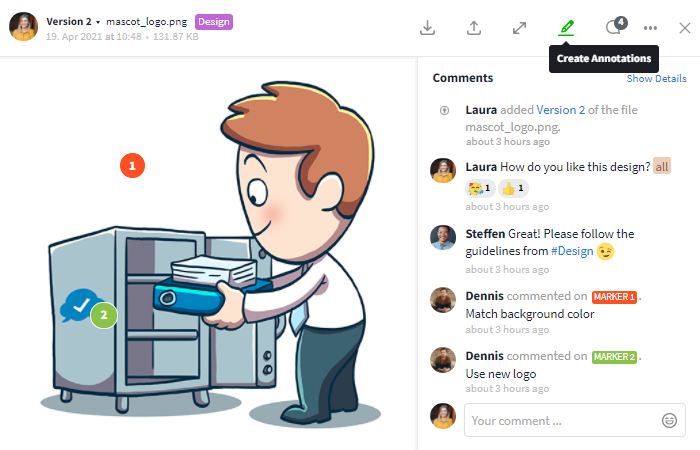
Annotations directly in the image
Check off clarified annotations
Note: If the file concerned is attached to a task, all open annotations are additionally displayed in a check-off list incl. a progress bar*.
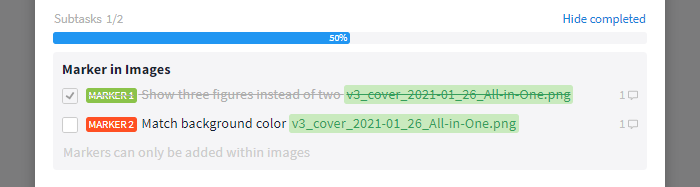
For attached files, markers appear as subtasks within the task
*The progress bar shows the annotations already checked off in relation to the total amount of annotations. The percentage of checked annotations is marked in blue, the percentage of pending annotations in gray. If the task contains subtasks, these are also taken into account in the progress bar.
Further functions
Accesses
Within an opened file, you can check who accessed (i. e. opened or downloaded) it and when, by clicking the "More" button (symbol: three dots).
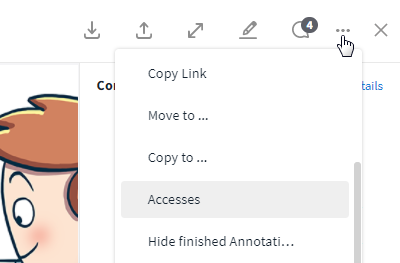
Display all accesses to the file
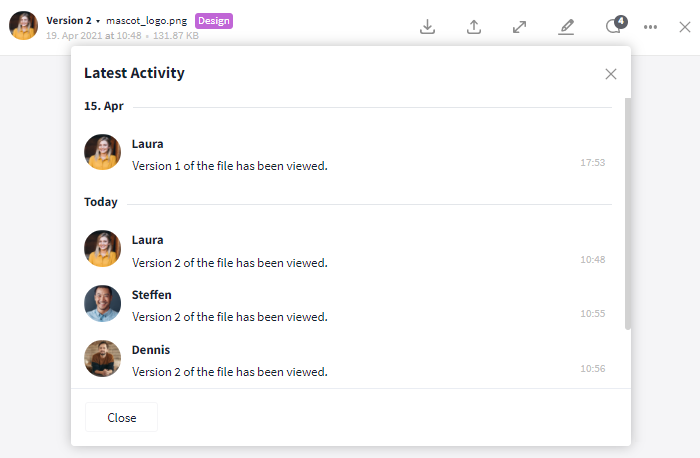
Latest activity
Options for admins
Any questions regarding the features, your plan, or an upgrade to the Premium plan? Just contact our support, we are happy to help you.
Further articles
File sharing
Within the tab Permissions within the organization settings, you can define which users (or roles) are allowed to share files through a public link.

Organization settings: Sharing files publicly through a link
Available file types for preview and local editing
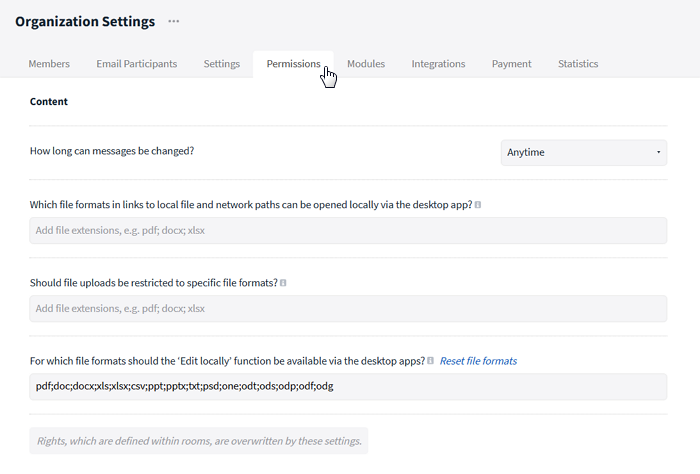
Options for Content in Organization Settings
The following file types are available by default for preview and local editing:
- Word processing (MS Office / OpenOffice): .docx; .doc; .odt
- Spreadsheet (MS Office / OpenOffice): .xlsx; .xls; .ods
- Presentation creation (MS Office / OpenOffice): .pptx; .ppt; .odp
Starting from the Premium plan, an extension of the file types is possible for local editing.
Preview of Office files
Preview for Word, Excel, and PowerPoint is available from the Premium plan.
Within the tab Settings in the organization settings you can define whether the preview should be available for Office files from end-to-end encrypted* rooms. If it is deactivated (default setting), a note will appear whenever a request is made stating that the preview is not available.
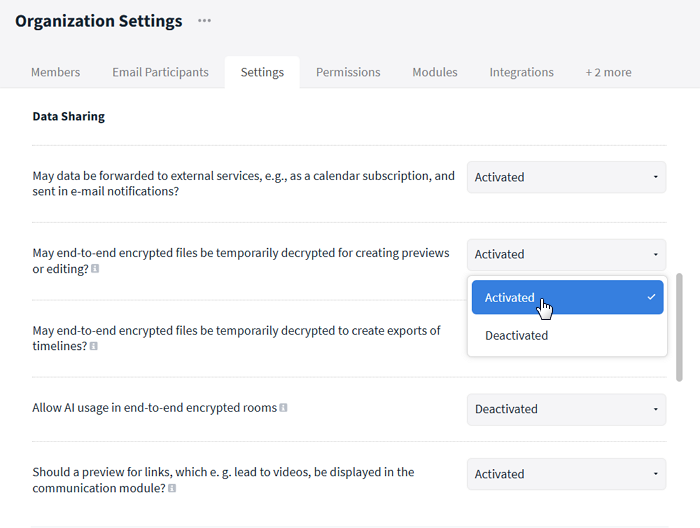
Organization settings: Preview of end-to-end encrypted Office files
*What happens when accessing a file from an end-to-end encrypted room?
All files originating from end-to-end encrypted rooms are stored encrypted on Stackfield's servers. Stackfield has no access to the encryption keys of these files.
The preview of a file must be created on Stackfield's servers. For this purpose, an individual encryption key of the file is sent only once to Stackfield's servers, the file will be decrypted and the preview will be created, which can then be displayed to the user.
Once the preview is closed, the information is deleted from the cache again. The file then remains end-to-end encrypted, inaccessible to third-party access, and secured on Stackfield's servers. The content from the preview is not saved by Stackfield.