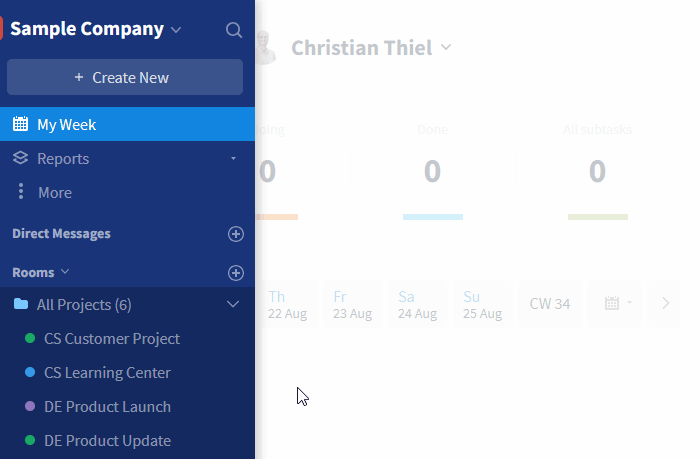
Unsere Website gibt es auch auf Deutsch - würden Sie gerne zu dieser Version wechseln?Zur deutschen Version wechseln
MADE & HOSTED IN GERMANY
ISO 27001 CERTIFIED

Working with Project Rooms

Project rooms are specifically designed for your project management and are intended to help you optimize your work processes. Using a series of additional functions, such as the visualization of certain project details and the use of project portfolios, you can plan and execute your projects without any problems.

The project details (view of a project) and the project portfolios (view of all projects) provide you with an overview of the respective project progress. If you are interested in individual activities from the project (e.g. the tasks), you can simply click on the respective module in the room / report and open the desired entries. Project rooms you are included in are displayed in the sidebar with a colored circle (color varies depending on the project status).

Basis: Working with a room
On Stackfield there are several room types available. The room type is defined when creating the room and cannot be changed afterwards.

Tip: Use room templates for recurring structures.

Project details

The project details are a project-related planning overview in which all relevant information on the progress of the respective project is presented.

Notes: Changes to the project details can only be performed by (the) project manager(s). Via the room itself, only members of the room with the roles Admin / Member / Guest can access the project details. Starting with the Premium plan, this is also possible for the roles External / Observer via the project portfolios.

How can I access the project details?

To open the project details of your project room, click on the room name in the upper left corner of the open room and select the option "Room Settings". Now, you can open your planning overview at the very bottom of the tab General by clicking on the button "Project Details".

Projekt details option 1
Access project details via room settings

Alternatively, you can open the project details by clicking on the project status in the upper left corner of the room bar right next to the room name.

Projekt details option 2
Access project details via project status

Starting with the Premium plan, the project details can be viewed via the portfolios by all participants of the project room incl. Observers.

Roles in the project: Observer / Member / Manager

The different roles have access to the project details and project portfolios as follows:

  • Project Manager / Room Admin: With editing rights. Additionally access to the contents of the room.
  • Member of the project room: With reading rights. Additionally access to the contents of the room.
  • Observer: With reading rights. Access via project portfolio.

The Room Admin has access to all settings of the room and has the right to edit the project details. The Room Admin(s) of a project is/are automatically stored as Project Manager(s) in the project details. If further Project Managers are missing from the list, they can be authorized by assigning them the role of Room Admin within the project room.

Users who are only supposed to have access to the project details, but not to the entire project room, can be added as Observers in the project details (right next to the Project Manager). The following information is denied to observers:

  • Contents of entries (such as tasks)
  • All members of a room
  • Modules within a room
  • Room Settings

Via the project portfolios, Observers can access the project details of the individual rooms and thus keep an eye on the progress of the project.

Add Project Observer
Project Manager and Observer in the project details

You can check who is an observer / manager of a project in the project details (or via the columns in the project portfolios). By clicking on a profile picture, details about the respective person can be displayed.

Note: The Observer function is only available from the Premium plan. The other two types are accessible in all plans.

People who are added to a room are members of the room and can view and edit entries depending on their right group. The project details in contrast can only be viewed, not edited. Members can be granted additional admin rights allowing access to the settings of the room and the editing of the project details.

Project status

The Project Manager can assign one of five statuses to the project. This way, the progress of the project can be classified at a glance.

Project room status
Status options

Once the status of the project is changed, a description field opens below, which is mandatory to fill out. Here, information about the project progress can be stored to clarify why the status was changed. The status description is displayed next to the current status (as soon as it has been created).

Status description
Status description

Below the status, you can read who changed the status and when they did so. With a click on "Show History", you as Project Manager get an overview of all status updates. The status history can only be viewed by Project Managers, everyone else has access only to the current status.

Status History
Overview of all status updates

Visibility of the project status: The status can be viewed in the project details as well as in the project portfolios and in the sidebar.
The name of your project room is shown in the sidebar and the navigation bar (in the opened room) next to a colored circle / label. Depending on the status of the project, the color varies, e.g. green for on Track.

Retrieve status from sidebar/room bar
The color of the circle / label represents the project status

Note: Some actions, such as changing the status to "At Risk", trigger warnings. Click here to learn more.

Priority

If several projects are carried out at the same time, it can be helpful to prioritize projects. In Stackfield, the following project priorities can be assigned: "Low" (gray font) / "Medium" (black font) / "High" (red font). In the project portfolios, the priority can additionally be displayed as a separate column and thus be viewed per project.

Project Priorities
Prioritize projects

Tip: Using the portfolios, a view can be created in which all projects are displayed grouped according to their priority. If required, additional room groups can be used for bundling according to a certain criterion.

Notes

The notes can be used to add further details. This is located between the status and the other project details such as the priority and is opened by clicking on the light gray font "Add a note for this project...".

Notes
Deposit details in the note field

Tip: The notes and room description can also be displayed in the project portfolios.

Start and end date / project timeline incl. milestones

Start and end dates are set when the room is created, however, they can be changed afterward in the project details if needed.

Start and end dates
Start and end dates

Right below you will find a project timeline. Here, you can easily check the project's progress, i.e. how many days have passed since the project started and how many days are left until the project's completion. If the project is overdue, the period is recorded to the day as well.

Project timeline
View project progress in the timeline

All milestones of the project are displayed as diamonds in the project timeline. The exact dates of the milestones can be displayed via mouseover. The color of the milestones is determined by their status:

  • Green: Complete
  • Red: Overdue
  • Pink: Without due date or with due date in the future

The note "x open" above the item Milestones provides you with information about how many of your milestones defined for the project are not yet completed (overdue or without due date). In our example, four milestones are pending (pink + red diamonds). To show a list of all milestones of the project including status (color) and due date, click on the note. By clicking on the corresponding milestone in the list, authorized members can open its task card.

Pending milestones
Pending milestones

Time budget

To keep better track of the planned and actual time required, a time budget can be stored for the project. You can define how many hours are scheduled for the project. With a click on the time budget, it can be adjusted at any time afterward.

Time budget
Store a time budget

Once the project manager has set a time budget and activated the time tracking in the room, a circular ring appears next to it, which shows the time budget in relation to the time spent*. The exact figures, absolute and percentage, can be viewed via mouse-over. The defined time budget is 100%, e.g. if twice as much time is spent on the project, the used time budget is displayed as 200%.

Time budget
Time budget spent

Further down in the project details, a list of all persons involved in the project is displayed. In the "Time Budget" column, the project manager can enter their own time quota per person. The other columns show how much time has already been used, how many hours of it are billable, and how much time is still left.
At the bottom right you can see the total time budget of all people, how much of it has already been used, and what is still left.

Note: If no time budget has yet been entered for a person, or if a zero is entered, the budget will be displayed as "Unlimited".

*There are several colors to distinguish between:

  • gray circular ring (no time tracking activated / used)
  • gray circular ring with blue portion (still on time schedule)
  • gray circular ring with yellow portion (at least 90% of the time budget has been used)
  • red circular ring (above the budget)

Time budget view
Time budget view

Money budget

In addition to the time budget, you can also set a money budget for your project and define how much money is planned for the implementation and, if necessary, select the respective currency via the drop-down menu. You can also adjust the money budget at any time later.

Money budget mask
Set a money budget

If a money budget has been entered, a circular ring appears next to it, which shows the money budget in relation to the used money budget*. By mouseover you can see the exact number. If you have not set a money budget, "N/A" (not available) is displayed here.

Money budget used
Money budget used

Further down in the details in the money budget tab, the people involved in the project as well as their hourly rate, billable hours and the total amount per person are displayed in columns. The default hourly rate is set to € 100.00. The project manager can change this for all project participants by clicking on "change" or adjust it for each individual by clicking on the respective amount.
At the bottom right, the total amount available is displayed, how much of it has already been used and what is left.

Note: If time tracking is enabled, the hourly rate can be charged against the actual work performed. Money budget view 2

Money budget view

*There are several colors to distinguish between:

  • gray circular ring (no money budget set / used)
  • gray circular ring with blue portion (still within the money budget)
  • gray circular ring with yellow portion (at least 90% of the money budget has been used)
  • red circular ring (above the budget)

Processing status of tasks / Time tracking

My Tasks / All Tasks

The pie chart in the "My tasks" section provides you with information on the processing status of all tasks assigned to you within the project. All tasks are broken down by their due date in percent.

Processing status tasks
Graphical breakdown of tasks by processing status

Analogously, the pie chart in the "All tasks" section informs you in the same way about the processing status of all created tasks within the project.

Open Tasks / Burn Up Chart / Time Tracking

The charts at the end of the project details view assist in better interpreting the remaining workload in terms of project progress. This allows you to easily tell how well the project team is progressing, how likely it is the project will be completed on time, and whether the project plan may need to be adjusted.

Note: Only the last 25 days with entries from the project period are shown. For an overall reporting use the reports.

The bar chart shows the remaining "Open tasks" of the project over time. It is therefore dedicated to the progress of the project.

Open tasks
Open tasks over time

The "Burn Up Chart" shows all completed tasks in relation to the project backlog (the totality of all tasks within the project). Ideally, the graph of completed tasks should meet the backlog graph within the project timeframe.

Burn Up Chart
Burn Up Chart

The last bar chart in the "Time tracking" area displays the time entries of all tasks for each day. This allows you to compare the actual time spent with the defined time budget more easily.

Time Tracking
Time tracking of the project

In addition, you can check the time tracking for each task individually in the room or in the reports in the module Tasks or in the module Time Tracking.

How am I informed on critical deviations?

During a project there may be challenges that can delay or even prevent the success /progress / plan of the project and therefore need to be detected early. For this reason, some (missing) actions in project rooms on Stackfield trigger automated alerts.

Stackfield sends an alert when the following cases occur:

  • The project has been manually assigned the status "At Risk" or "Off Track".
  • The timeframe set for the project has been exceeded.
  • The specified time budget / / money budget is exhausted.
  • Milestones without a due date have been created.
  • Milestones exist that have exceeded their due date, have not yet been completed, or are beyond the defined project timeframe.
  • The project start date has been reached, but the project still has the status "Not Started".
  • The project status has not been updated for more than 7 days.

Warnings in the header area
Warnings appear in the head area of the project details and in the status label of the project room

Next, the following automated warnings are activated:

  • A red exclamation mark appears in the status label at the top left of the room.
  • The room icon (filled circle) in the sidebar changes its color to red.
  • A red exclamation mark appears next to the project in the project portfolios.
  • All warnings are displayed in the head area of the project details.

Project portfolios

Note:
  • The project portfolios are available to you from the Premium Plan (range of functions).
  • Individual functions / content may not be available due to the plan of your organization, your assigned role and / or rights group.
  • In reality several projects are often carried out simultaneously. The cross-project reports / project portfolios help you to keep an eye on all projects. They can be viewed by all participants of the corresponding project rooms including Observers, however, they can only be edited by Project Managers.

    How can I access the project portfolios?

    To access the project portfolios, click on the Reports button in the upper part of the sidebar and select "Project Portfolios".* In the overview, all projects accessible to you are now displayed as a list or in the timeline, and can also be edited using filters.

    Project Portfolios
    Access the project portfolios

    *Tip: You can also open the project portfolios through the global search.

    Special features of the view:

    • Inactive projects, i.e. already completed (status: Done) or paused (status: On Hold) projects, are shown grayed out and marked with the note "(not running)".
    • Projects at risk are marked with a red warning symbol (exclamation mark) in front of the project title. All existing warnings are listed in the head area of the project details of the corresponding project.
    • Monitored projects, i.e. projects you are listed as an observer in but not included in the corresponding room, are marked with an eye symbol.

    How can I personalize my view and what options are available to me?

    The display of the project portfolios can be changed at the top right (below the navigation bar, between "Filter" and plus symbol). The options List and Timeline are available.

    Using the filter function in the upper right corner, the view can be individually restricted according to the criteria start, end, status, priority, manager and observer. The displayed content can also be sorted and / or grouped and columns can be displayed.
    The projects created can be bundled according to status, priority or room groups. The small arrow next to the group title can be used to expand / collapse it.
    The views can also be saved and subsequently edited (deactivated, deleted or renamed) by the project managers. For a quick overview of the current status of these views, simply assign the Observer role for the desired rooms to people from your company outside the project (all other projects remain hidden).

    Overview of your projects as a list:

    In the list all projects visible to you are listed. A small arrow next to the column title (here for the name of the projects) shows the sorting set in the filter. With a click on the arrow you can change the order (ascending / descending).

    Editing the columns
    Customize the view by using the filter functions

    Via the filter or in the overview via the "MORE" button on the far right, the following project details can be hidden or displayed through columns:

    Persons:

    • Managers: Which user(s) manage(s) the project and can edit the project details?
    • Observers: Which user(s) have access to the detailed overview of the project without being included in the room?

    Timeframe / Progress / Time Budget:

    • Start: When does the project start?
    • End: When does the project end?
    • Progress: Time already elapsed in relation to the planned time
    • Time Budget: What time budget was given for the project?
    • Tracked Time: How many hours of work were tracked during the project?
    • Time spent: Time spent in relation to time budget
    • Money Budget: What is the budget for the project?
    • Money spent: Ratio of generated costs vs. remaining budget

    Status / Priority / Textfields:

    • Status: What is the status of the project?
    • Status Message: What was the last status update manually stored for the project?
    • Priority: How important is the project?
    • Notes: Details about the project
    • Description: Room description with details about the project or the use of the room.

    Tasks:

    • Closed - Tasks: How many tasks of the project have already been completed?
    • Overdue - Tasks: How many tasks of the project have already passed their due date?
    • Planned - Tasks: How many tasks of the project have been assigned an upcoming due date?
    • No Due Date - Tasks: How many tasks of the project do not have a due date?
    • Tasks Left: Tasks already completed in relation to tasks still to be completed
    Overview of your projects in the timeline (Gantt view):

    With the Timeline option, the projects are visualized in the timeline and can be set in dependence on each other (method analogous to the timeline for tasks).
    To do this, drag a link from the link point (visible on mouseover) of the predecessor project to the link point of the successor project. Only a project manager (visible on the bar*) who is registered for the projects concerned can do this.

    *Up to three project managers can be displayed on the bar. Open the project details (double-click on the bar) to view all additional managers.

    Dependencies
    Show project name and set dependencies

    The name of the project can be displayed via mouseover and / or shown as a column. The bar length shows the entered project duration and the color shows which status the project has. Double-clicking on the bar opens the project details, whereas clicking on the project name (left in the column) opens the room (not possible with Observer role). The start and end date of the project can be extended / shortened by dragging the bar and / or moved by drag & drop.

    How can I access the project details via the project portfolios?

    With a click on the respective project, the project details can be opened directly in the portfolio. This way, you can easily edit all the key data for the project via quick access. The contents of the columns in the portfolio are automatically adjusted to the changes.

    Access project details via portfolio
    Access and edit project details through the portfolio

    Note: All members of the project room as well as Observers not included in the room can access the project details this way.

    Further functions (export, creation & search)

    Export and print:
    Portfolios can be exported and printed. Simply click on the More button (symbol: three dots) in the top right corner of the project portfolio overview and select "Print and Export". Make sure to hide all unimportant details beforehand by using the filter function.

    Export and print portfolios
    Export and print the portfolio

    New project room:
    The blue plus button can be used to create new project rooms directly in the portfolio view.

    Create new project room
    Create new project room

    Search:
    Projects can be found quickly and easily via the search (symbol: magnifying glass) in the project portfolios.

    Search portfolios
    Search project portfolios

    If you want to search for keywords directly in the project room, use the module search. The cross-room global search allows you to search all of Stackfield.

    Was this article helpful?