Creating an event
In the module Calendar a new event can be created by clicking the blue plus button in the upper right corner or directly within the calendar, by left-clicking or right-clicking the respective day. (Note: Tasks, on the other hand, can only be created by right-clicking.) Entries can be moved in the overview by drag and drop.
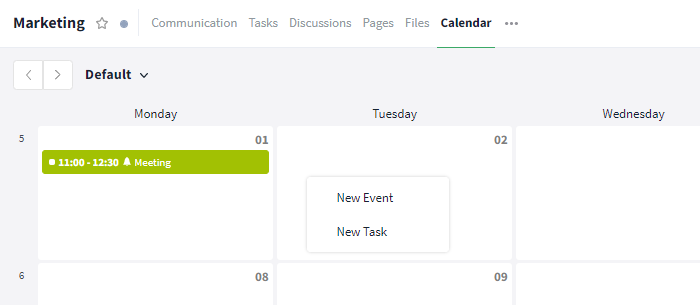
Create an event / a task by right-clicking
Alternatively, you can create events using the following modules and areas:
- Module Communication: You can find all activities of the room here, e. g. changes to tasks, as well as all communication
- Sidebar: By clicking the button "+ Create New" at the top of the sidebar you can create module entries via shortcuts ("New Event")*
- Global Search: Through the Control Center of the global search you can navigate through Stackfield, create module entries and much more
Settings of an event
Basics
To create a new event it is only necessary to enter a title and a period (start and end with date and time / all day). All other settings, such as agenda (= description), attendees* or location, can be filled in optionally. However, we recommend you fill in as many fields as possible, as this will make your work clearer and more efficient.
Note: The creator of the event automatically becomes an attendee.
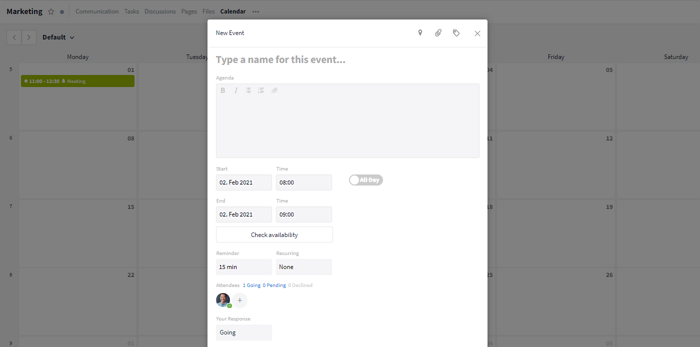
Fill all fields to ensure highest clarity and efficiency
Recurring event
If it is a regularly recurring event, a recurrence as well as the frequency can be set via the field "Recurring".
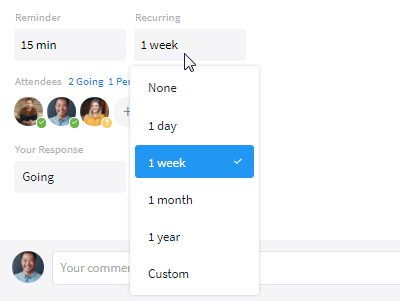
"Recurring" + Selection of the frequency
In the calendar, all individual events of the recurring event are entered according to their due date and marked with a recurring symbol.
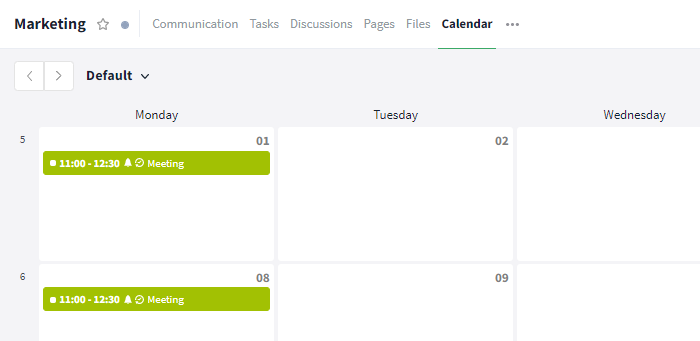
Recurring events in the calendar module
Reminder
You can activate a reminder for the start of the due date for events. All participants will subsequently receive a notification in My Week at the deposited time. Additional notifications can be enabled if required.
User management
Invite users to an event / remove users from an event:
Invite a user by clicking on the plus icon beneath Attendees. Via the text input field "Search by name..." (marked with a magnifying glass icon) can be searched for specific users.
By clicking on the desired person, a checkmark is added and the person becomes a participant in the event. With the "Invite all" option, all listed members of the room are invited to the event with one click.
Invited participants will now receive a notification and can accept or decline within the event. Alternatively, users can also be invited via the section "Email Participants" by email.
To remove a user again, click on the green check mark next to the requested user in the opened list and the check mark disappears.
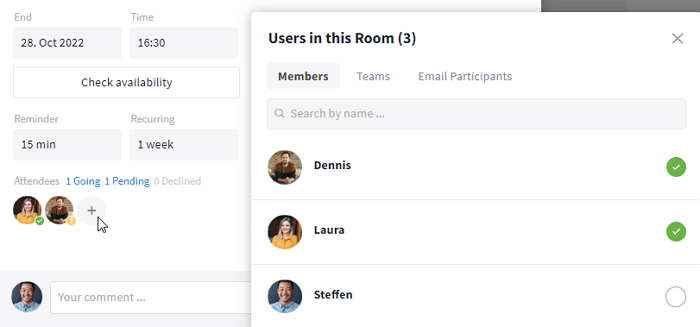
Invite users via "plus" icon
Where do I see the answers / the invitation status?
With a click on "Going", "Pending" or "Declined" a list of the respective users is displayed.
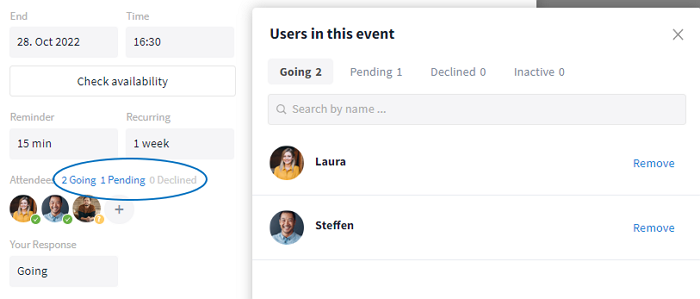
Divide users into "Going", "Pending" and "Declined"
More functions
Telephony function
The Premium plan in Stackfield offers a telephony function within an event to enable virtual conferences. The roles Admin, Member and Guest (provided they are attendees of the event) can start a call (audio/video/screen sharing). To do this, click on the handset icon and select the required option in the drop-down menu.
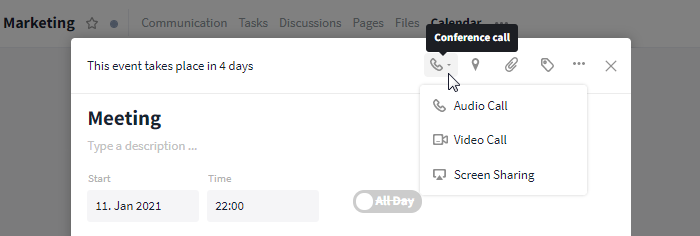
Click on the "handset" icon to start a telephone conference with all appointment participants
Location
To add a location, e.g. department, room or company location, to an event, simply click on the location marker symbol in the top right corner. Now you can manually enter the location in the text input field beneath Location. For privacy reasons locations are not listed in any map service.
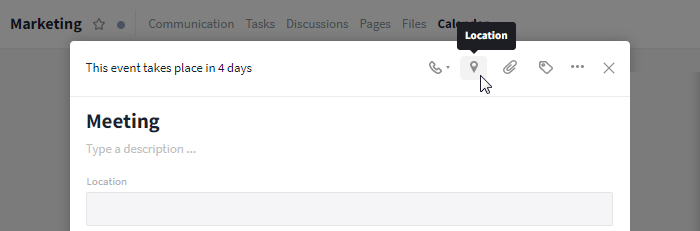
Add location to an event via "location marker" symbol
Availability
Click on the "Check availability" button to verify whether all participants for an event are available at the planned time. Here, the registered events of all invited participants from all rooms of the organization are displayed so that overlaps can be seen quickly. Events from rooms in which the current user is not a member and which therefore cannot be accessed are shaded in light/dark gray and displayed with the note "Blocked".
Note: By default, users with the roles Admin, Member and Guest can view the schedules.
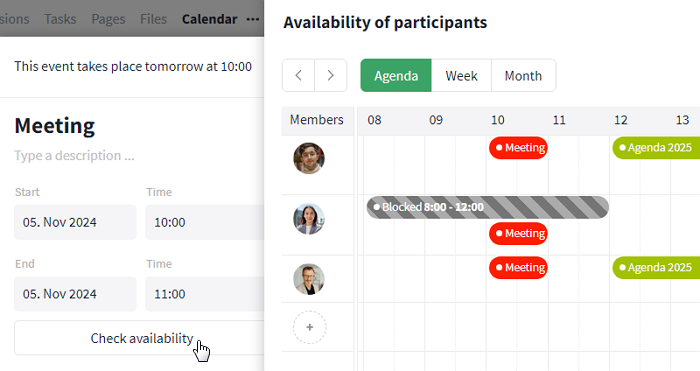
The participants' schedule can be viewed via the "Check availability" button
Comment section
You can comment on the event using the text input field "Your comment..." and the enter key ( Alternatively: "Send"-button). The comment history can be expanded and collapsed. With the help of @-mentions / questions attandees can be addressed directly.
It is also possible to address specific member groups:
- @all (All users in the room)
- @pending (All pending users)
- @going (All going users)
- @declined (All declined users)

With an @-mention you can address everyone invited or only certain member groups
Further articles
*Note: To receive a reminder, the event must have been confirmed and a time of day must have been given.
Visualization and filtering in the calendar
Symbols and Colors
In the calendar, the time period and title are displayed in the event display, as well as a note on recurrences and / or an activated reminder, if applicable. To distinguish appointments, tasks and milestones in the calendar, appointments are marked with a circle and a bright color. The color depends on the room color or the room group. Tasks / milestones are displayed with a check mark / diamond and in a darker color, completed tasks are greyed out.
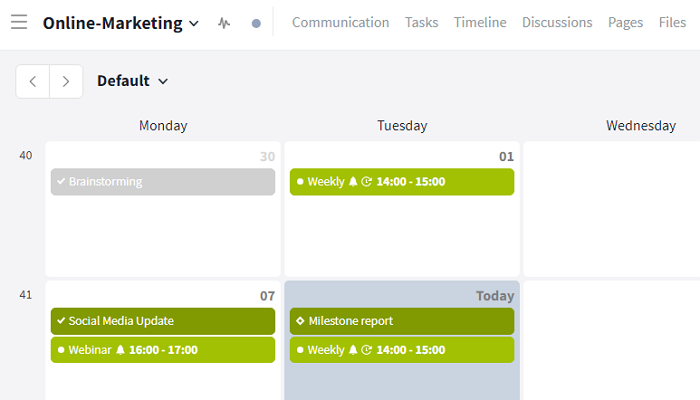
Display of events in the calendar module
- Event: circle symbol
- Tasks: check mark symbol
- Milestones: diamond symbol
- Recurring event / task: recurring symbol
- Reminder: bells symbol
Weekly and monthly view
The calendar offers a weekly view (button: "Week") and a monthly view (button: "Month") available with dates and the calendar week. The calendar icon allows you to view upcoming and previous entries in a list.
If an hourly grid is required for a better overview, the display can be switched from the classic monthly view to the weekly view.

Open weekly view in calendar module
Already entered events and the due date of tasks can be edited easily by drag and drop.
Filter/Views
The selected calendar view can be modified and saved according to your requirements by using a filter. To filter the view, click on the "Filter" button in the top center and select the desired options in the drop-down menu.
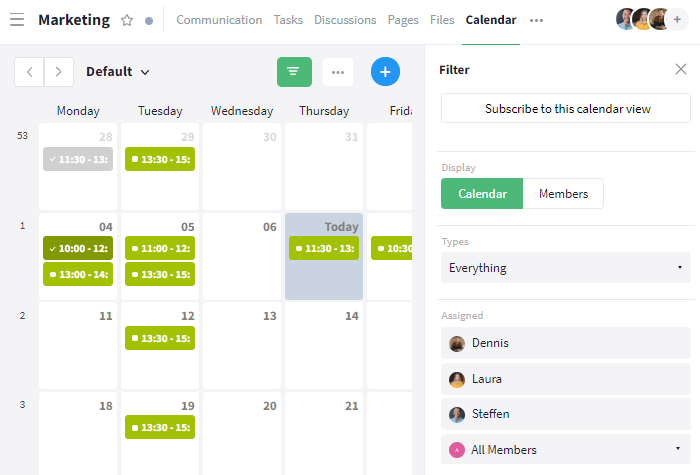
Click on the "Filter" button to filter the contents of the calendar
The filter can also be used to open a member view instead of the calendar view. To do this, click on the Members button in the drop-down menu.
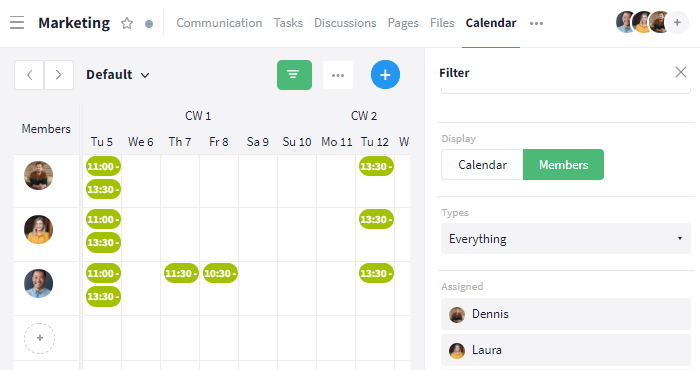
Open member view via filter
If entries are added in the meantime, refreshing the page may be necessary.
Options for admins
Further articles