The discussions module on Stackfield allows you to maintain an organized thread of communication. Here you can bundle the communication on a topic and create polls. Relevant information can be easily found and classified even after a long time and several discussions can be held (even in parallel) over an extended period of time.
Creating a discussion
In the discussions module, you can create a "Topic" or a "Poll". To do this, click on the blue plus button at the top right and select accordingly.
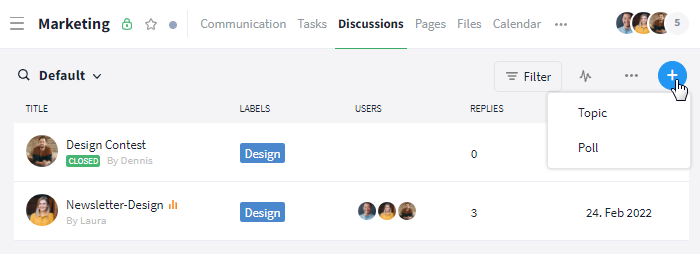
Create a new discussion via the blue plus button in the upper right corner
To avoid duplicates, use the module search (icon: magnifying glass, top left) to search for discussion topics and polls. If the discussion topic you are looking for does not exist, you can automatically create a new topic by pressing the Enter key.
Alternatively, you can create tasks using the following modules and areas:
Tip: A single message in the communication stream can also be converted directly into a discussion topic. To do this, click on the speech bubble icon that appears at the right end of the message on mouseover. Alternatively, this function can also be found by right-clicking on a message. The topic now has the corresponding message as its title and can be opened at any time in the discussions module.
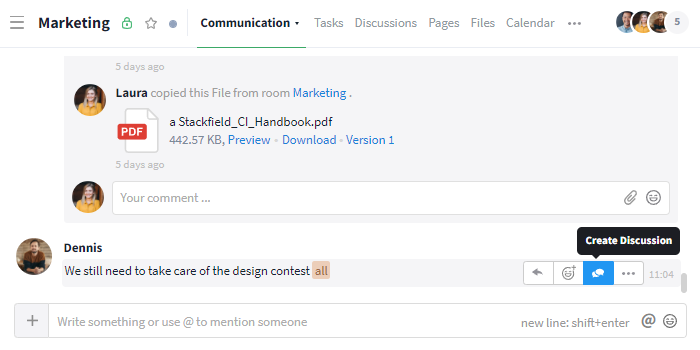
Convert message to discussion via "speech bubble" icon
- Sidebar: By clicking the button "+ Create New" at the top of the sidebar you can create module entries via shortcuts ("New Discussion")*
- Global Search: Through the Control Center of the global search you can navigate through Stackfield, create module entries and much more
- Email integration (only for discussion topics): Email integration converts email content into module entries
- API / WebHook (only for discussion topics): Using the Stackfield API you can send information to Stackfield and create it as module entries
*The plus symbol at the top of the sidebar and the option "New Discussion" allow you to create a discussion centrally at any time. Attention: An additional field appears in the opened window, in which you can specify the room where the discussion is to be stored. By default, it will be the last room you visited.
Option 1: Discussion topic
Discussion topics help you keep the communication module clear and allow you to quickly access topic-related information at any time. When creating a topic, only the title is mandatory. The description can be skipped if necessary. However, we recommend filling in as many fields as possible, as this leads to clearer and more efficient work.
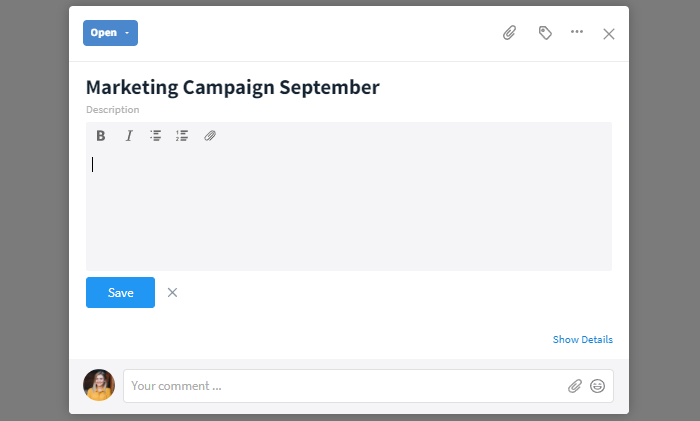
Fill in all fields for efficient work
After saving a discussion topic for the first time, a comment area with an input field for replies ("Your comment") appears in the lower area.
Option 2: Poll
Here you will learn everything you need to know about polls:
General conditions of the poll
With polls, questions to the team can be answered and evaluated digitally. When creating a poll, you are required to fill in the title and at least two options as possible answers. In principle, you can specify as many options as you like, however, we recommend focusing on the essentials to keep an overview at all times.

Create a poll
Below the options you can configure the poll with different switches. (Note: After creating or saving the poll for the first time, you can no longer edit these selections).
Show results only after voting
Decide whether the results of the poll should only be visible after a vote has been cast or before. This way you can prevent participants from being influenced by the results. Click here to find out where exactly the results are displayed.
Allow multiple votes
Do you want poll participants to be able to select only one option or are they allowed to cast multiple votes? If multiple votes are allowed, the answer options will be displayed next to boxes instead of circles. This way you can always see which setting was selected.
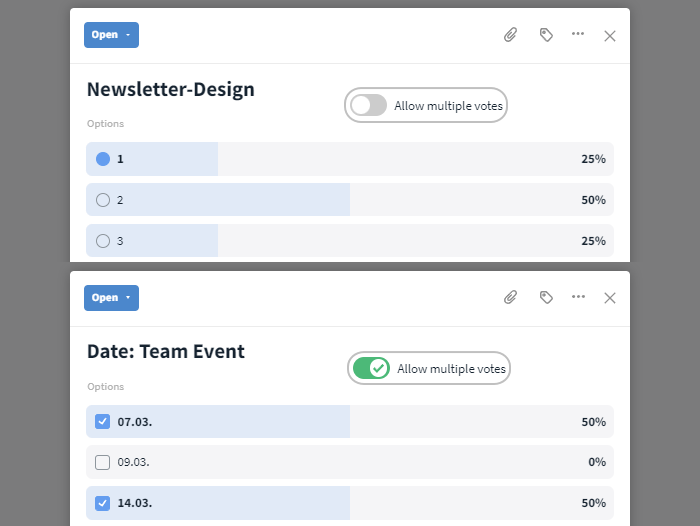
Depending on the setting, one or multiple votes can be cast
Allow the addition of custom options
If custom options are allowed, all participants in the room can add additional answer options to the poll. As soon as you enter another option, you automatically vote for it. However, you can change your vote at any time.
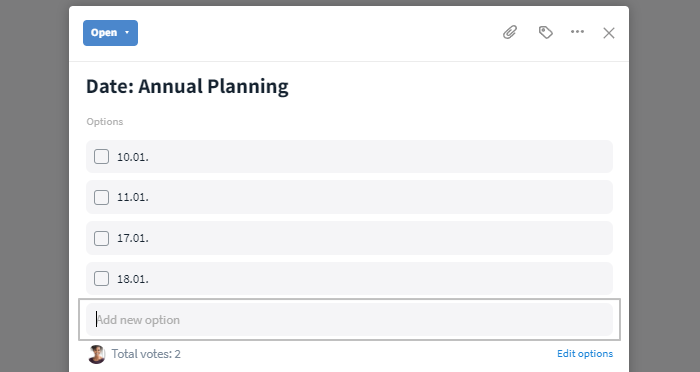
Here: Adding options is allowed
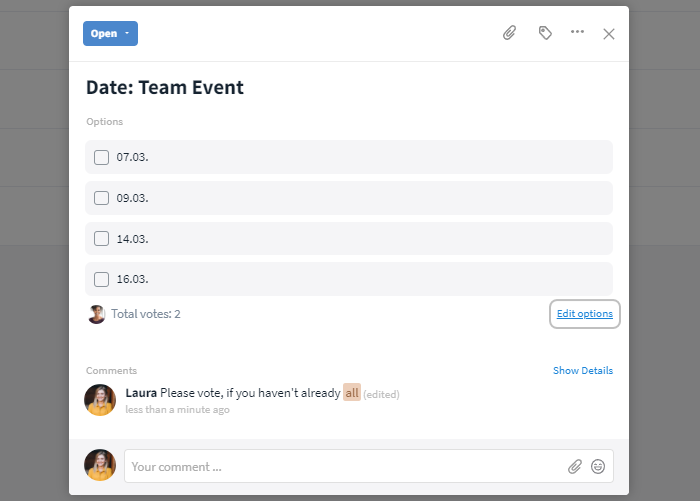
After saving a poll for the first time, a comment area appears in the lower area. Here, users can get rid of comments and questions.
Notification and submit or change voting
Once the poll is created, all participants in the room* will receive a notification in My Week inviting them to participate in the poll. By clicking "Participate" you will be redirected to the poll. If you do not want to participate directly or not at all, click on "Mark as read". The notification will then be removed from My Week.
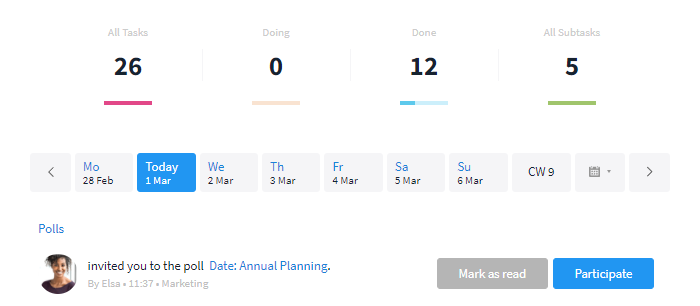
Members of the room will be notified about polls in "My Week"
After opening the poll you can cast your vote. Depending on the structure of the poll (see: General Conditions) you can either only cast one vote (circle) or multiple votes (boxes).
Every user can change or extend their voting afterward. Simply click on another option or remove your tick and set it again. Submissions or changes to your voting are visible in the history as "has voted".
Post-editing the poll and retrieving its history
The title of the poll and the individual answer options can be edited at any time, even after the completion of the poll. All other settings such as casting multiple votes can no longer be changed after the poll has been created (see: General conditions), as changes here could collide with the votes that have already been cast.
To edit the poll title, simply click on the old title and replace it with the new one.
To edit the answer options subsequently, click on the "Edit options" button, also accessible via the More button (symbol: three dots) at the top right.
With the appropriate rights (rights group: option "Update") you can rename the answer options, delete them, and/or add new ones.
The options can also be edited afterwards
All changes can be viewed via the History. Simply click on "Show Details" to the right above the comment area.
Where can I check the results and participants of the poll?
You can check the percentage of users who voted for which option right next to each possible answer.* Who voted for which option can be displayed by mouseover on the respective percentage. However, only a limited number of users is displayed here. Clicking on the percentage opens a list with all votes for this option. A general overview of all users participating in the poll, including the number of votes, is displayed at the bottom left.
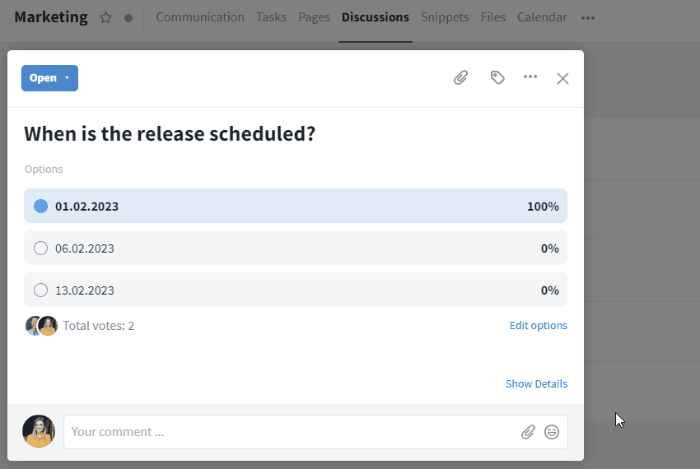
View results of a poll
*Depending on the settings selected at the beginning, the results of the poll will be displayed directly or only after you have cast your vote (see: General Conditions).
Processing status
The status of a discussion is displayed in the upper left corner of the opened discussion. To ensure that other colleagues are aware of the current status, update the status regularly.
There are three different statuses to choose from: Open, On Hold, and Closed. This way, you will always know whether the discussion has already reached a final result.
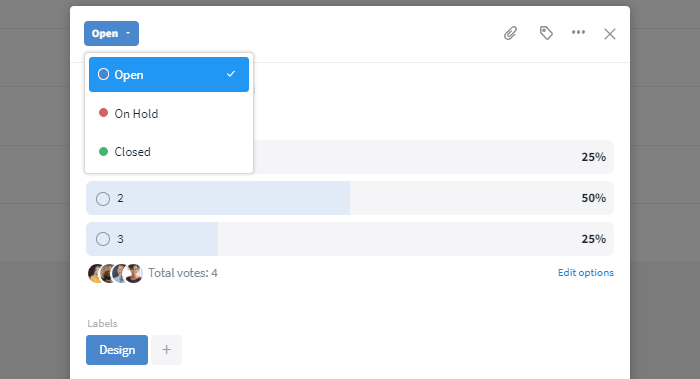
Possible status for discussions
Note: Closed and postponed discussions can no longer be commented or modified. It is only possible again after changing the status.
Display and filters
All created topics and polls are displayed as a list in the discussion module and can be viewed by members with the appropriate rights. Polls are displayed with their poll icon (three orange bars).
The view can be limited via the "Filter" button in the upper right corner. You can also show or hide columns (alternatively possible via the "MORE" button in the overview). The column Modified considers changes to title, description, comments, and files.
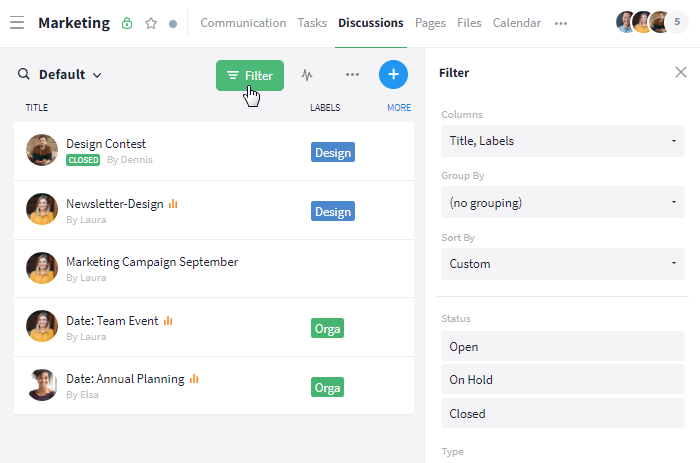
Filter the view using multiple criteria
Tip: Use labels to structure topics and set up one view per category (i.e. set filter with label and save).
Further functions
Options for admins
Further articles