With subtasks, you can break down your work into different stages, making it easier for you to reach your goal.
Creating a subtask
Subtasks in a task are grouped into lists. You can create as many lists with as many subtasks as you want.
To create a list, click on the list icon ("Subtasks" when mouseover) in the upper right corner of the opened task card. Now, a small popup window will open and you can enter the title of the list. With a click on "Add" the list will be created.
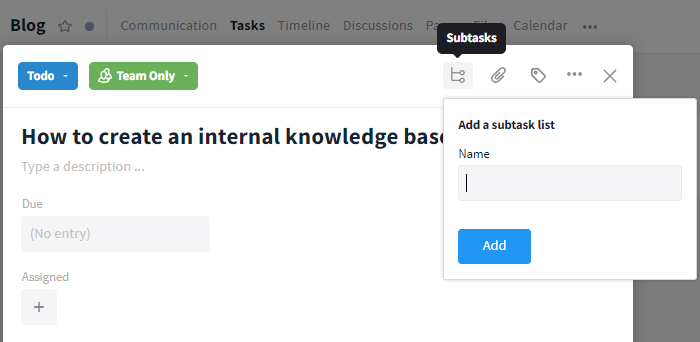
Create a subtasks list within the task
You can now create your first subtask including properties like assignment and due date.
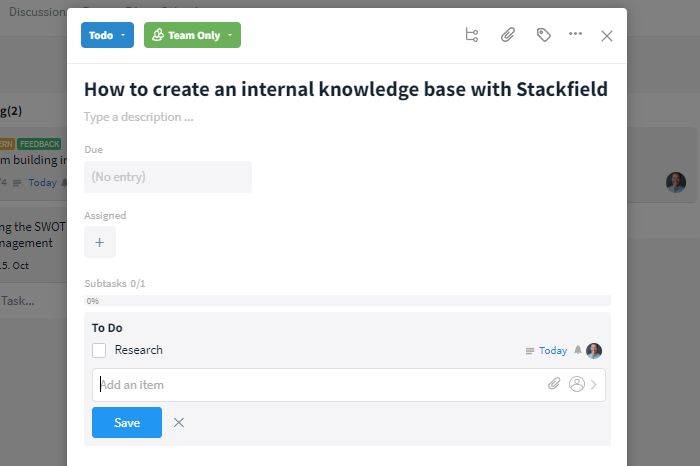
Add subtasks to the list
Creating from templates: tips and tricks
Transferring content from Excel: Formatting
You can simply copy stored contents from an Excel spreadsheet into a task including all formatting to map them as subtasks. Copy all rows and columns in the Excel spreadsheet (right-click or Windows: Ctrl + C / Mac: Cmd + C) and paste them into a subtask (right-click or Windows: Ctrl + V / Mac: Cmd + V). Now, a subtask is created for each row (with all columns).
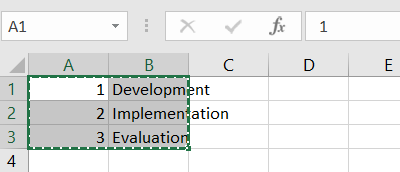
Copy multiple rows from Excel
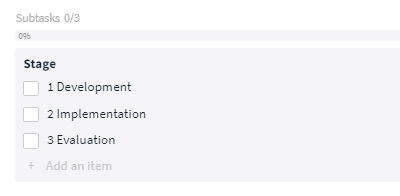
Paste multiple rows into a subtask
Task Templates incl. Subtasks
If you often create tasks that follow a certain structure, create task templates with all the framework conditions. You can then duplicate / copy these, including subtasks, to the appropriate place to create tasks based on them.
Alternatively, templates for subtask lists can also be created and saved. These are particularly helpful if the same subtask list is required in different tasks.
Subtask characteristics: Due date, assignment, description
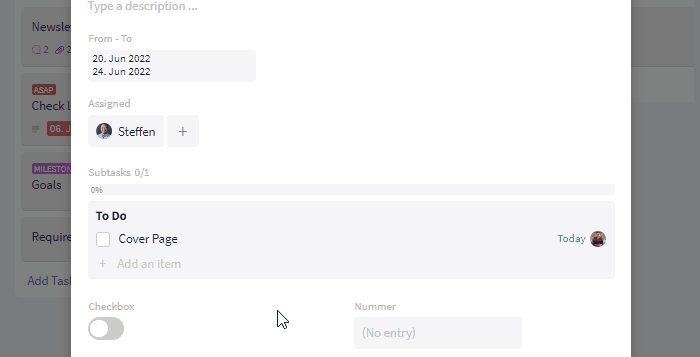
You can assign various properties to subtasks when you create them or later in a popup window. The popup window can be opened when creating the subtask by clicking on the user icon on the far right of the input field.
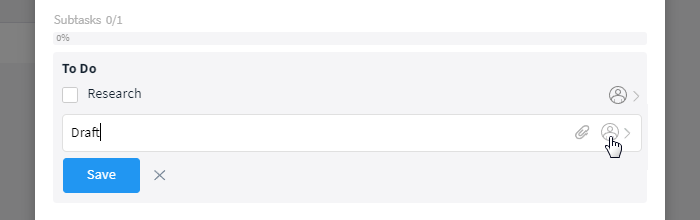
Click on the user icon to add properties
You can now define the following properties:
- Description: You can use the description to store important key data for the subtask. If a subtask has a description, it will be marked with three dashes.
- Due date: You can use the due date to define when the subtask is to be completed. At the time of the due date, the task will appear in the dashboard (My Week) of the assigned person.*
- Assignment: Via the assignment, the responsible person is deposited. Subtasks assigned to you will be highlighted in yellow.
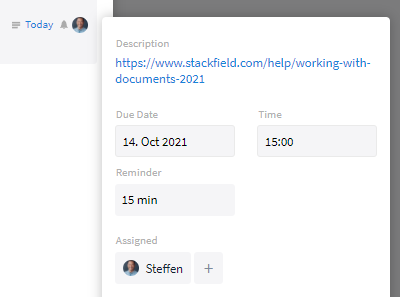
This subtask has a description, a due date and an assignment
*
Tip: Assigned subtasks in My Week
When creating subtasks, store an assignment and due date so no important subtask gets left out. At the time of the due date, the corresponding task including the subtask(s) will appear in the dashboard (My Week) of the assigned person. If you additionally store a time, a reminder for the task will be activated for the assigned person(s) in My Week.
Attaching comments and files to subtasks
To ensure that information can be assigned quickly, make sure to store it directly in the appropriate subtask:
- Comment subtasks via the user icon (visible by mouseover). The comments will then appear in the comment section of the task with a reference to the corresponding subtask.
- Deposit files directly in the subtask by selecting the corresponding subtask and clicking on the paperclip icon on the right (see: Attachments). This way, files that already exist in the task can also be assigned to a subtask later.
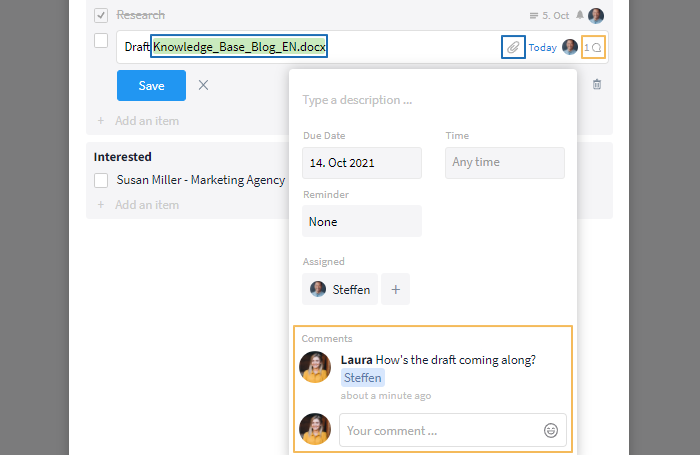
This subtask has been annotated and provided with an attached file
Overview of subtasks
List of subtasks incl. progress bar in the task card
Quick guide:
Once you have created a list, it will be displayed in the task card and you can start adding subtasks. If subtasks exist, a progress bar will show you all subtasks that have already been completed in relation to the total amount*, taking into account the subtasks from all the lists of the task.
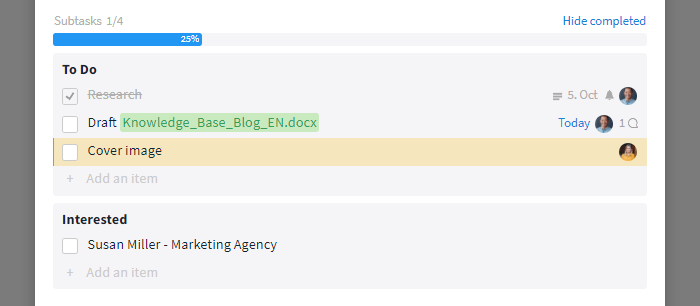
You can create multiple lists and monitor them via the progress bar
*Note: If markers exist in images attached to the task, they will be mapped as subtasks within the "Markers in Images" list and integrated into the progress bar.
Even when closed, you can check how many subtasks belong to a task and how many of them have already been completed. Just make sure you are in the cards view of the task module and take all the necessary information from the task card.
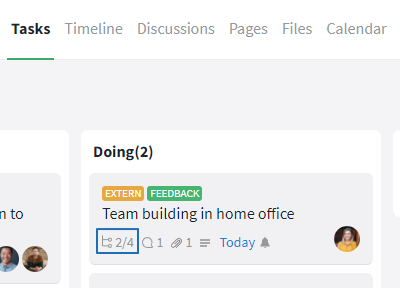
Two out of four subtasks have already been completed
Tips on working with subtasks:
- Sort and move subtasks between lists using drag and drop.
- Create large subtasks as separate tasks and work with references and/or dependencies.
- You can search for subtasks and their list titles using the module search and the global search.
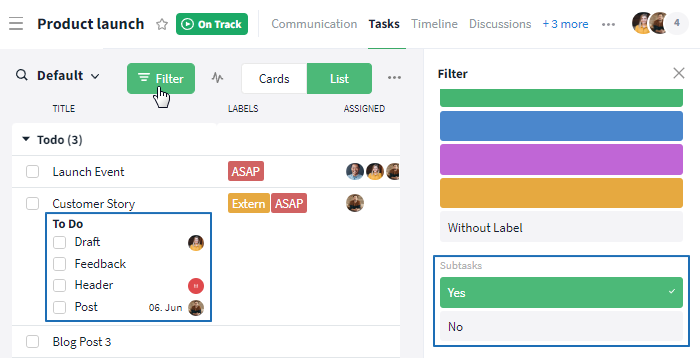
Tasks overview: All open tasks
In the list view of the tasks module, open subtasks can be displayed in the overview using the filter. Simply click on the filter button and select the "Yes" option in the section Subtasks. Now, you will see all open subtasks including the due date and assignment under the respective task.
Display subtasks via the filter
You can also export or print the view via the More button (symbol: three dots) in the upper right corner. Here, you can also show/hide the subtasks by clicking on the button with the heading "Subtasks".

Subtasks can be included in the report via the switch
All subtasks in My Week
Via the field "All Subtasks" in My Week you can open a report about all subtasks assigned to you. This way you can easily check what is still to be done in which room.
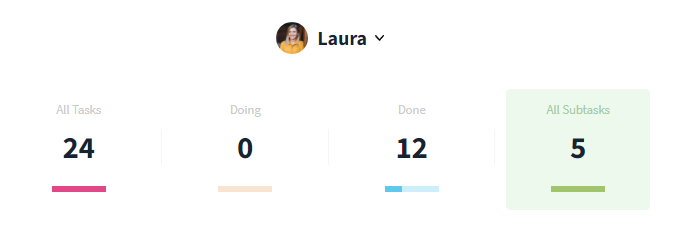
Via My Week you can access an overview of all subtasks
To map not only your subtasks but all subtasks of specific members of the organization in My Week, select the Member Perspective.
What happens to completed subtasks?
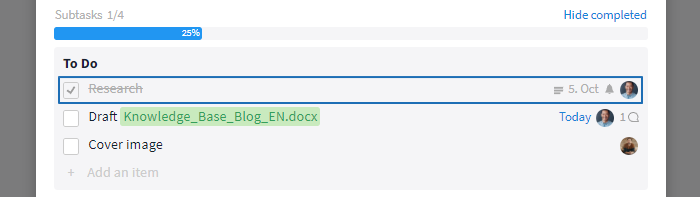
Once you have completed a subtask, you can check it off by clicking the box. It will then be crossed out in the task.
This subtask has already been completed
To keep a better overview, you can hide completed subtasks by clicking "Hide completed". The number of all hidden completed tasks will be displayed at that point. If you want to show the completed subtasks again, just click on "Show completed".
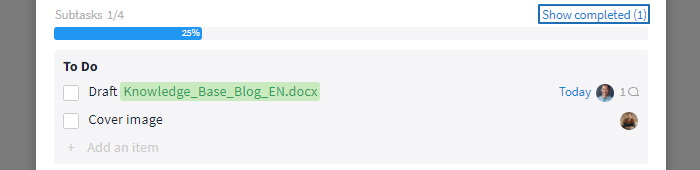
All completed subtasks were hidden
Note: When a recurring task is completed, a successor task is automatically created, including all subtasks. Previously completed subtasks are now shown as open again. If a due date was stored in the subtask(s), it will be adjusted accordingly.
Deleting a subtask
You can delete subtasks from a task at any time. Simply select the corresponding subtask and click on the trash can icon at the bottom right. The subtask will now be irrevocably deleted.
Delete subtasks via the trash can icon
Note: When deleting a subtask list, all subtasks contained in the list will be deleted as well.