Custom fields supplement the standard fields within the task cards of a room and can be customized according to your wishes. This way, you can create a uniform structure and ensure that all relevant information is stored in a well-organized manner. Only an admin of the room can create custom fields.
Types and application examples
You can choose from different types and customize them if required. If a field should always be filled in, you can define it as a mandatory field when you create it or later in the administration.
What types of fields are available and how can I use them effectively?
- Checkbox (= switch): The checkbox is suitable for criteria that can be answered with yes or no, for example, the verification of the task by a person or whether a customer meets a certain character trait.
- Date (= small text input field with popup calendar): This field can be used, for example, for the start date of the processing of the task or important interim dates. Data stored here will not be taken into account in the calendar module.
- Dropdown (= dropdown list): From several criteria (e.g. the priority of the task or the size of a customer) one can be selected here. The selection options and optionally the colors of the individual options are set up when creating the field and can be changed later in the administration.
- Number (= small text input field): Only numbers can be entered in this field, letters and special characters are not possible. It is suitable, for example, for product numbers or telephone numbers.
- Textfield (= small text input field): The text field is useful, for example, for keywords or order/customer numbers with a combination of letters and numbers.
- Textbox (= large text input field): The text box is suitable for a bit more text, for example invoice addresses, customer details, links / storage locations in other tools...
- User (= dropdown list): In the user field, a user of the room can be specified, for example a responsible person for a certain task area (acceptance, subject area / project manager,...) or a contact person (for queries, as a substitute,...).
Application examples
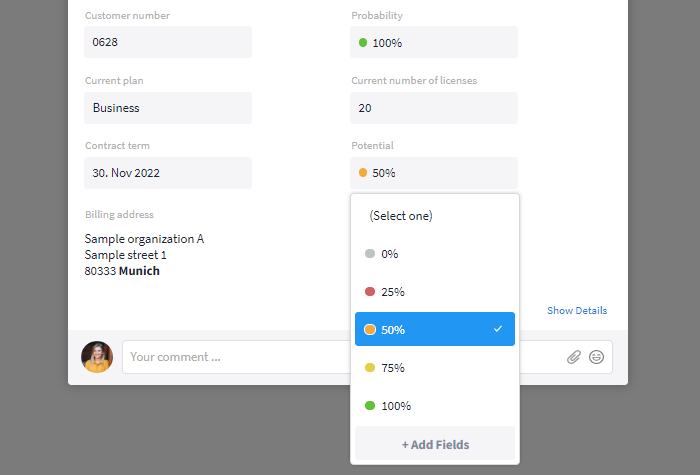
Funnel task card
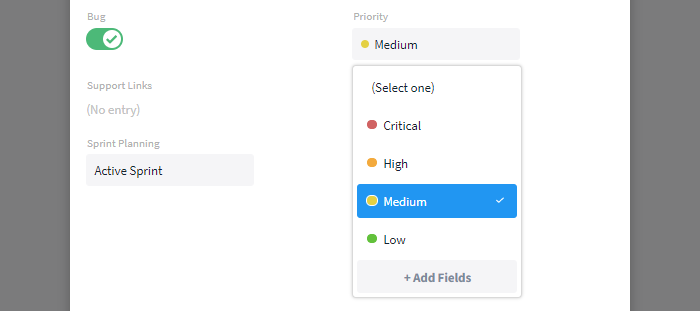
Development task card
Creating new fields
To create a custom field within a room, open the custom field management. You can then add as many custom fields as you like using the gray plus button. Proceed as follows:
- Select the type of the field ("Type").
- Enter a name for the field ("Name").
- Decide whether the field should be mandatory ("Mandatory field") or whether the users can decide for themselves.*
- Confirm your selection by clicking "Save".
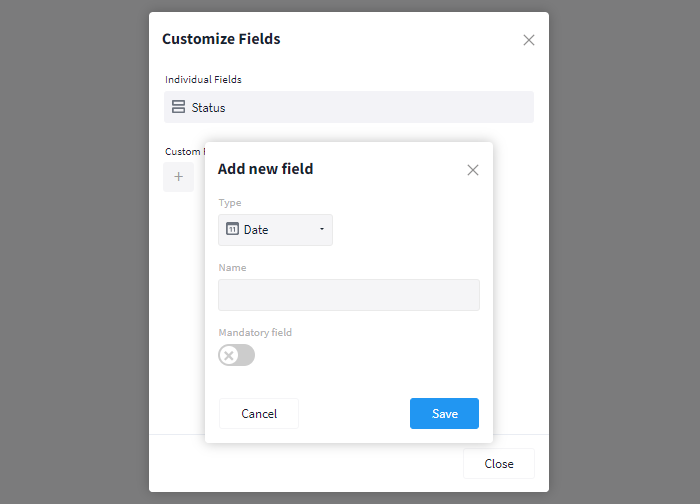
Design your very own field
Note: Fields of the type "Checkbox" cannot be set as mandatory fields.
Management of existing fields
Note: Custom fields are created for each room individually.
To access the management of a room's custom fields, click on the More button (icon: three dots) at the top right next to the blue Plus button in the tasks module and select the option "Customize Fields".
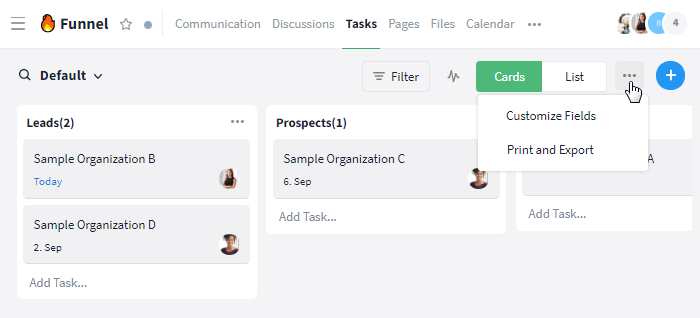
Access the management of all custom fields of the room via the tasks module
Alternatively, you can access the fields management in the "Room Settings". Simply open the settings and switch to the tab Modules. With a click on "Settings" below the module "Tasks" the administration opens in a popup window.
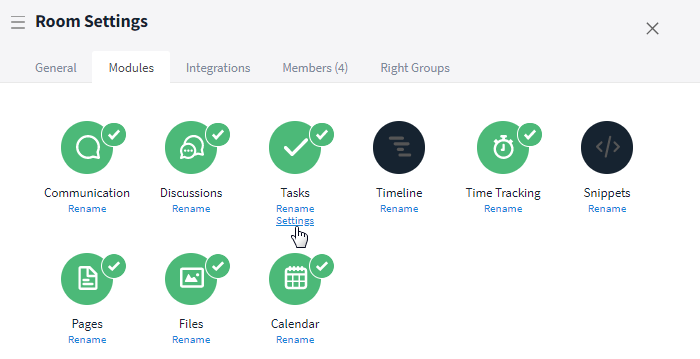
Access the management of all custom fields of the room via the room settings
The following actions are available here:
- Editing a custom field with a click on the corresponding field (Options)
- Deleting a custom field by clicking the trash can icon to the right of the corresponding field
- Changing the order of the custom fields within the task card by drag and drop
- Creating a custom field using the gray plus button (Procedure)
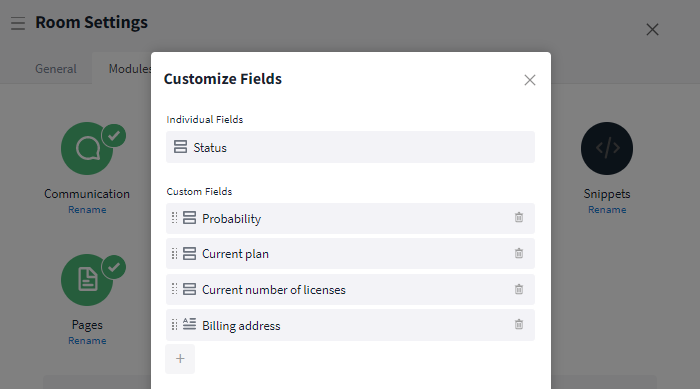
Management of all custom fields of the room
Editing a custom field
In the administration you can subsequently edit the following properties by clicking on the corresponding field:
- Name of the field
- (De-) Activating a mandatory field
- Special case Dropdown: List selection options
- Special case Dropdown: Colors of the options
You can simply enter the new name in the "Name" input field. To make the field mandatory, activate the "Mandatory field" checkbox below (Disabled: gray, Enabled: green). Confirm your changes by clicking the "Save" button at the bottom right.
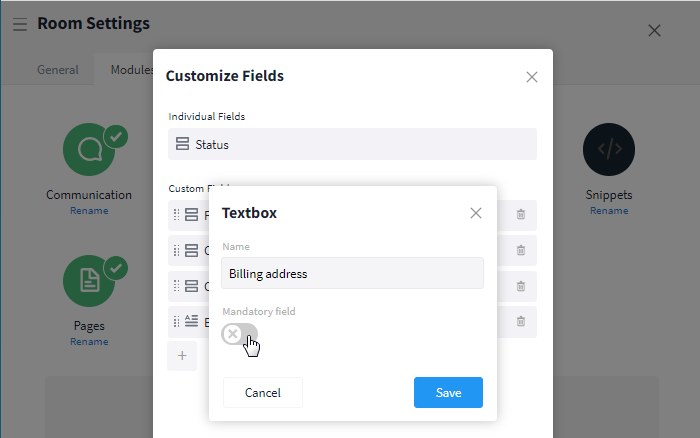
Activate a mandatory field
Within the custom field Dropdown additional changes can be made. The order of the options can be changed on the left via the small dots by drag & drop. Using the More button (symbol: three dots) to the right of the corresponding option, you can delete it or make it the default, i.e. it will be selected by default in your tasks. You can add new options via the "Add Item" area below the options.
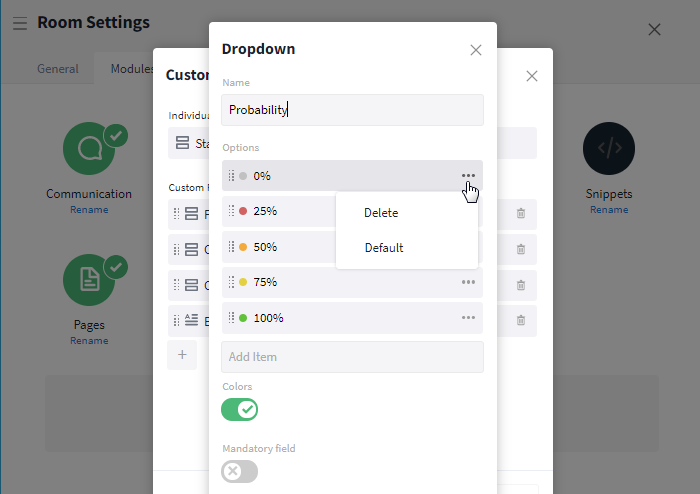
You can edit the options at any time
Use the "Colors" switch to enable colors for your options (Disabled: gray, Enabled: green). To change the color of an option, click the colored dot in the corresponding option and select a new one.
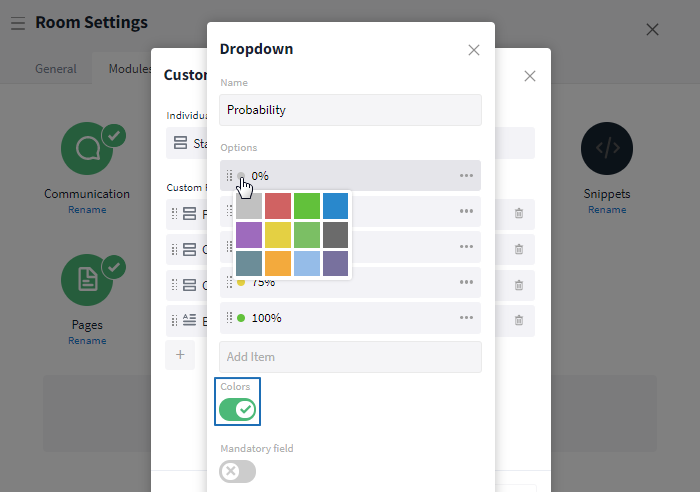
Change the color of an option in the dropdown list
Working with custom fields
Display as columns in the "List" view
You can display custom fields as additional columns in the "List" view of the tasks module in rooms as well as in the cross-room overview of all tasks in the Reports.
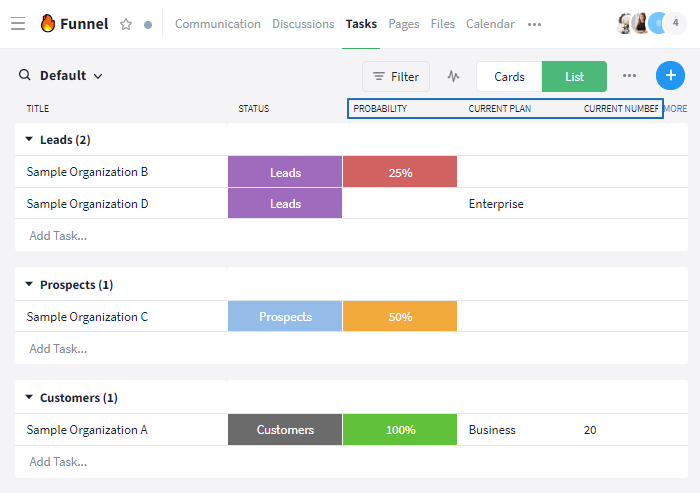
Custom fields as columns in the tasks module
To do so, click on the "MORE" button in the upper right corner of the tasks module / Reports and add the corresponding custom fields to the view with a checkmark. The order of the columns can be changed via drag & drop.
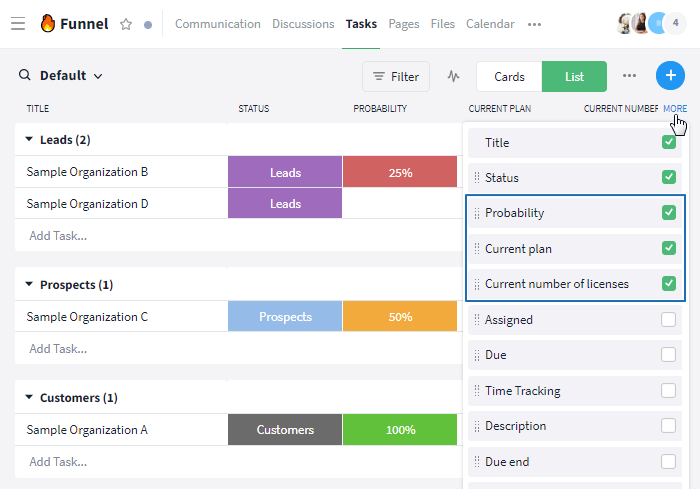
Add custom fields as columns
Identical custom fields (upper/lower case does not matter) from different rooms are combined in the Reports and their results are displayed together in one column. When renaming the fields, the view must be overwritten or saved again.
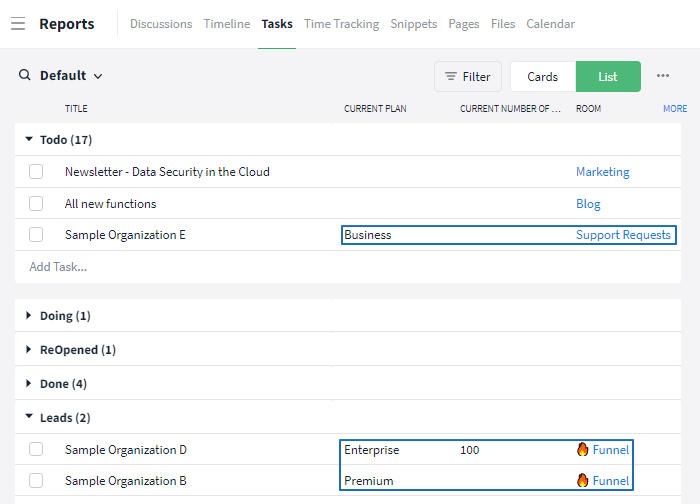
Identical fields from different rooms in one column
Filter / group by custom fields
Once custom fields are created in the room, you can filter and group by them using the filter functions in the tasks module. You open them via the "Filter" button in the upper right corner. Grouping is also possible in the Reports, while filtering is only possible in the room.
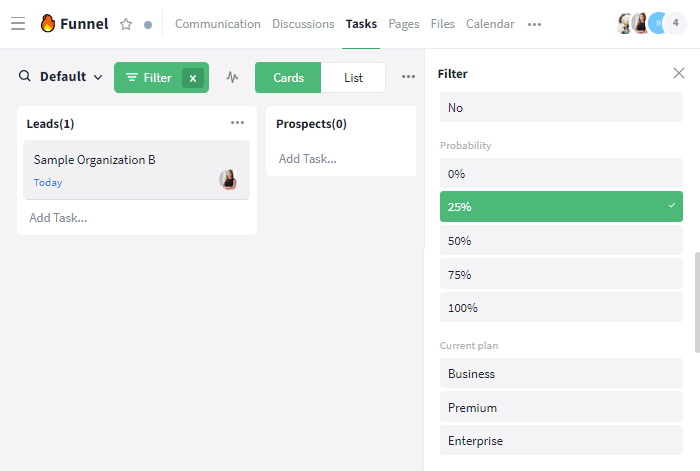
Filter by an option from a custom field in the room
You can group by the following types of custom fields:
- Date, e. g. for a phase-oriented structure
- Dropdown, e. g. for a categorization according to topics
- User, e. g. for a categorization according to users
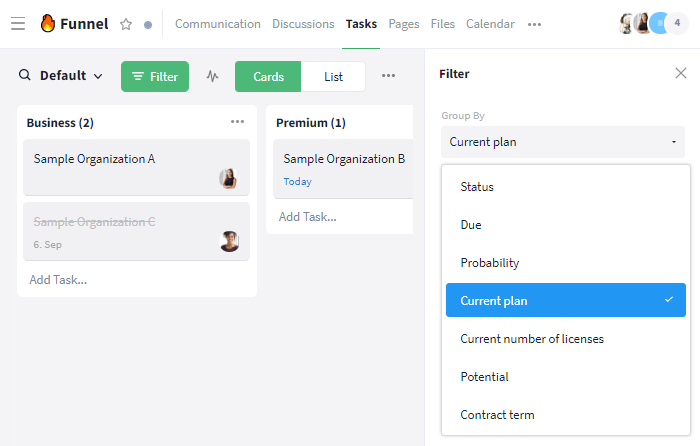
Group by custom fields
Note: When grouping by date, selection list or user, open and completed tasks (different statuses) can be stored within the same list.
Search for custom fields
Within a room, the module search in the tasks module can be used to search for contents of the following custom fields: number, text field, text box. All other custom fields as well as the titles of the fields cannot be found via the module search.

Contents from custom fields can be searched for