You can adjust tasks you completed yourself to the current processing status through a status change. This may be associated with an approval (= the task is passed on to another person). However, only certain status changes may be enabled for you. What happens / is possible during a status change is controlled by your assigned right group in the room.
Standard Workflow: "For approval"
You can pass on tasks completed by you to another user, e.g. for approval or revision, by changing the status to "For approval".
Attention: The standard workflow only works with the standard right groups (Contributor and Manually shared)*. If you create an individual right group and still want the standard workflow to work, you have to define it manually as an individual workflow in the corresponding right group.
*Default right groups for editing contents:
- Contributor: Allowed to perform all status changes (incl. standard workflow on approvals).
- External: Allowed to perform status changes for standard status (incl. standard workflow on approvals).
- Reader: Not allowed to perform status changes.
How do I assign the approval of a task?
To pass a task to another user / send a request, change the status of the task to "For approval". You can either move the task to the "For approval" column in the task module overview or simply change the status in the open task card.
You can change the status in the Kanban board via drag & drop
Once you have changed the status to "For approval", a popup window will appear and you can select which user should carry out the task. Click on the user displayed in the pop-up window to open the entire selection of users. All users in the room are available to you. If you want to give the task to another user, add them to the room.
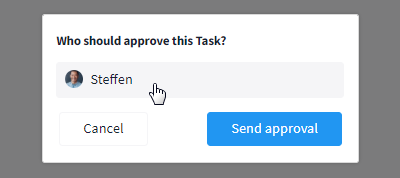
Decide who should do the task instead
Click on "Send approval" to confirm your selection and trigger a notification to the corresponding user. If you spontaneously decide against submitting the task, simply click on "Cancel". You can also cancel the approval later on.
What happens to the task afterward and how will the recipient be notified?
Once the approval has been sent, the task is temporarily "locked" for all users of the room, i. e. it can no longer be edited. A note in the header of the task card indicates the locking of the task.
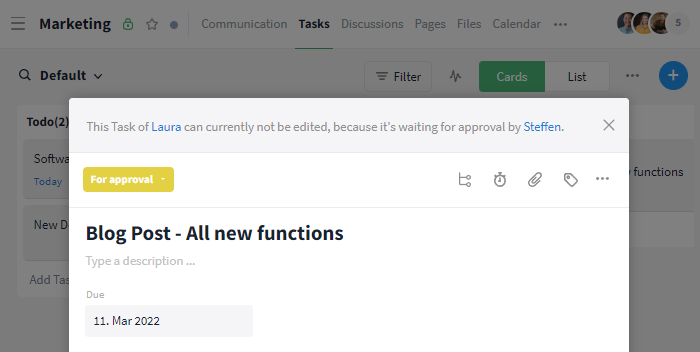
This task cannot be processed due to an open approval
A task open for approval cannot be processed again until the recipient of the approval sent has accepted or rejected it, or until the sender has withdrawn the approval.
Changing the status of a task to "For approval" triggers a notification in My Week. The recipient of the request can accept the task here by clicking "Accept". If they do not want to accept the approval, they can reject it by clicking on "Decline".
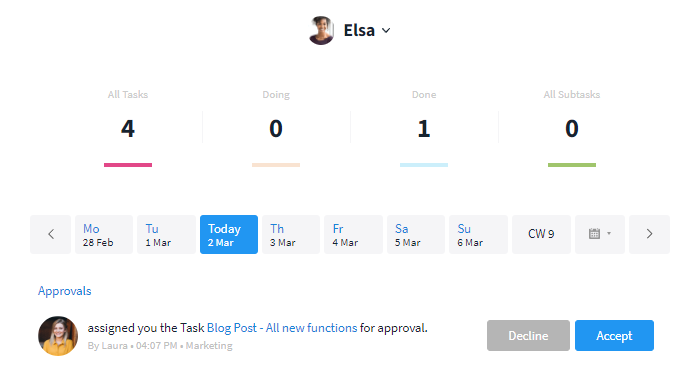
Approvals are requested in "My Week"
With a click on "Decline" a dialog window opens and an optional reason can be entered. Complete the process via the "Reject approval" button. The approval request is now deleted and the reason, if specified, is posted with an @-mention to the initiator in the comments section of the corresponding task.
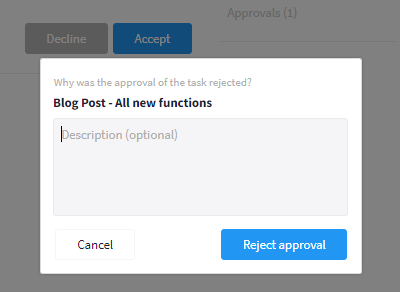
Add a reason if desired
Via the task title written in blue in the notification, you can alternatively open the task directly. In the header of the task, you can accept or reject the task, as in My Week.
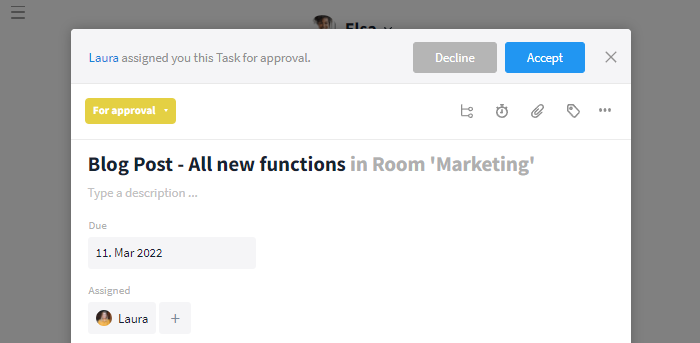
The pending approval is noted in the task card
Once the approval has been responded to, the status of the corresponding task changes. If the approval is accepted, the status changes to "Done" by default. If the approval is declined, it changes to "ReOpened". If a separate workflow including a new status has been defined, the workflow rules determine the process.
Can I withdraw an approval?
You have requested the approval of a task and realized later you still need to make some changes? No problem! As long as the approval has not been confirmed yet, you can withdraw it at any time.
To withdraw the approval, open the corresponding task. In the task header, you will find a note informing you about the open approval. Now, simply click on the "Withdraw" button to the right of it. The status of the task will now change to "ReOpened" and you can continue working on the task as usual. The notification in My Week concerning the approval will be withdrawn as well.
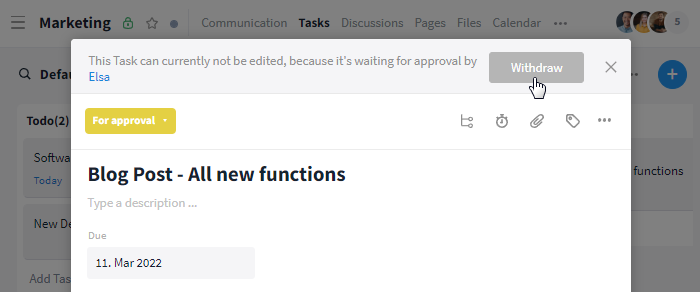
You can withdraw approvals any time
Individual workflows / approvals
In addition to our predefined standard workflow "For approval", you can define your own workflows via individual right groups and thus trigger notifications in My Week the same way.
Attention: Your individual workflow rules only apply to the corresponding right groups they have been defined in. They do not apply to standard right groups. Behind each status (even "For approval", since the standard workflow is not executed) you can store an individual rule. Without individual workflow rules, every user can perform all status changes.
Basics: Workflows
Using approvals / workflows you can define which actions trigger status changes of a task.
One of the following criteria can be defined for a status:
- Next allowed State (status change)*: Several statuses can be defined
- Yes/No mask (status change with approval)**: Who performs the approval? Where will the task be moved to if the approval is accepted? Where to if it is declined?
*The option "Final Status" (= no status is selected) means no change can be made after changing to this status (in the example below: "Todo").
**The status change is performed analogously to the workflow predefined by us for "For approval". Only the general conditions can be defined by the user. The workflow only takes effect if the field does not have an alternative name.
If an approval is performed in a defined workflow, the workflow rule of the person who initiated the approval is taken into account. Not the one of the person who receives the approval.
You can define the workflow rules in the management of the right groups in the "Room Settings".
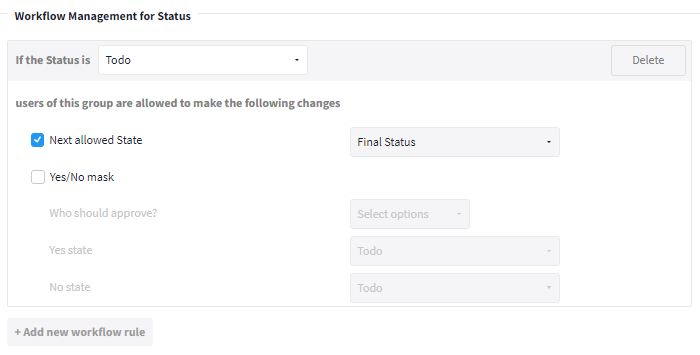
Define your individual workflow via the Workflow Management
Application example: Cooperation between assistant and consultant / manager
The following example explains the collaboration between assistants and consultants / managers using an individual workflow.
What should the workflow look like?
- A new task is created. This task ends up in the "Todo" status column.
- The assistant starts working on the task and therefore changes its status to "Research Assistant".
- As soon as the assistant has finished, they pass the task on to the consultant / manager via the "For approval" status.
- The consultant / manager now has the option to
- Accept: The status changes to "Revision"
- Decline: The status changes back to "Research Assistant".
- If the consultant / manager has accepted and processed the task, there are again two options to choose from:
- The consultant / manager was satisfied with the work of the assistant and changes the status of the task to "Assistant Done". The task is thus checked off.
- The consultant / manager was dissatisfied with the assistant's work and changes the status of the task to "Correction / Addition". The task is then passed back to the assistant, who continues with step 3.
How do I need to adjust my status columns?
The corresponding processing statuses that you need for your workflow must now be changed accordingly in the task module. You can find the field management in the tab Modules in the "Room Settings" (see: Processing status).
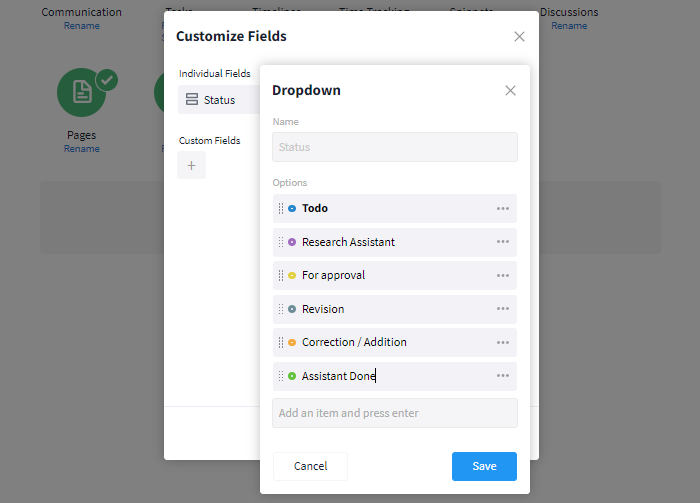
Adapt the statuses to your workflow
Which workflow rules and rights do I need to add?
To ensure the workflow runs smoothly and no errors occur, create an individual right group including workflow rules and rights. The following workflow rules and rights would be useful for the "Assistants" right group:
Workflow rules based on the example:
- If the status is "Todo" next allowed state "Research Assistant".
- If the status is "Research Assistant" next allowed state "For approval"
- If the status is "Correction / Addition" next allowed state "For approval"
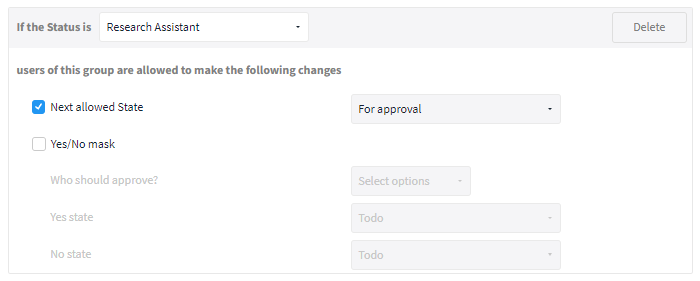
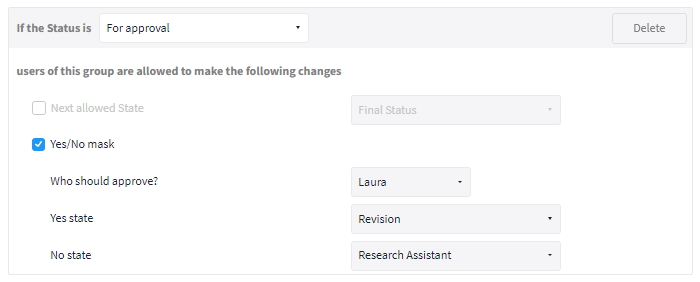
- If the status is "For approval" yes/no mask:
- Who should accept it? - Consultant / Manager
- Yes State - "Revision"
- No Status - "Research Assistant"
Rights based on example:
- Display: All entries assigned
- Update: All entries assigned
- Delete: All entries created by the user
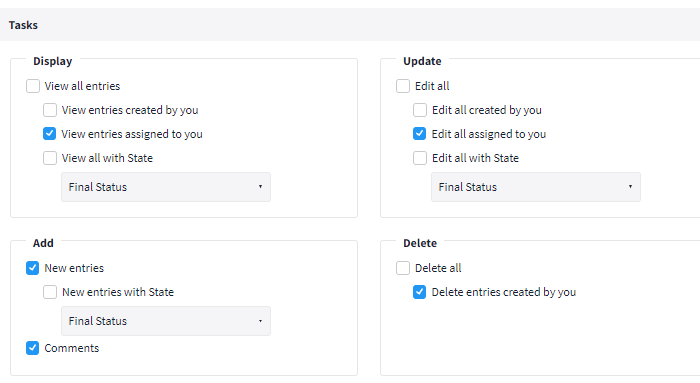
Limited rights for assistants
Final result:
Once you have assigned new statuses, workflow rules, and rights, nothing is standing in the way of your new work processes.
The assistant is only allowed to pass the task to her manager after her research has been completed
The assistant has finished her research and passes on the task
The status of the task changes depending on the reaction of the manager
The manager accepts the task for revision