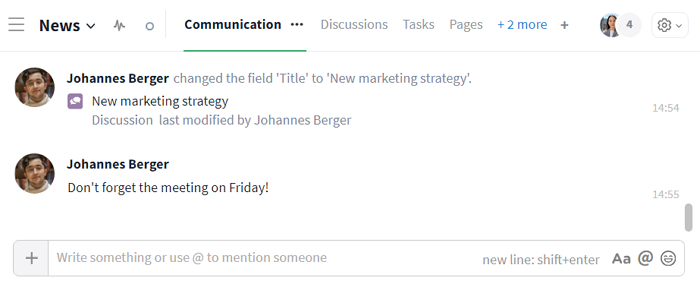
The communication module includes the history of all activities, the team chat and system messages within a room / a direct message.
In other modules there is also a separate comment area. Our search function (global search, "Search all messages") makes it easy to find keywords, and therefore specific messages.
Alternative for longer conversations: Working with discussions
Creating entries
Messages
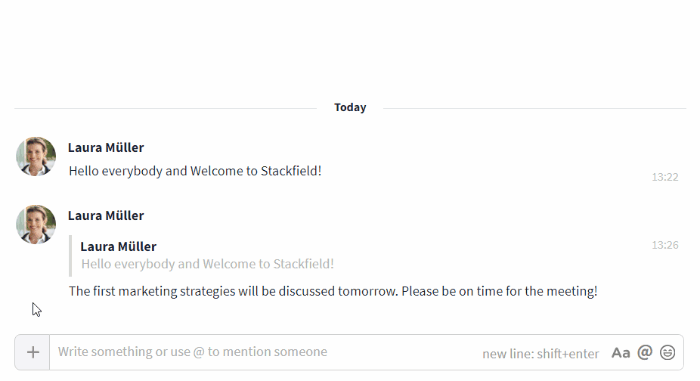
In the communication module, you can write individual messages using the text input field and send them by pressing the enter key.
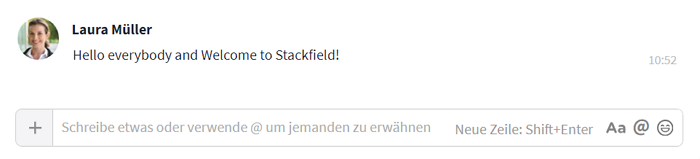
Send message via text input field
Alternatively, a "Send"-button can be activated in the account settings, in which case the enter key takes over the function of a line break.
Convert messages into discussions
If the discussion module is activated, individual messages can also be subsequently converted into discussions for a more organized thread. All you need to do is click on the speech bubble symbol which appears on mouseover at the right-hand end of the message.
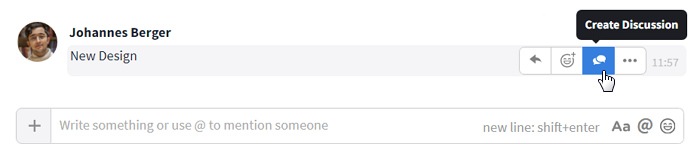
Convert a message into discussion via the speech bubbles symbol
The discussion now carries the message as its title and relevant fields like description, status or label can be filled in / selected.
Further entries
Within the communication module you can not only send messages but also create other entries such as tasks, pages, or events. To do so, click on the plus icon on the left of the text input field and select the required option. Alternatively, this is also possible in the respective module.
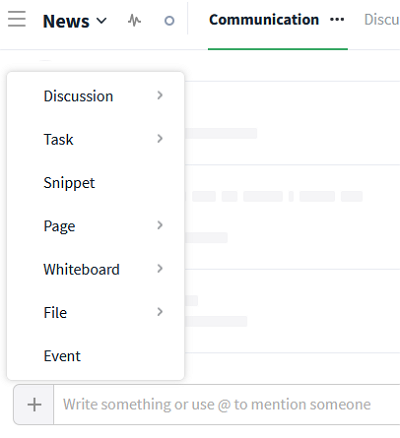
New entry via the plus icon next to the text input field
Comments
Comments are messages in the comment area of an existing entry (e. g. a task).
In an open file (or its preview) / page, the comment area can be expanded / collapsed by clicking on the speech bubble symbol in the top right-hand corner. In the opened comment area, comments can be left via the text input field using the Enter key (alternatively: "Send" button).
Open comment section via speech bubble icon
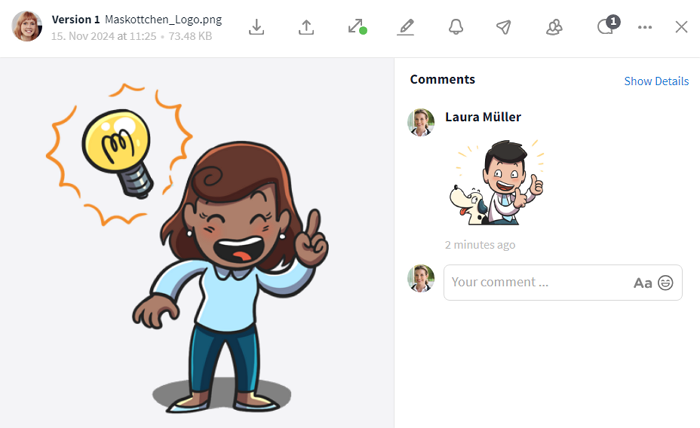
For discussions, tasks and events, comments can be written using the text input field "Your comment…" and the enter key (alternative: "Send" button). After sending the first comment (or attaching the first file) the comment section can be found in the lower area at any time.
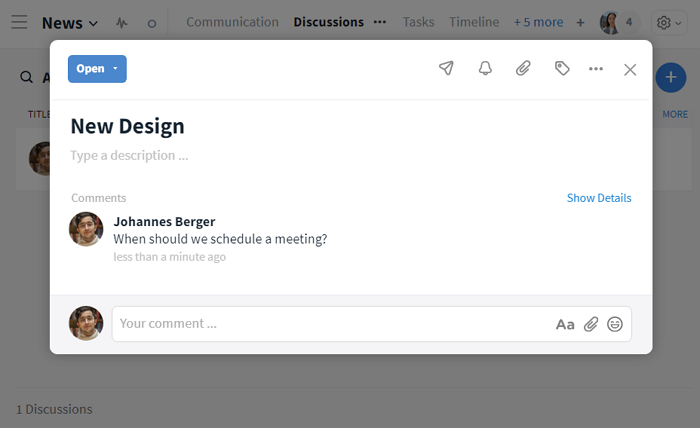
Comment entries via text input field "Your comment…"
Through email integration
Through email integration automatic forwarding of emails to rooms as tasks can be created. The message then contains the full text of the email, including key data such as the subject, sender and time.
If the email integration is enabled directly in a discussion / task, forwarded emails are attached to the element as comments.
Message options
React to messages
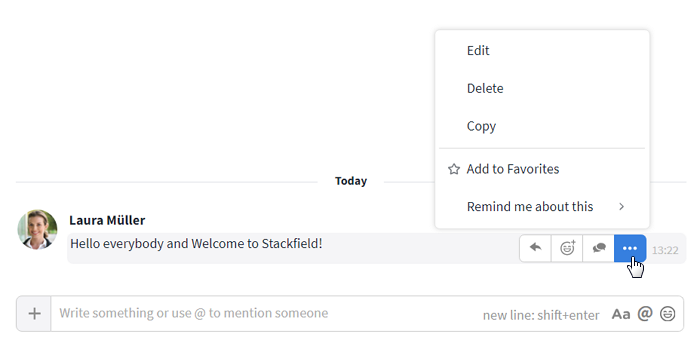
By mouse-over the message options can be selected
Options, callable by mouseover:
*Note: These options are only available in the communication module for standalone messages (not in the comment section of other entries).
By replying to messages, older messages can be retrieved from a chat and a new reference can be created. Simply click on the reply arrow button that appears on mouseover at the right end of the message. Then add text and / or emojis, stickers, or GIFs and send the message by pressing Enter.
Now, a reference to the original message is created. References to own messages are marked in yellow, all other references are marked in light gray. With a click on the reference, you will be taken to the corresponding location in the thread, which will briefly light up in yellow.
Reply to messages via the reply arrow
References and mentions
In the communication module as well as in the comment area, users can be directly addressed / asked something by placing an @-mention.
A reference, link or attachment can be used to refer to other elements. Annotations to files / pages can be placed directly in the image or text of the page by a marker positioned at the spot to be clarified and will then appear in the comment area.
Formatting
By using special characters at the beginning and end of the text, the text in Stackfield can be formatted. See: How to format messages.
A
paragraph / line break can be created with Shift + Enter, or, if the
"Send" button is activated, only with the Enter key.
If you copy the contents of an Excel file (right-click or Windows: Ctrl + C / Mac: Cmd + C) and paste it directly into a text input field (right-click or Windows: Ctrl + V / Mac: Cmd + V), only the text is copied without formatting. If, however, no field is focused during insertion (→ place the cursor next to the text input field), it will be appended as an image with the appropriate formatting.
Formatting by different insertion of the contents
Filtering in the communication module
The communication stream can be filtered in rooms according to different content so that only relevant entries are displayed and the rest is simply hidden. These settings only apply to the current user and cannot be specified for other users.
These options can be found via the More button (symbol: three dots) next to the Communication tab. The filter options can be selected under "Filter". The filter "Chat Messages" always takes effect.
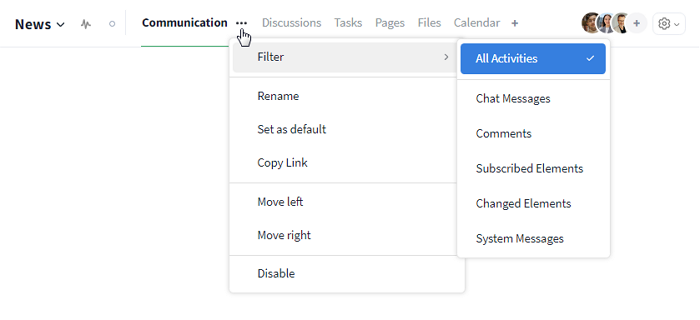
The contents of the module can be filtered using the "More" button
If a filter is activated, you can tell by the three green lines that appear instead of the arrow.

Activated filter in the communication module
If you want to deactivate the filter again, the best way to do this is to select "All activities".
History, Timestamp and Read Confirmation and timestamp
History
The history within the communication module and in the comment area is completely visible to newly added users in the room, i.e. they can also read chat content that was created before they were added.
Within the stream, the communication module immediately displays all changes in chronological order. Not all contents are visible to you? Then check if a filter is activated or if you are not allowed to see all entries due to an individual right group.
History in the communication module
Within the comment area, all activities concerning the element (e.g. the file, the task, ...) can be expanded or collapsed using the button "Show history" / "Hide history".
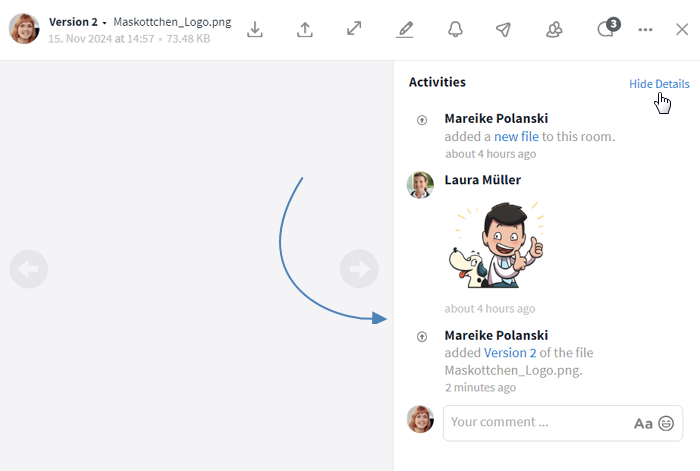
History within the comment area
When creating a new version of a page / file, a comment is added as a note of the change. This way you can always see which version a comment refers to. Markers are included in the history as well. Clarified annotations can be hidden / shown in the history within the comment area via the More button (symbol: three dots).
Timestamp
When a message is sent or shared in Stackfield, the time at which it was sent appears at the end of the bar. By mouse-over, the date is also displayed.
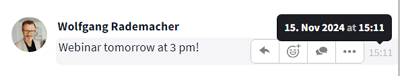
Timestamp with date and time
Read confirmation: "Read by…"
If chat messages or other entries in the communication module have been read by one or more members, a tick appears underneath with a list of the members concerned if read confirmation is activated.
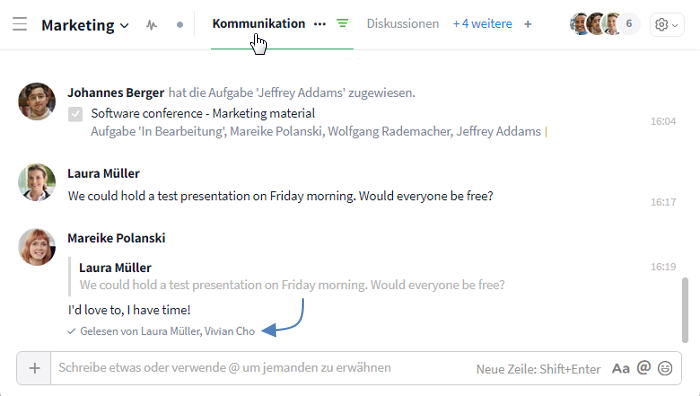
If a comment was read, a read confirmation appears
For files, there is an additional possibility to check who has accessed them at what time by using the more button (symbol: three dots) (see: Accesses).
More features
Options for admins
Further articles
Use case: Disallowing chat messages
Via individual right groups, the sending of chat messages in the communication module can be prohibited. This way, users can only leave their messages related to a specific topic, e.g. discussions or tasks.
Simply create a new right group and remove the checkmark next to "Add - New entries" in the Communication section.
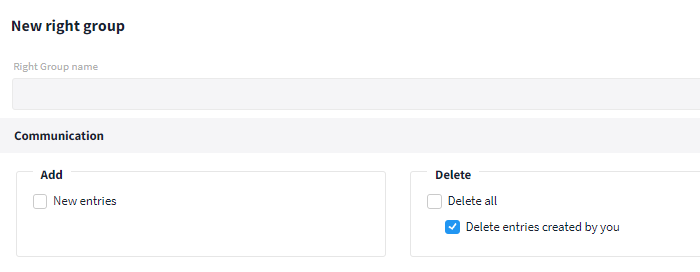
Prohibit the creation of messages in the "Communication" module
For users of this right group, a note now appears in the text input field, which informs about the missing authorization. The entries in the history remain visible.
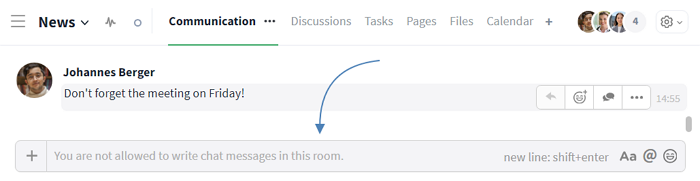
The right group prohibits the sending of loose chat messages
Use case: (De)activating read confirmation
The read confirmation can be (de)activated in the organization settings. This option can be found under the Settings tab. Clicking on the radio button on the right allows you to choose between the settings "Activated" and "Deactivated". The "Activated" option is enabled by default. If "Deactivated" is selected, users can no longer see read confirmations.
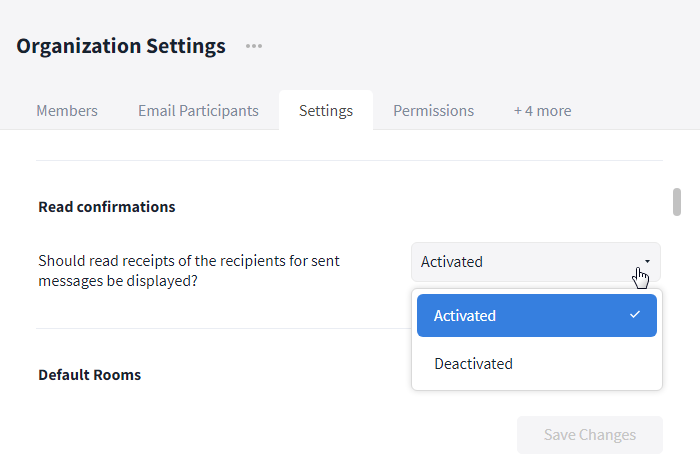
The read comfirmation can be (de)activated in the organization settings